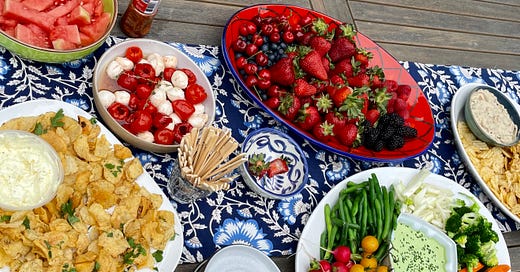
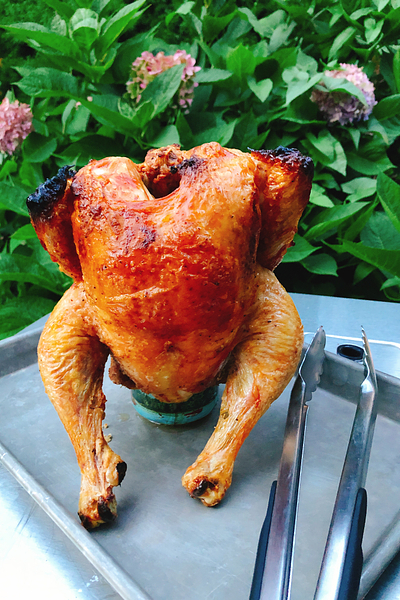
It’s Fourth of July Weekend, so we’re focusing on outdoor entertaining ideas to make sure your table is as poppin’ as the fireworks! Elizabeth’s favorite thing to eat is an oldie, but a goody: the VERY BEST Beer Can Chicken you’ll ever eat! It’s so simple, and so easy to make for a crowd. Plus, Anthony has culled together some great menu ideas from the archives for your weekend spread.
THE ABSOLUTE BEST BEER CAN CHICKEN YOU CAN MAKE
EK: It’s the fourth of July, can you believe it?!
AU: No, I really can’t! How is the Summer flying by?? I’ve barely done any grilling this year.
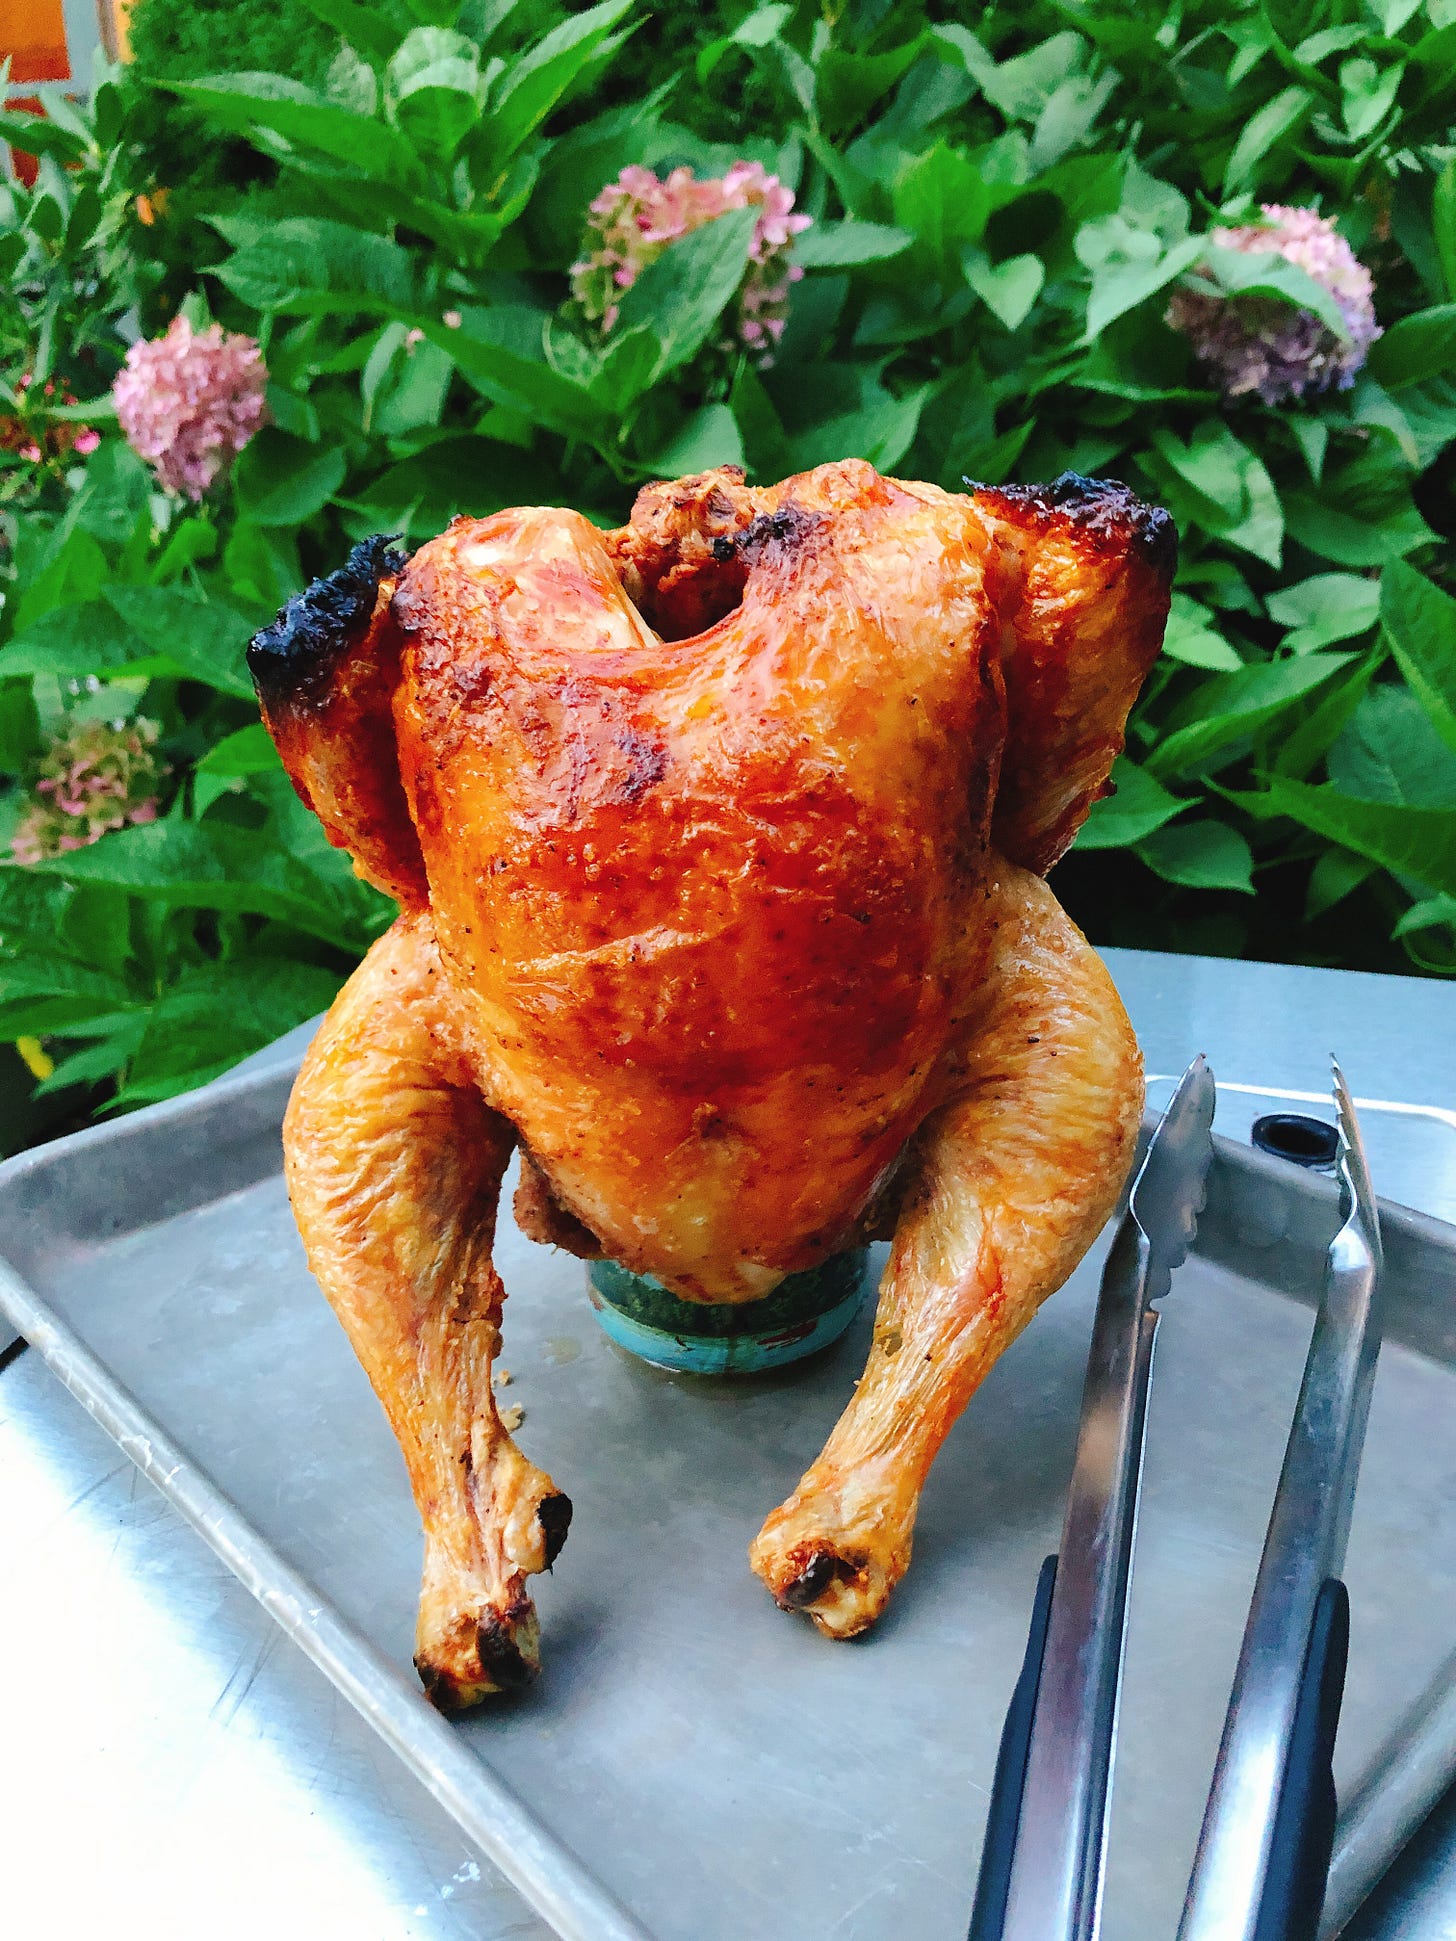
EK: And while there is nothing like, a good burger or grilled hot dog, why not make Beer Can Chicken? It’s easy on the grillmaster and there is still nothing as impressive as presenting a chicken sitting on a beer can to all your food fans…Plus, who doesn’t love a fresh roasted chicken? Hot and juicy bursting with GBD (Golden Brown Delicious) crisp skin.
If you are like me, you may have even “attacked it” with your bare hands, tearing a wing or drumstick off the bird and relishing it immediately. It is a delicious visceral experience.
AU: I always think the wings are the “Chef’s Treat” anyway!
EK: Wings torn off while carving the bird are my favorite! If a whole roast chicken is the ultimate comfort food, Beer Can Chicken is the ultimate roast chicken.
I have friends who crave the chicken from the farmer’s market in Hollywood, CA, others crave the rotisserie chicken from Costco, and of course, those from the outdoor markets in France. I am partial to the French rotisserie chickens, and have found that beer-can chicken made at home comes closest to the flavor of those coveted chickens.
AU: Oooooh I love the idea of a beer can chicken surrounded by potatoes, so the chicken fat flavors them as they roast—just like in Paris!
What ingredients do I need?
EK: Because beer can chicken is little more than the chicken you source, the kind of chicken you buy and cook makes a big difference in what the final dish tastes like. I am partial to Amish or local chickens that weigh 4-5 pounds. Most often, I buy Bell & Evans chickens, and they are frequently just under 4 pounds (which falls loosely into my category of 4-5 pounds).
Once you have your chicken, all you really need is olive oil, salt and pepper, or your favorite spice rub. I add a bit of dry sage and dehydrated garlic to my kosher salt and pepper, and sprinkle that liberally over the lightly oiled whole bird.
For best results, use a standard 12-ounce can of beer or a chicken sitter. Some people prefer a “tall boy” can, but you need to make sure that there is plenty of room once you put the lid on the grill. You don’t want the lid of the grill to be too close or touch the top of the chicken.
The type of beer that you use doesn’t matter that much. You can use your favorite beer as long as it comes in a beer can—otherwise, pour that beer into a vertical roaster (chicken sitter). The one caveat is that I don’t like to use strong bitter beers or stout.
My favorite chicken sitter is made of ceramic, not metal. It is much easier to clean and will never rust, but I use a 12-ounce beer can most often.
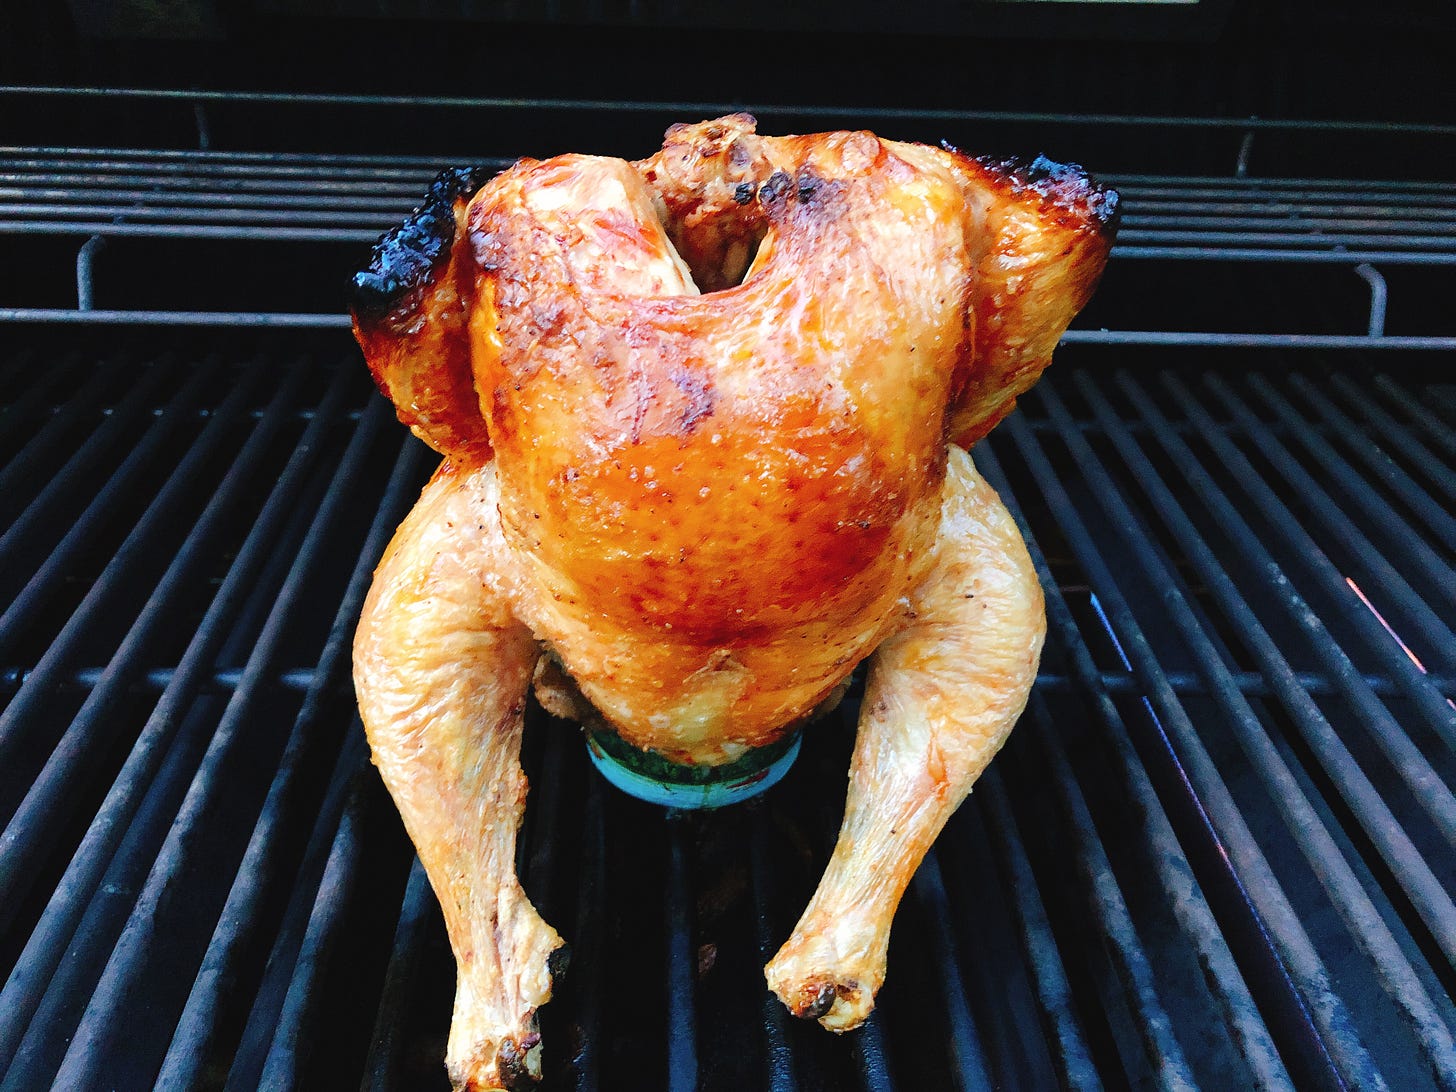
How do I balance the chicken?
EK: I used to think that this was obvious, but years of teaching beer-can chicken taught me that most people slip the chicken over the beer can and leave the legs dangling in the back of the can, so the chicken looks like it is flying.
Beer-can chicken has three points of contact; the beer can is one, and each of the drumsticks is another. The legs of the chicken must be positioned in front of the can. This will stabilize the chicken and prevent it from tipping over. Balance the chicken using the drumsticks as you would using a tri-pod. They are easy to move, and you will quickly learn how to position them so they balance your bird.
The chicken balances best if you bend back the wings “akimbo,” so that the chicken looks like it has its hands behind it’s back. Basically, you twist the wings in a similar motion to what you use when you twist your own arms behind your back with your hands up as close to your head as possible.
How do I cook the chicken?
EK: Because you cook Beer Can Chicken over indirect heat, you don’t have to have a grill to make beer-can chicken. With a little maneuvering, you can make it just as easily in the oven. *Indirect heat on a grill means that there is no heat/flame directly under the food being cooked, and the lid of the grill has to be down.
On a grill, you simply take your prepped chicken and place it on top of the beer can set directly on the cooking grates, balance the legs and close the lid. In about an hour—depending on the size of your bird—the indirect heat will surround the chicken, and you will have a juicy tender bird with crispy skin. If the wings are larger (like the ones in my photographs), they might burn a little on the edges. That doesn’t bother me, but if it bothers you, you can cover them with foil half-way through the cooking time.
In an oven, you can place the chicken on the beer can—just like on the grill—but place it in a cake pan or atop a quarter sheet pan. Preheat the oven to 350°F and position the oven rack in the lower middle part of the oven, so that the chicken has plenty of space and isn‘t too close to the top heating element. Carefully place the pan with the beer-can chicken on the middle oven rack, and close the oven door. Roast for about an hour and 15 minutes—again, depending on the size of the chicken. The grill cooks food faster than the oven, because it cooks like a convection oven, so it is a good idea in both cases to use a meat thermometer.
EK: Beer-can chicken is my comfort food and I make it about once a week. It is delicious served hot, and even makes great leftovers straight from the fridge. You may find people who denounce beer-can chicken, but don’t take their word for it, you should try it and make up your own mind! I love the result, and the vertical roasting that is inherent in a beer can chicken creates the best roasted chicken that I have ever made at home!
FOOD FOR A FABULOUS FOURTH!
APPS, DIPS, AND SIPS
We’ve got plenty of Cocktails to whet your guests’ whistles. Try a batch of Josh’s Signature Pomegranate Margarita or Elizabeth’s Boozy Peach-Mango Smoothies
You can’t say “Fourth of July” without Fire Crackers! Elizabeth’s Grilled Shrimp Cocktail or Grilled Asparagus with Romesco Sauce are show stoppers, and don’t forget about her Homemade Buttermilk Ricotta. Anthony’s Spicy Cashew “Queso” is perfect for dunking tortilla chips or Fritos. And don’t forget about Green Goddess Dip for your veggie platter, or Spring Pea Crostini for a little nosh. Or start the meal with some perfect Tomato Toasts or succulent Chimichurri Chicken Wings!
MAINS
How ‘bout some Barbecue Ribs, Perfect Burgers and Hot Dogs, Big Bold Steaks (no need to thaw!), even Pizzas, Skirt Steak Tacos, and Chicken any way you want it! We’ve also spilled the beans on how to make Shake Shack Burgers at home. Or keep it light with a Greek Salad with Grilled Chicken Paillard or Grilled Chicken with Peaches and Burrata.
SIDES
We’ve got recipes for the absolute BEST Baked Beans, Mac ‘n’ Cheese Perfection, a Summery Fresh Panzanella, two different Cole Slaws, Deviled Eggs, a Tropical Jicama Slaw, or Grilled Asparagus (with a Fire-Roasted Romesco Sauce). And don’t forget Elizabeth’s Cool as a Cucumber Salad (which is a perfect pairing with rich, beefy dishes!).
DESSERT
Of course there are crowd pleasers like Peach and/or Strawberry-Rhubarb Pies, Summer Berry Crostata and No-Bake S’mores, but don’t forget about our takes on Plum Tortes, Lemon Raspberry Loaf, Skillet Brownies (can also be made in a regular pan!), Raspberry Crunch Bars, and a festive Berry Dessert Pizza. Or make a big ol’ batch of Chocolate Chip Cookies and set out some ice cream for a DIY ice cream sandwich bar.
W4D ESSENTIALS: BEACH GEAR
Summer Time = Beach Time!
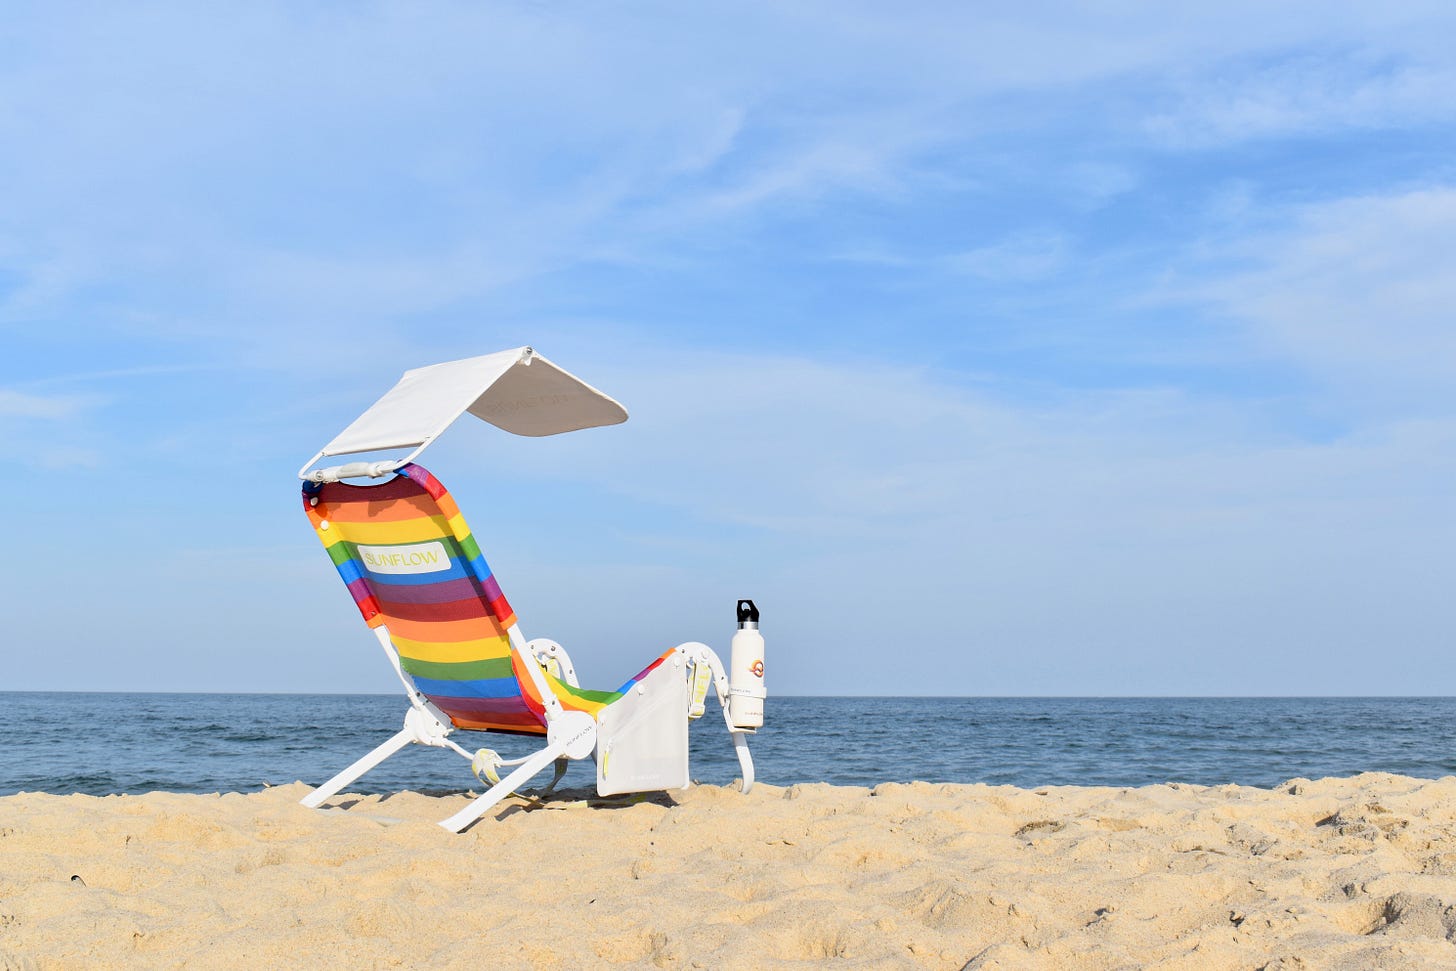
EK: I love the beach!! But, I hate schlepping all the essential things like chairs and umbrellas and coolers filled with snacks!
AU: That’s the exact reason why I don’t go to the beach often. LA might as well be a land-locked city!
EK: Anyone who goes to the beach knows that it is a hassle to pack up and carry everything you need to the beach—chairs, towels, umbrella, coolers, bags, cup holders, etc.The newer back-pack chairs are easier to carry, but the ones that I have purchased are awkward to carry for a shorter person like me. But I no longer have that problem now that I have a SUNFLOW Beach Chair.
Like me, you may have seen the creators on Shark Tank. They told their familiar story…
After struggling to take all their gear to the beach, Leslie Hsu and her husband, Greg Besner thought that there had to be a better way to organize everything you need for a relaxing beach day. It took three years to re-design the beach chair to be compact, high quality, comfortable and functional.
The chair includes a Sun Shade, an adjustable Drink Holder; a Dry Bag to keep your phone and valuables sand-free, dry and safe; and a towel that attaches to the chair so it stays in place.
The chair can be set into 4 different positions for lounging or reading. It is rust-resistant and can be hosed off after using. It is heavy-duty without being too heavy and you carry it as a backpack.
The “Beach Bundle” sells for $296. If that is sticker shock, add up the cost of another chair, an umbrella and accessories and don’t forget the memories of struggling to walk across the sand with all that gear…
Use this link to get Free Shipping and if you are buying 2 chairs, this link will give you 15% off. Happy Beach Days!!
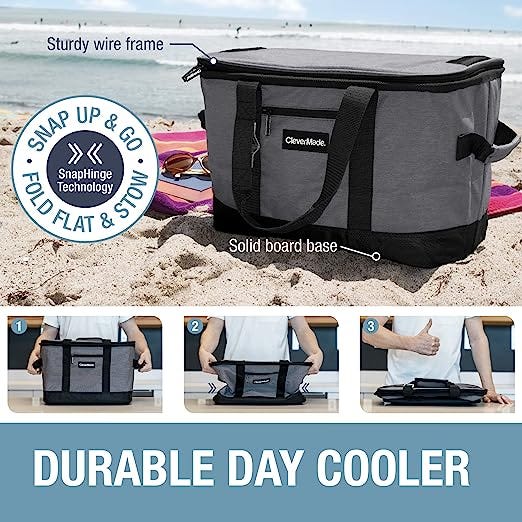
AU: And if you’re in the market for a cooler to keep your summer refreshments chilled, I absolutely love this Collapsible Cooler Bag by CleverMade. Josh and I bought two of them (5 years ago!) and find them so useful for picnics, outdoor concerts, taking food to friends who are far away, etc.
The best part is that they are collapsible, so they are easy to stow away (especially if you live in an apartment, or don’t have a lot of storage). The waterproof lining dries easily, and there’s a built in bottle opener on the handle. The coolers feature two braces built into the sides, so they are sturdy when expanded. We’ve also been known to put one on the side of our pool when we don’t want to get out to get another beverage. HAPPY FOURTH!!

