


WE LOVE AN AIR FRYER
You could love one, too. Enter our Ninja Crispi Giveaway!


Happy Thursday! We’ve always thought air fryers had their place on the kitchen counter, especially if you’re someone who eats a lot of frozen-to-table foods. But for us personally, we’ve never allocated the counter space to the air fryer.
Until now.
We recently did some consulting work at the Ninja Kitchen Headquarters, and they introduced us to the Ninja Crispi…
EK: I never thought it would happen to me, but then I saw the Ninja Crispi!
AU: Immediately, I was like, “This is an air fryer for people who don’t want an air fryer!” I had to see it in action.
EK: If you love watching the multi-talented, late-night host Jimmy Fallon, you might have seen the Crispi in action. He made wings with it, and boy, did they look good!
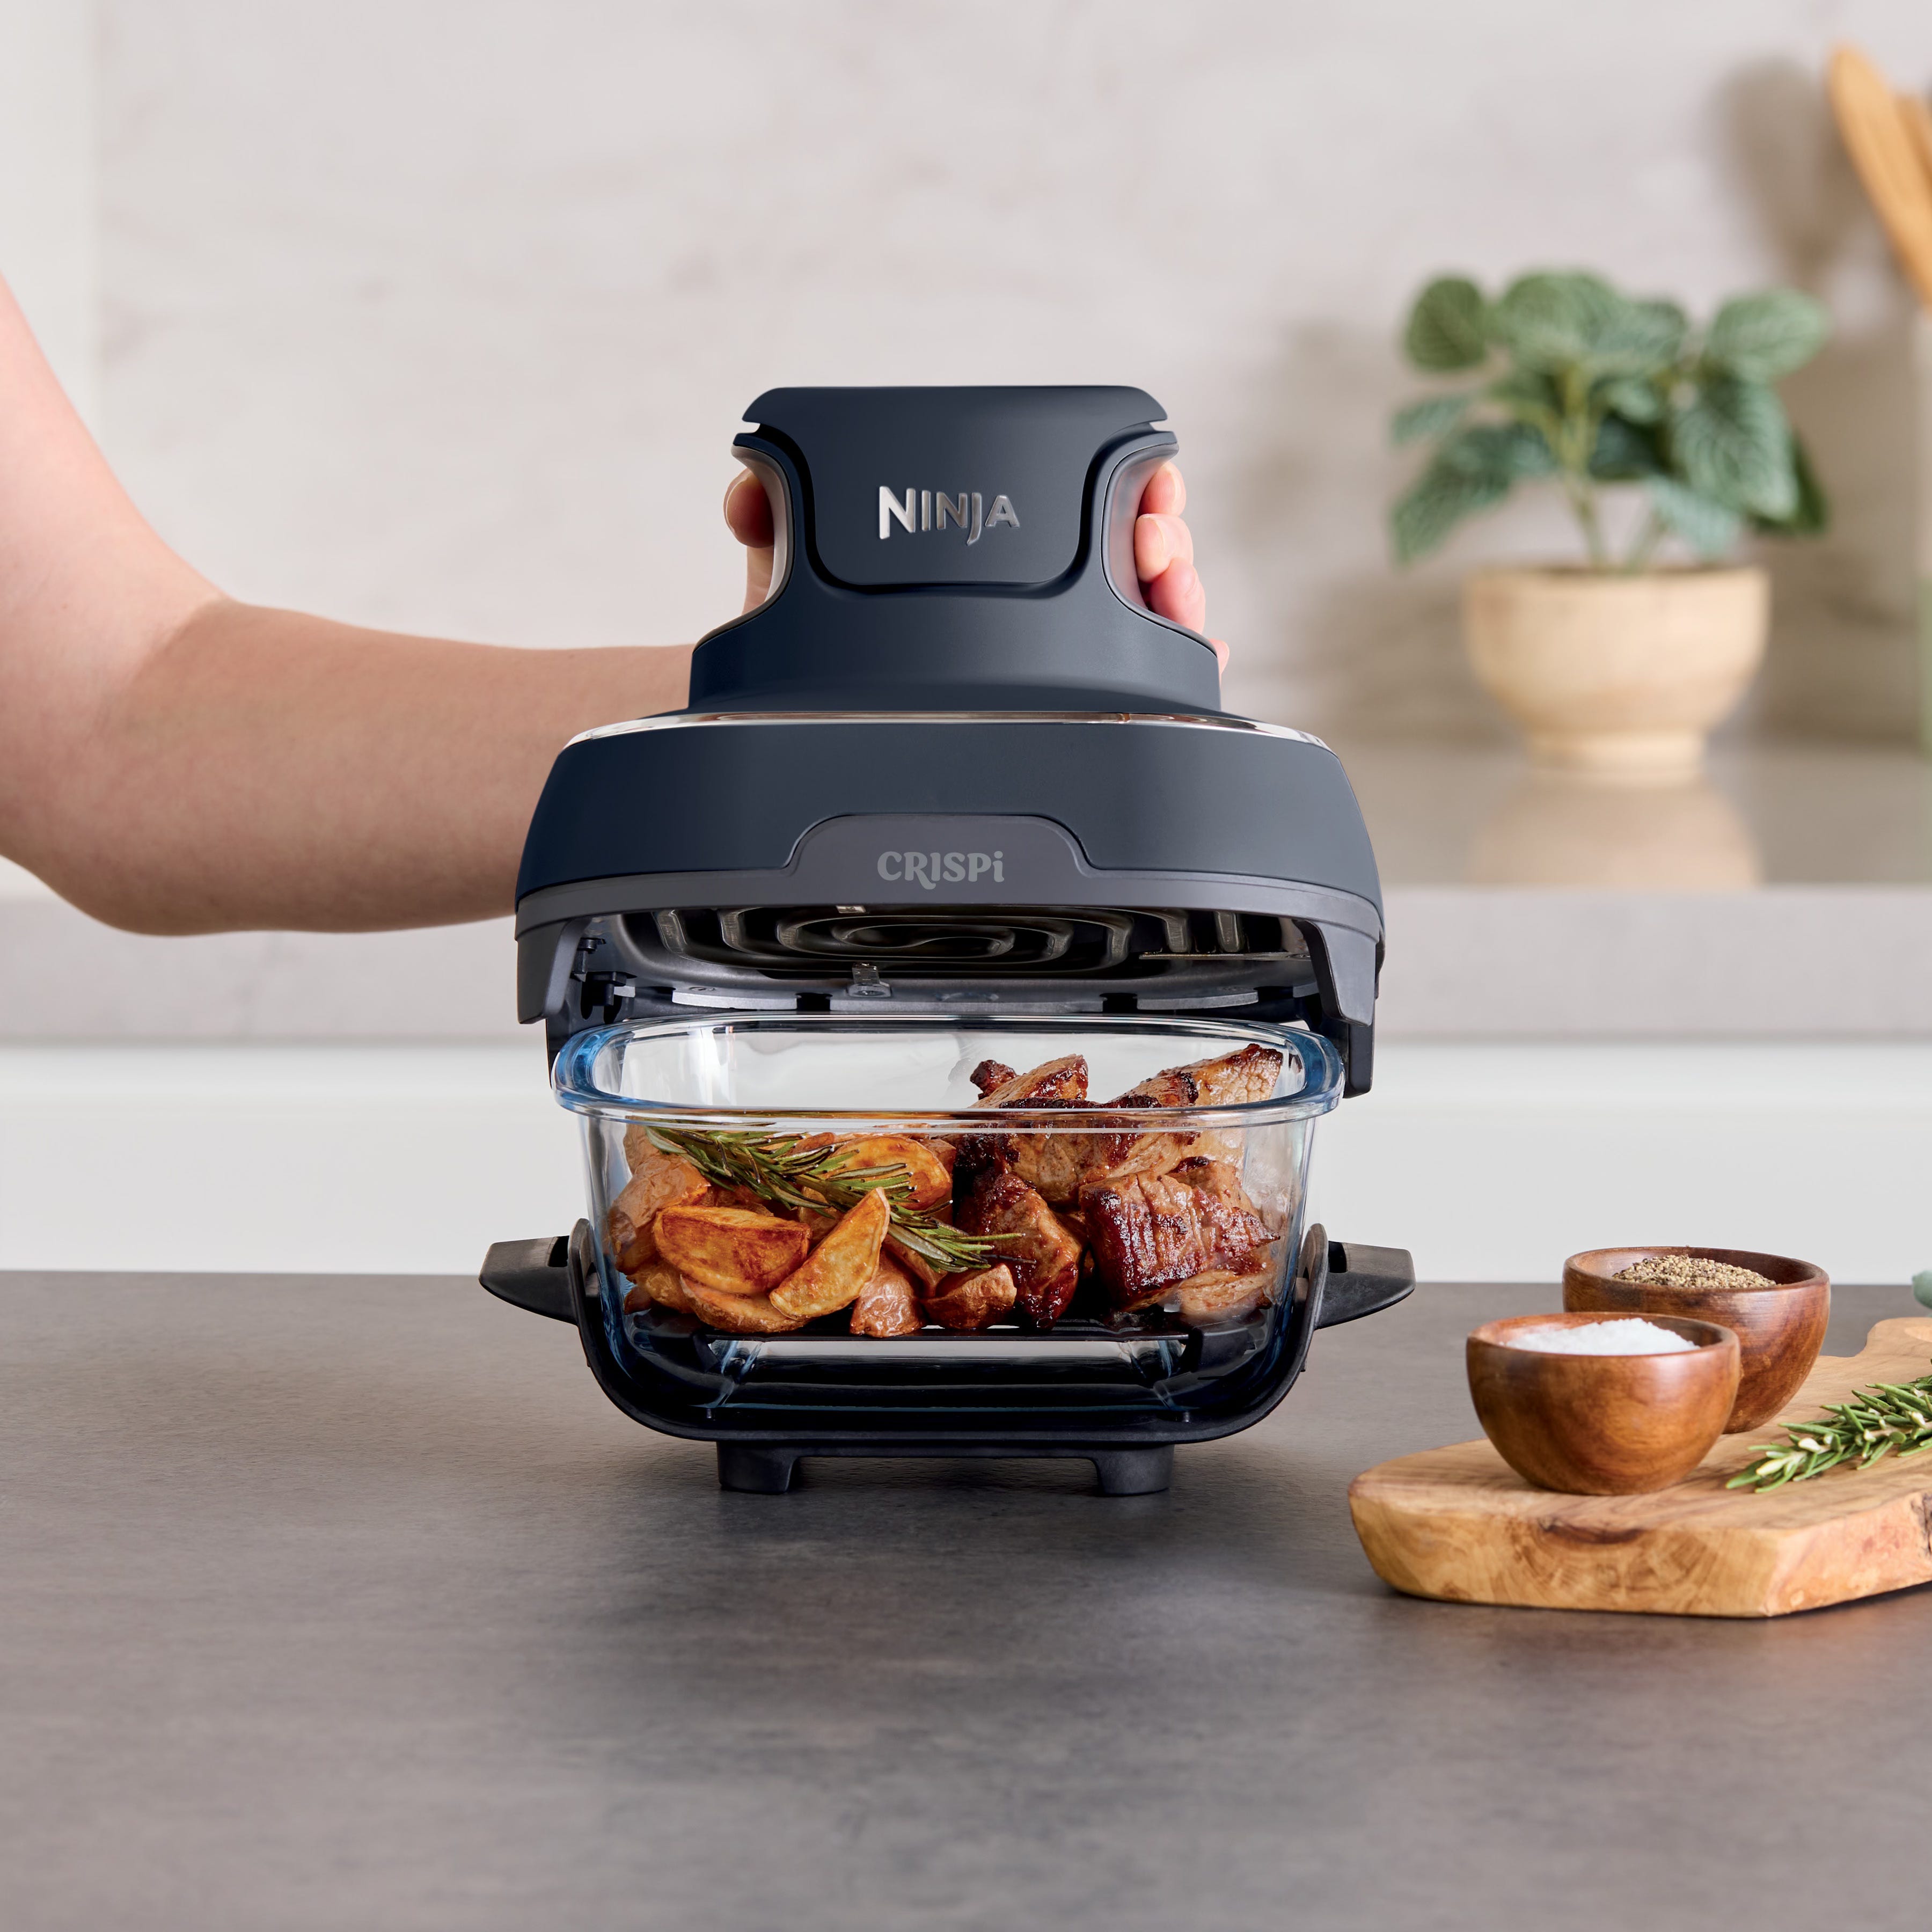
The thing that appealed to me first was the size. I loved that it was a high-heat-proof [borosilicate] glass container—like the original Pyrex—with an air- fryer lid.
AU: Yes! It’s an air fryer that’s MADE to be stowed away (if you want)… It’s small enough to fit in any cabinet.

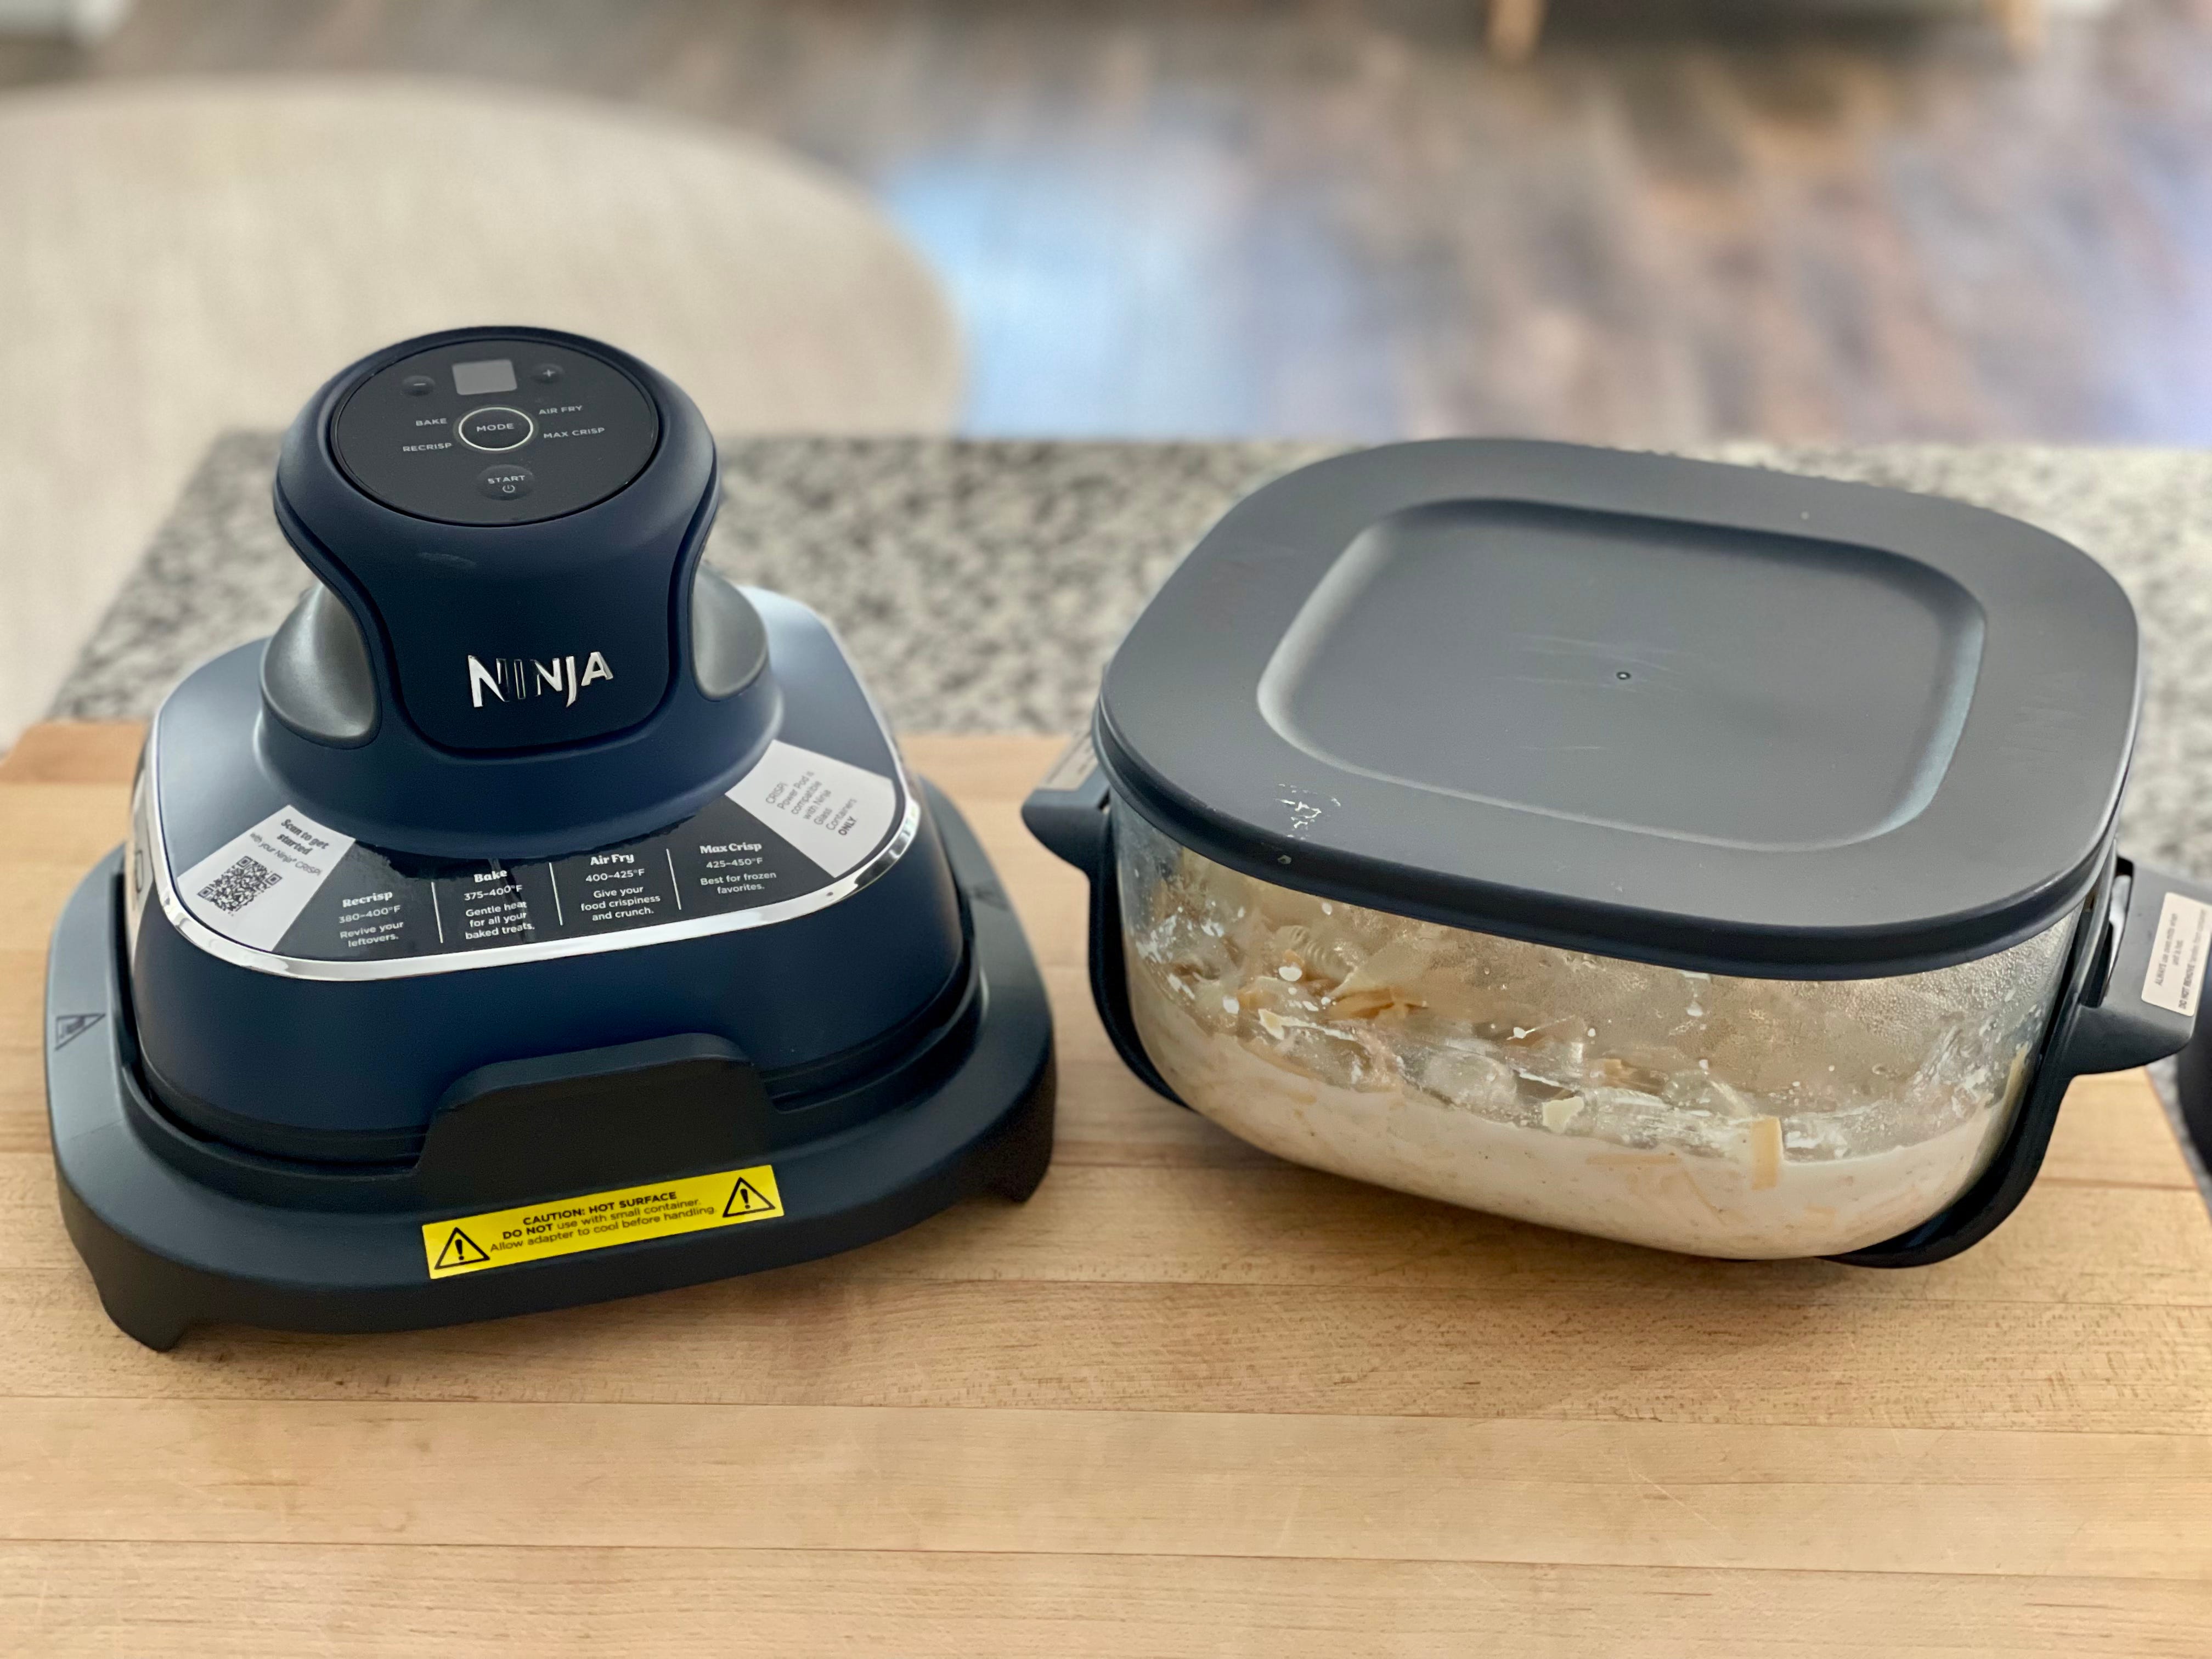
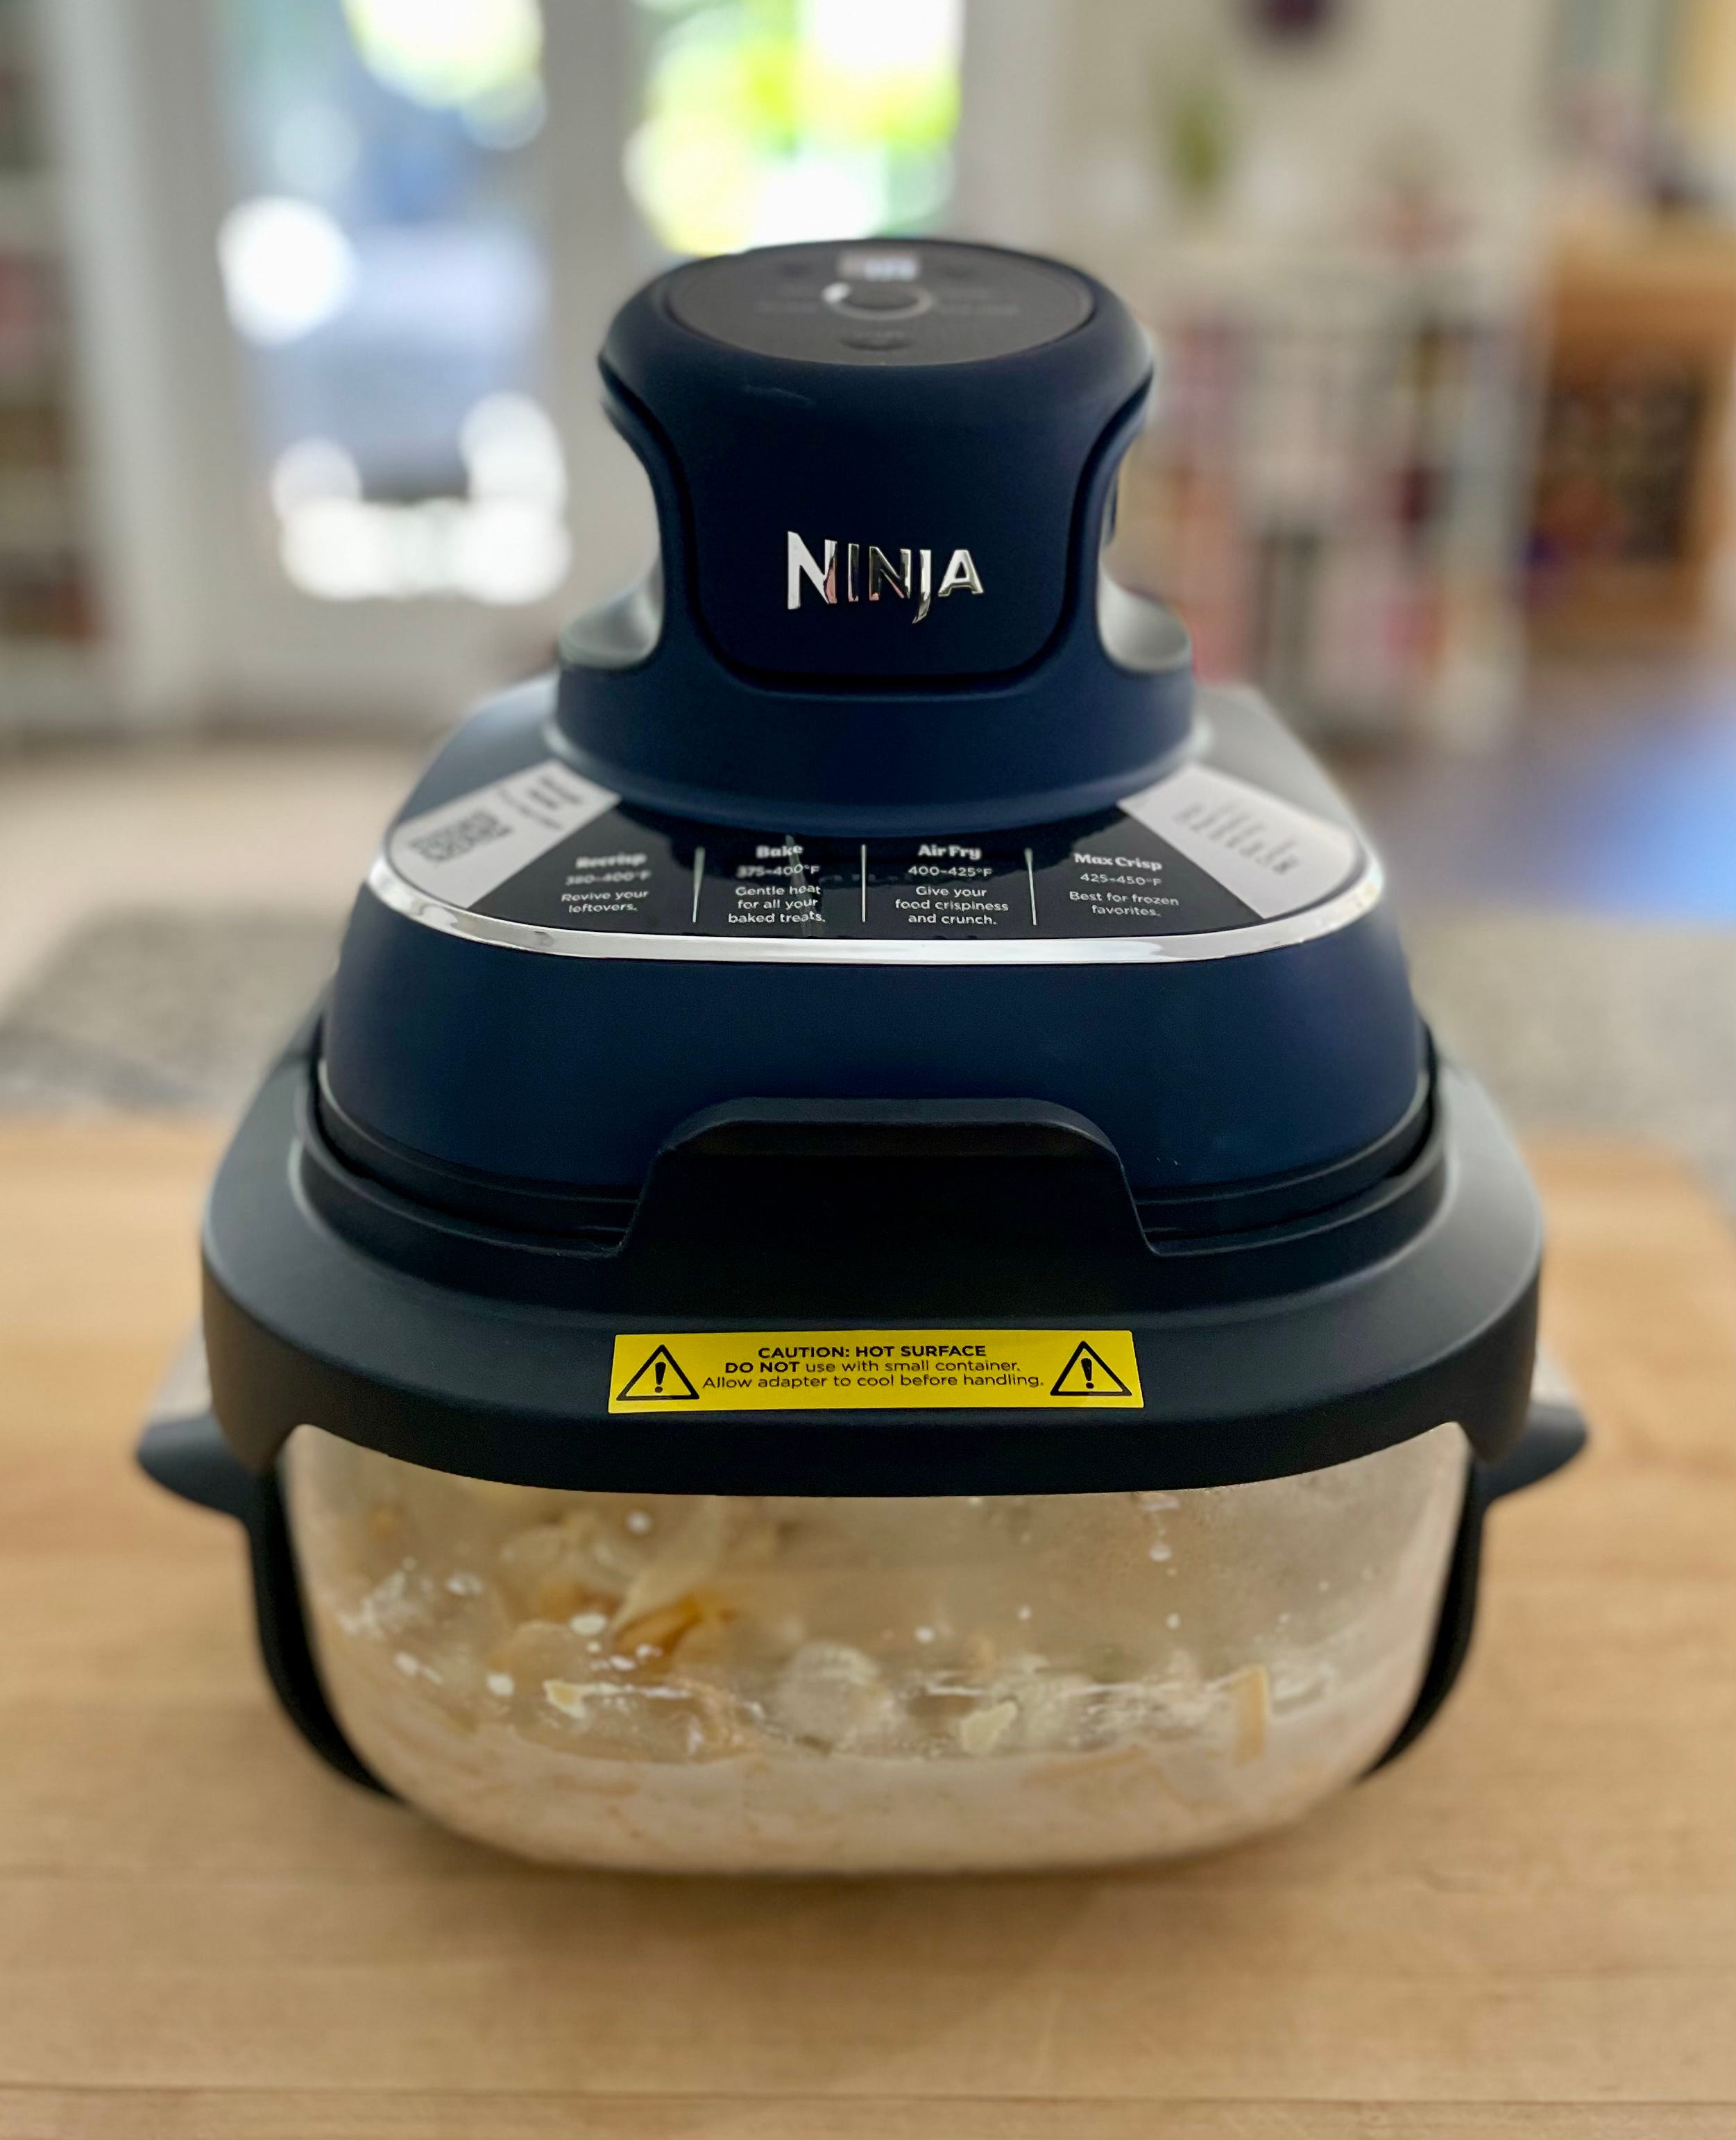
EK: Exactly. Not a huge appliance that is impossible to store and hard to clean. The Crispi comes with 2 TempWare glass containers, one 4-quart and a smaller 6-cup container, two crisping plates, storage lids, and an air-fryer lid called the PowerPod. Ninja calls it a 4-in-1, meaning that there are 4 functions including Recrisp, Bake, Air Fry, and Max Crisp.
AU: And I use all four all the time. Each function has its own temperature range. If you’re just reheating leftovers (that you can store IN the TempWare containers), use the Recrisp function. Want to get something GBD? (Golden Brown Delicious) Then use Bake, Air Fry or Max Crisp!
EK: The first thing I did when I unboxed mine was to “air-fry” the frozen Chicken Masala Samosas from Trader Joe’s. What a game changer!
They were just as crisp and juicy as if I had fried them in a commercial fryer, and they weren’t the least bit greasy! I’ve made them in my oven before, even a convection oven, and they were OK, but not great. The Crispi made them taste like I’d ordered them in a restaurant!
AU: I think the magic lies in the size of the containers. The heat is so concentrated, that it cooks in no time and transforms food to crispy perfection. I probably should say Crispi perfection, eh??
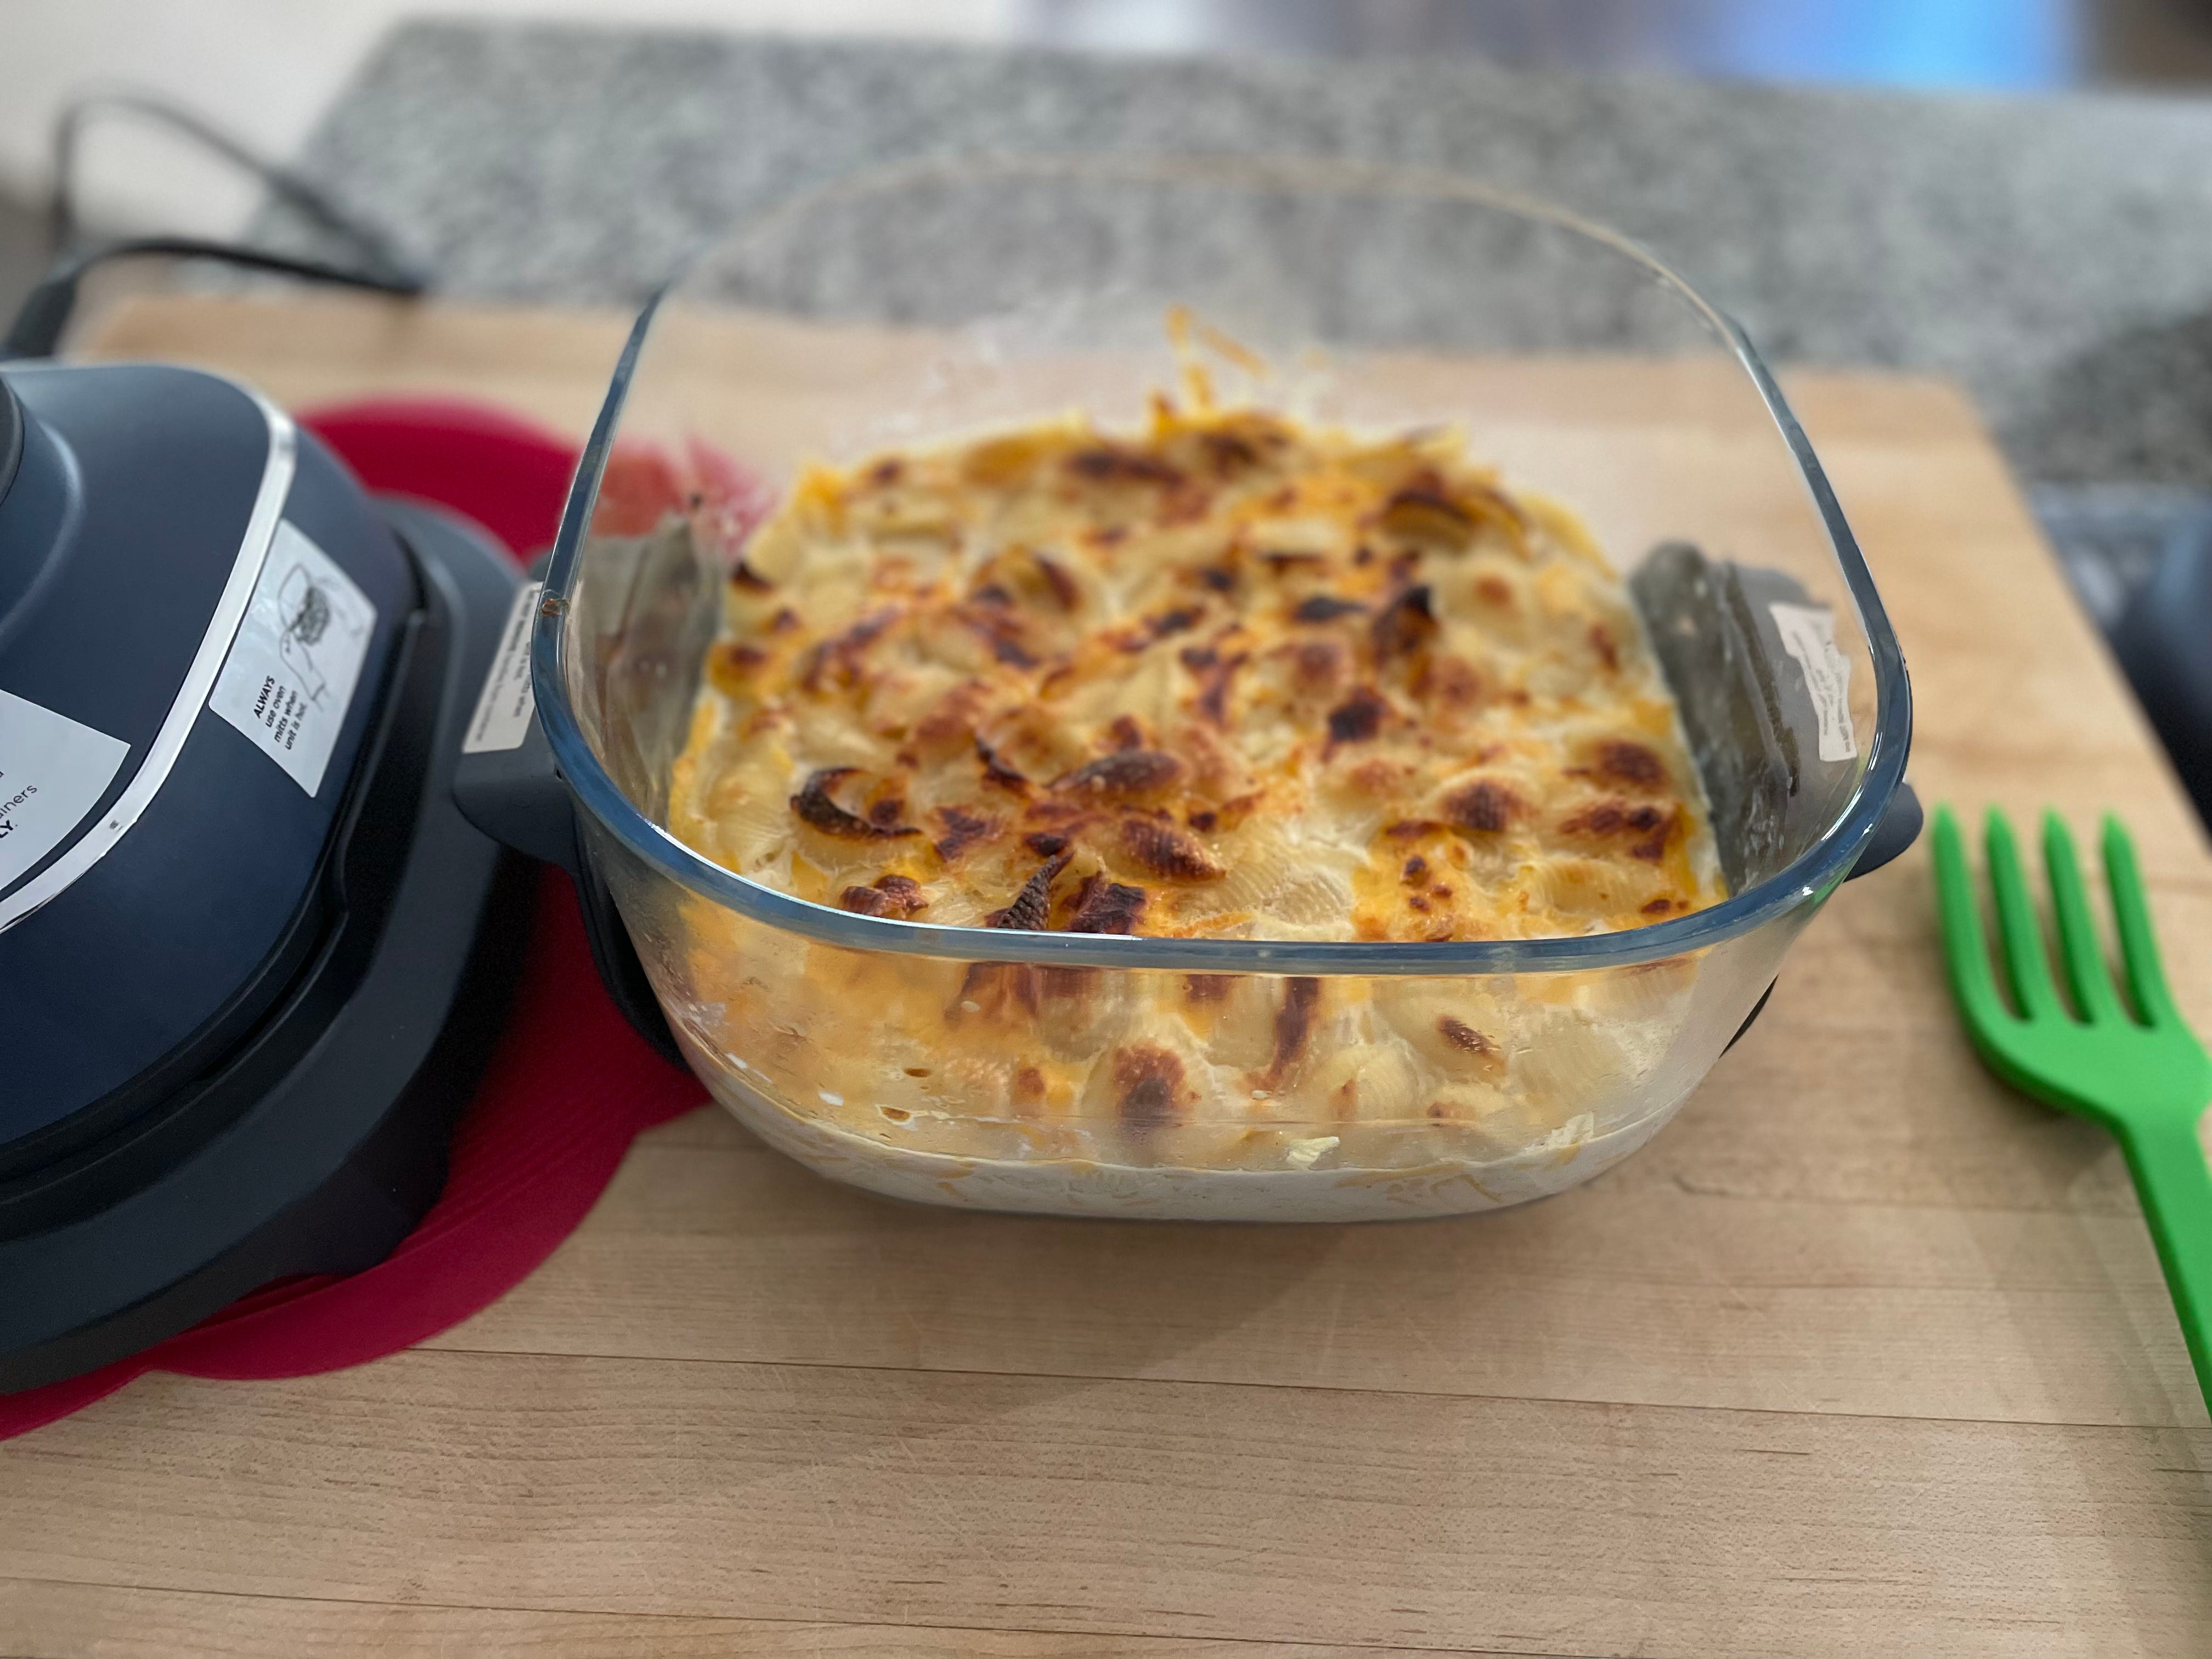
EK: Ha! The glass container made me instantly think of Mac & Cheese and the storage lid made me think about my No-Boil Overnight Mac & Cheese which is assembled the day before you want to serve it, so it can soften as it sits overnight in the fridge. You could never make Mac & Cheese in a regular air fryer unless you put it in a separate dish before cooking it [otherwise, it would drip and ooze out of the basket].
EK: I wondered if I could make it in the large container, let it sit in the fridge and cook it just before dinner?
AU: Sounds like a solid plan to me.
EK: I made the recipe just as I originally wrote it, but reduced the milk to 3 cups because the air-fryer would keep all the moisture in the dish unlike an oven where Mac & Cheese has a tendency to dry out and needs more moisture. I also added a 10-ounce bag of frozen butternut squash. I added the squash and stirred it in just before I put the PowerPod lid on the container.
One note: If you are using the 4-quart container, make sure you position the PowerPod in the frame so that the vent is not obstructed. The frame has a little rectangular piece that fits in front of the product name. It will fit the container in the back as well, but that will block the air vent and the Cripsi will not heat up. I know about this first hand. Yes, I made the mistake so you don’t have too!
EK: The thing about an air-fryer is you only have top=down heat. It is convection heat that circulates, but only comes from above. It’s like the reverse of direct cooking on an outdoor grill (where the heat is coming from the bottom), but the result is the same.
For this reason, I needed to cook and stir, and cook and stir in the following intervals:
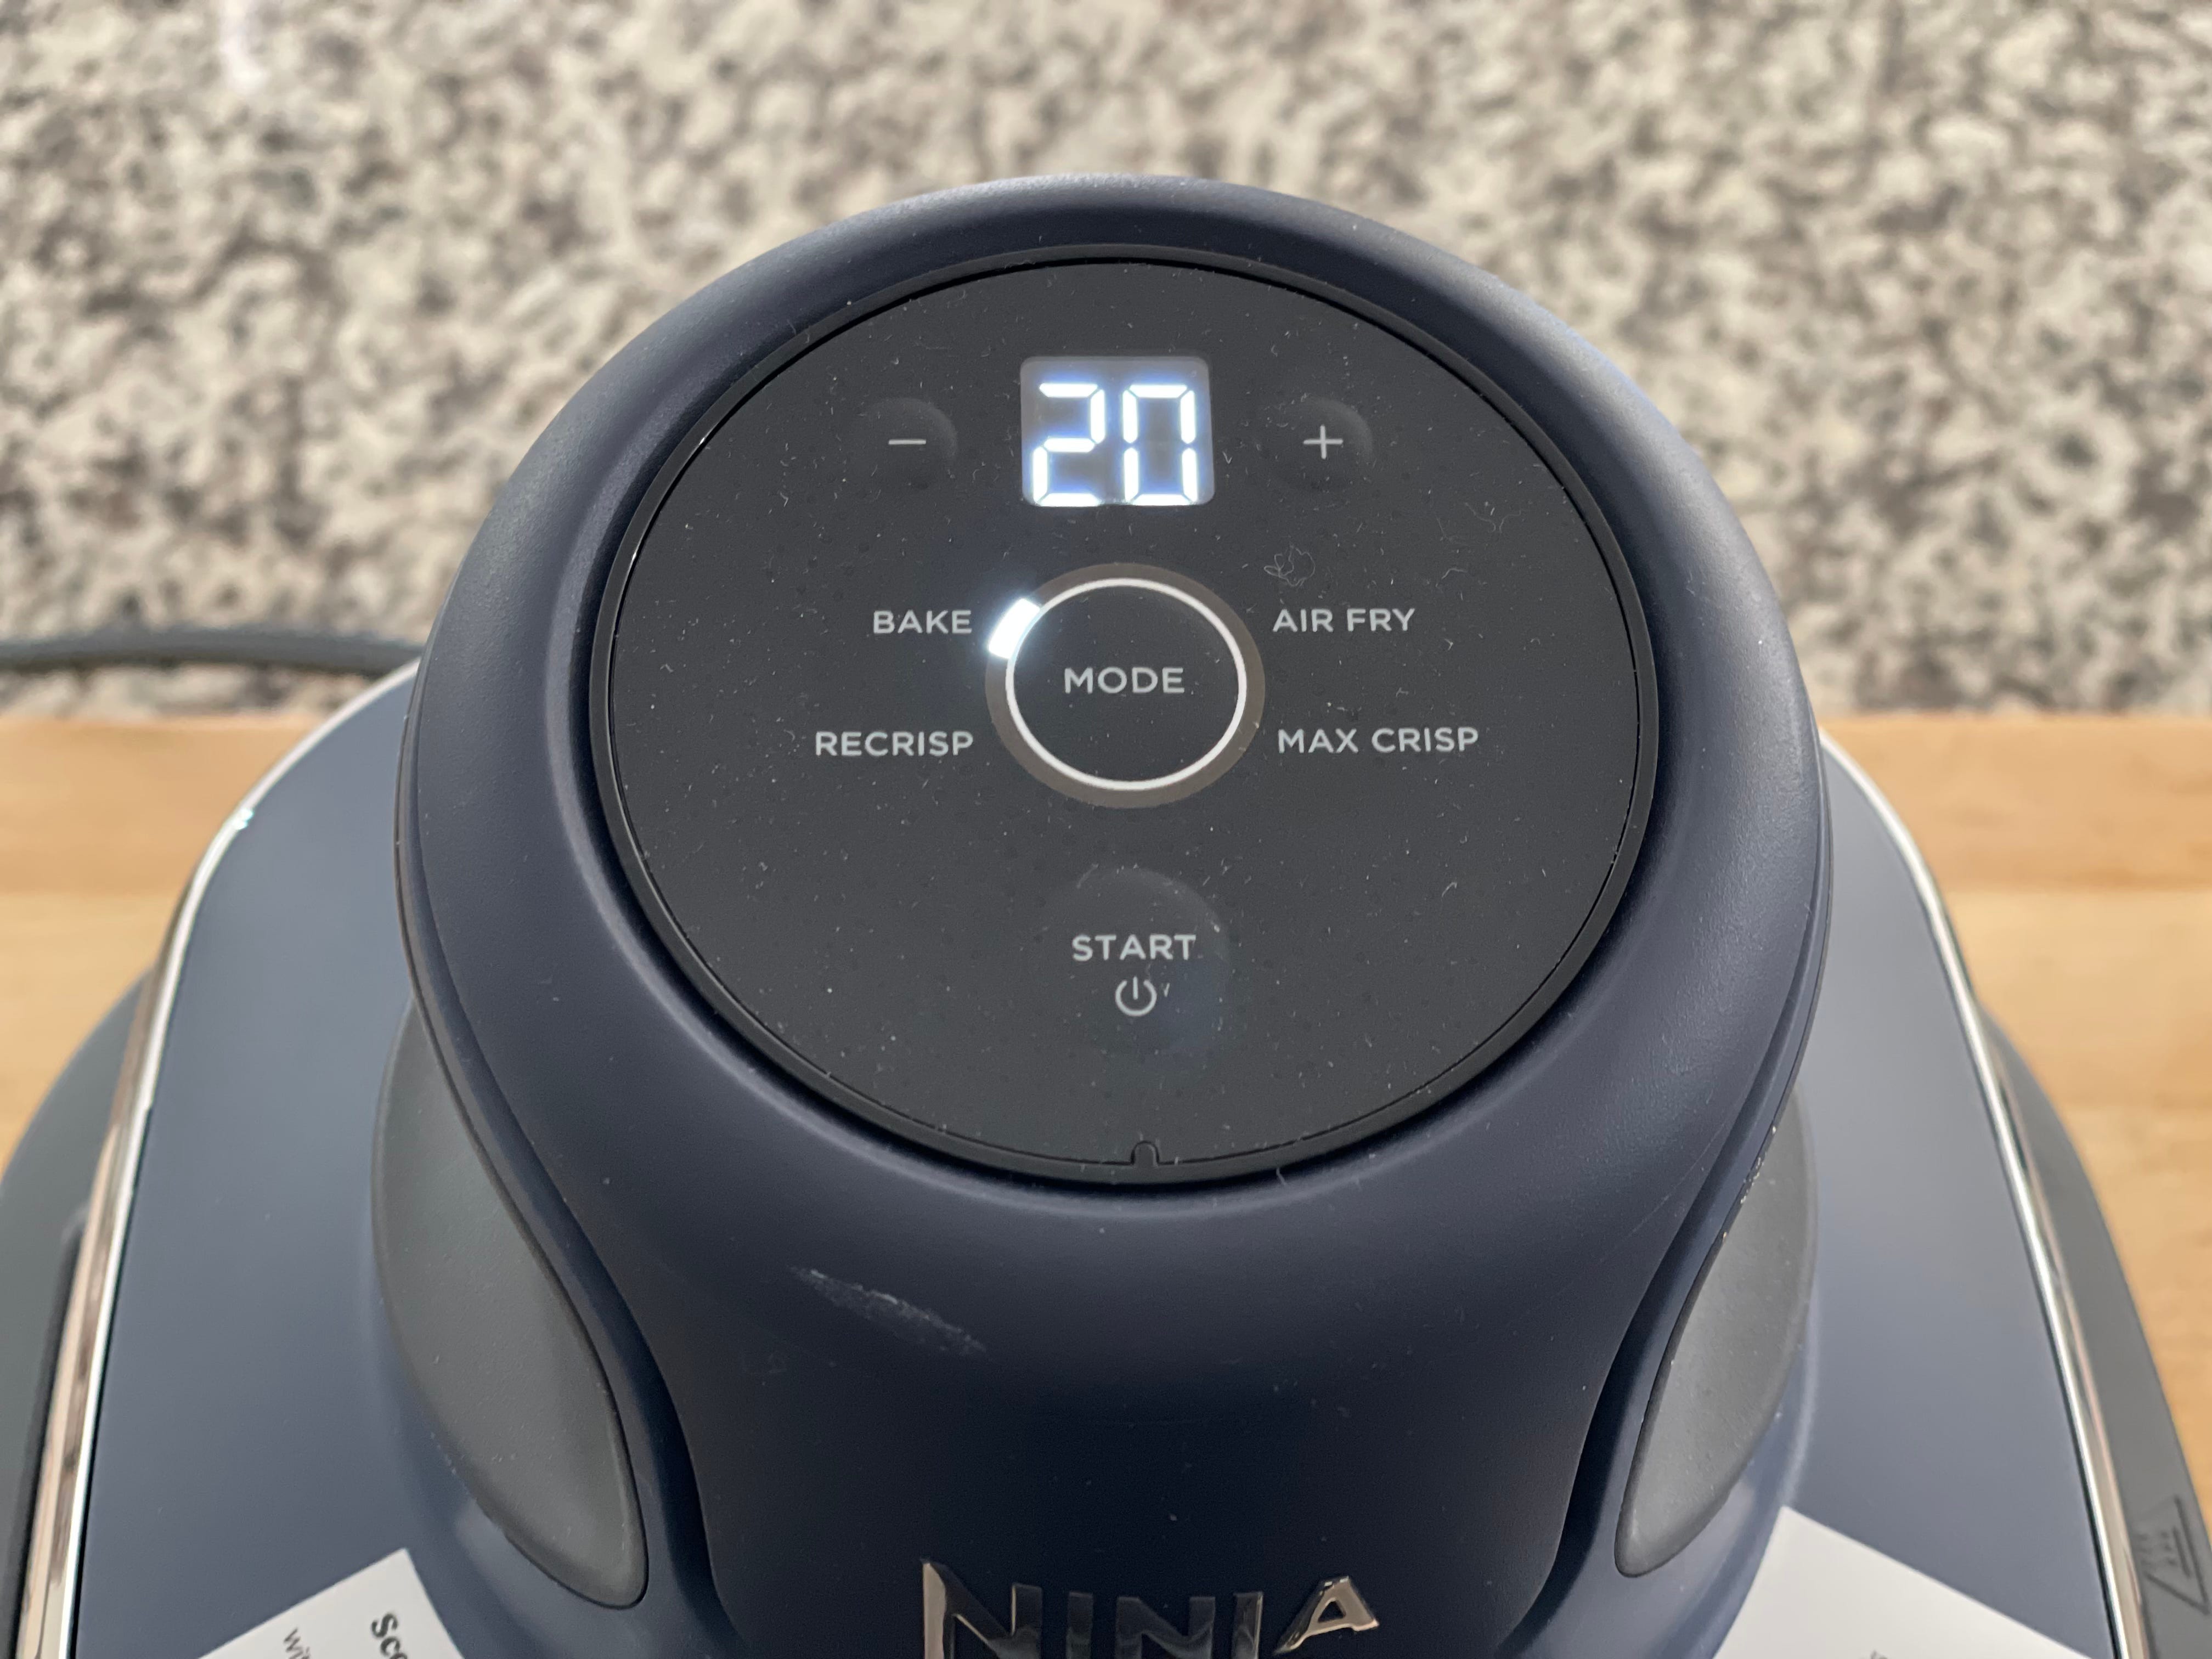
20 minutes on the most gentle mode/setting which is Bake
After 20 minutes, I stirred the brown crispy bits into the rest of the Mac & Cheese and set the PowerPod for another 10 minutes. I repeated this 2 times.
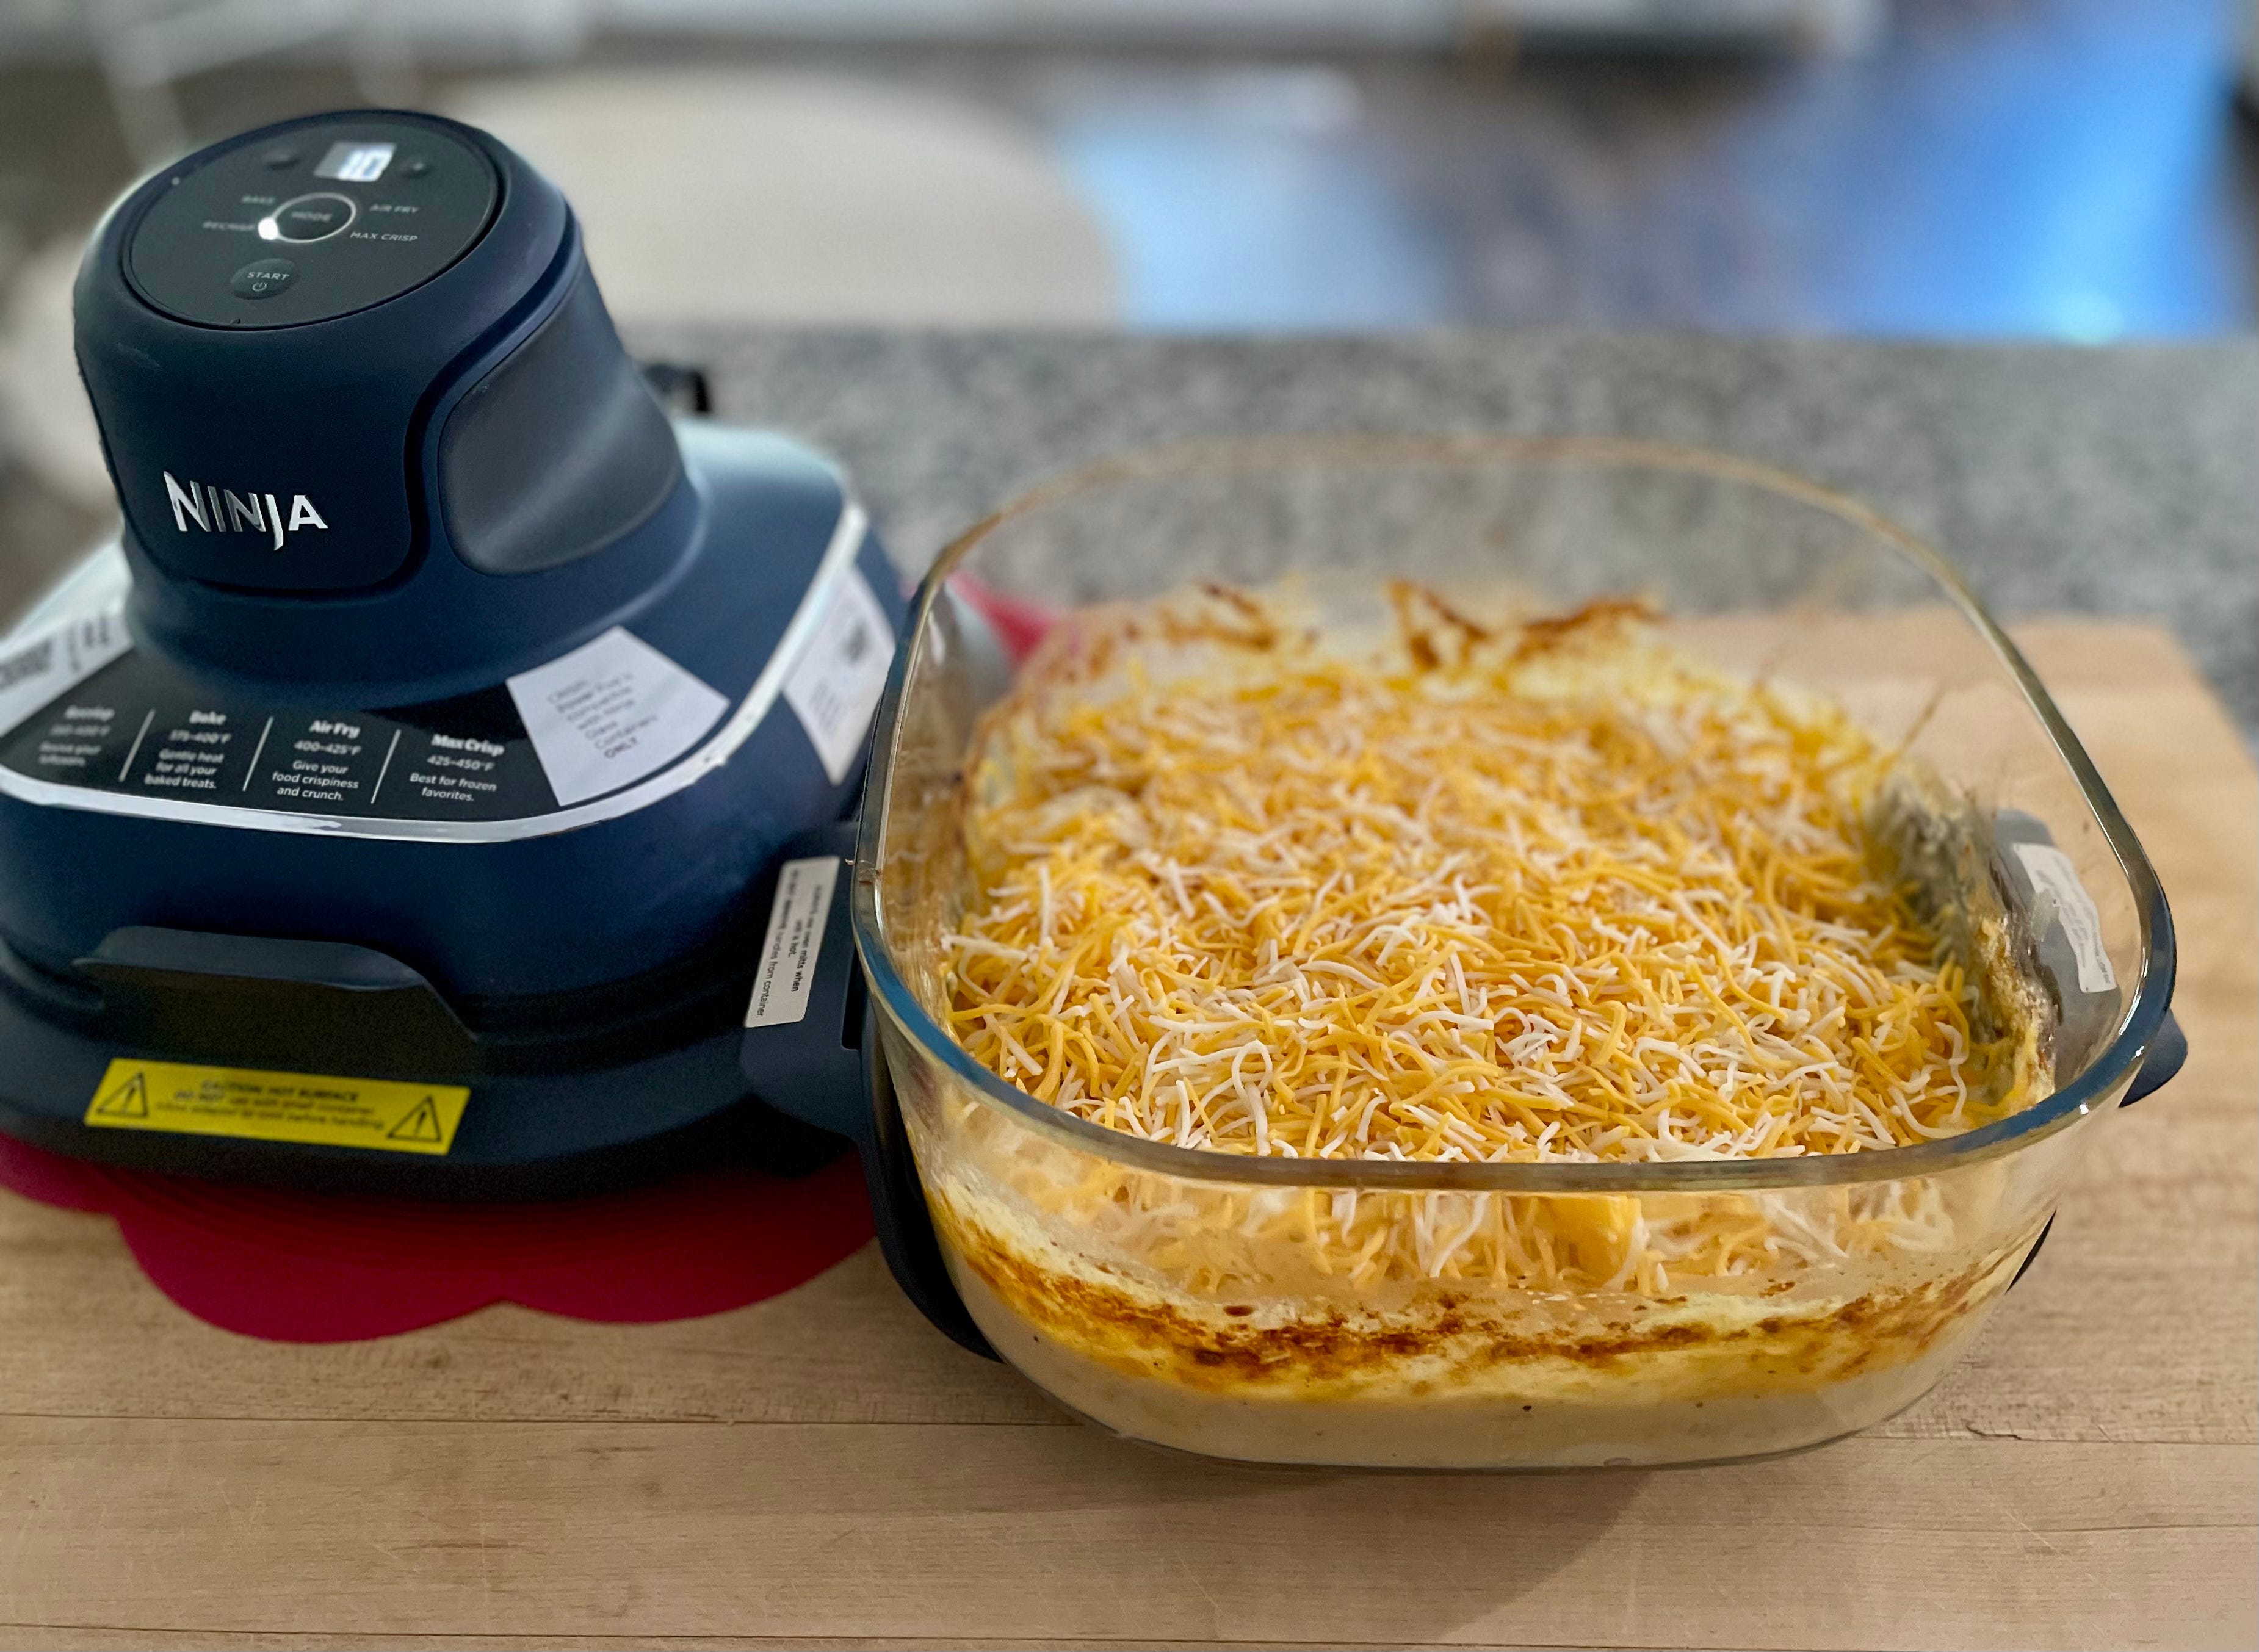
EK: After the Mac & Cheese cooked and was stirred for a total of 40 minutes, I added shredded cheese to the top and re-set the PowerPod for another 10 minutes on Bake.
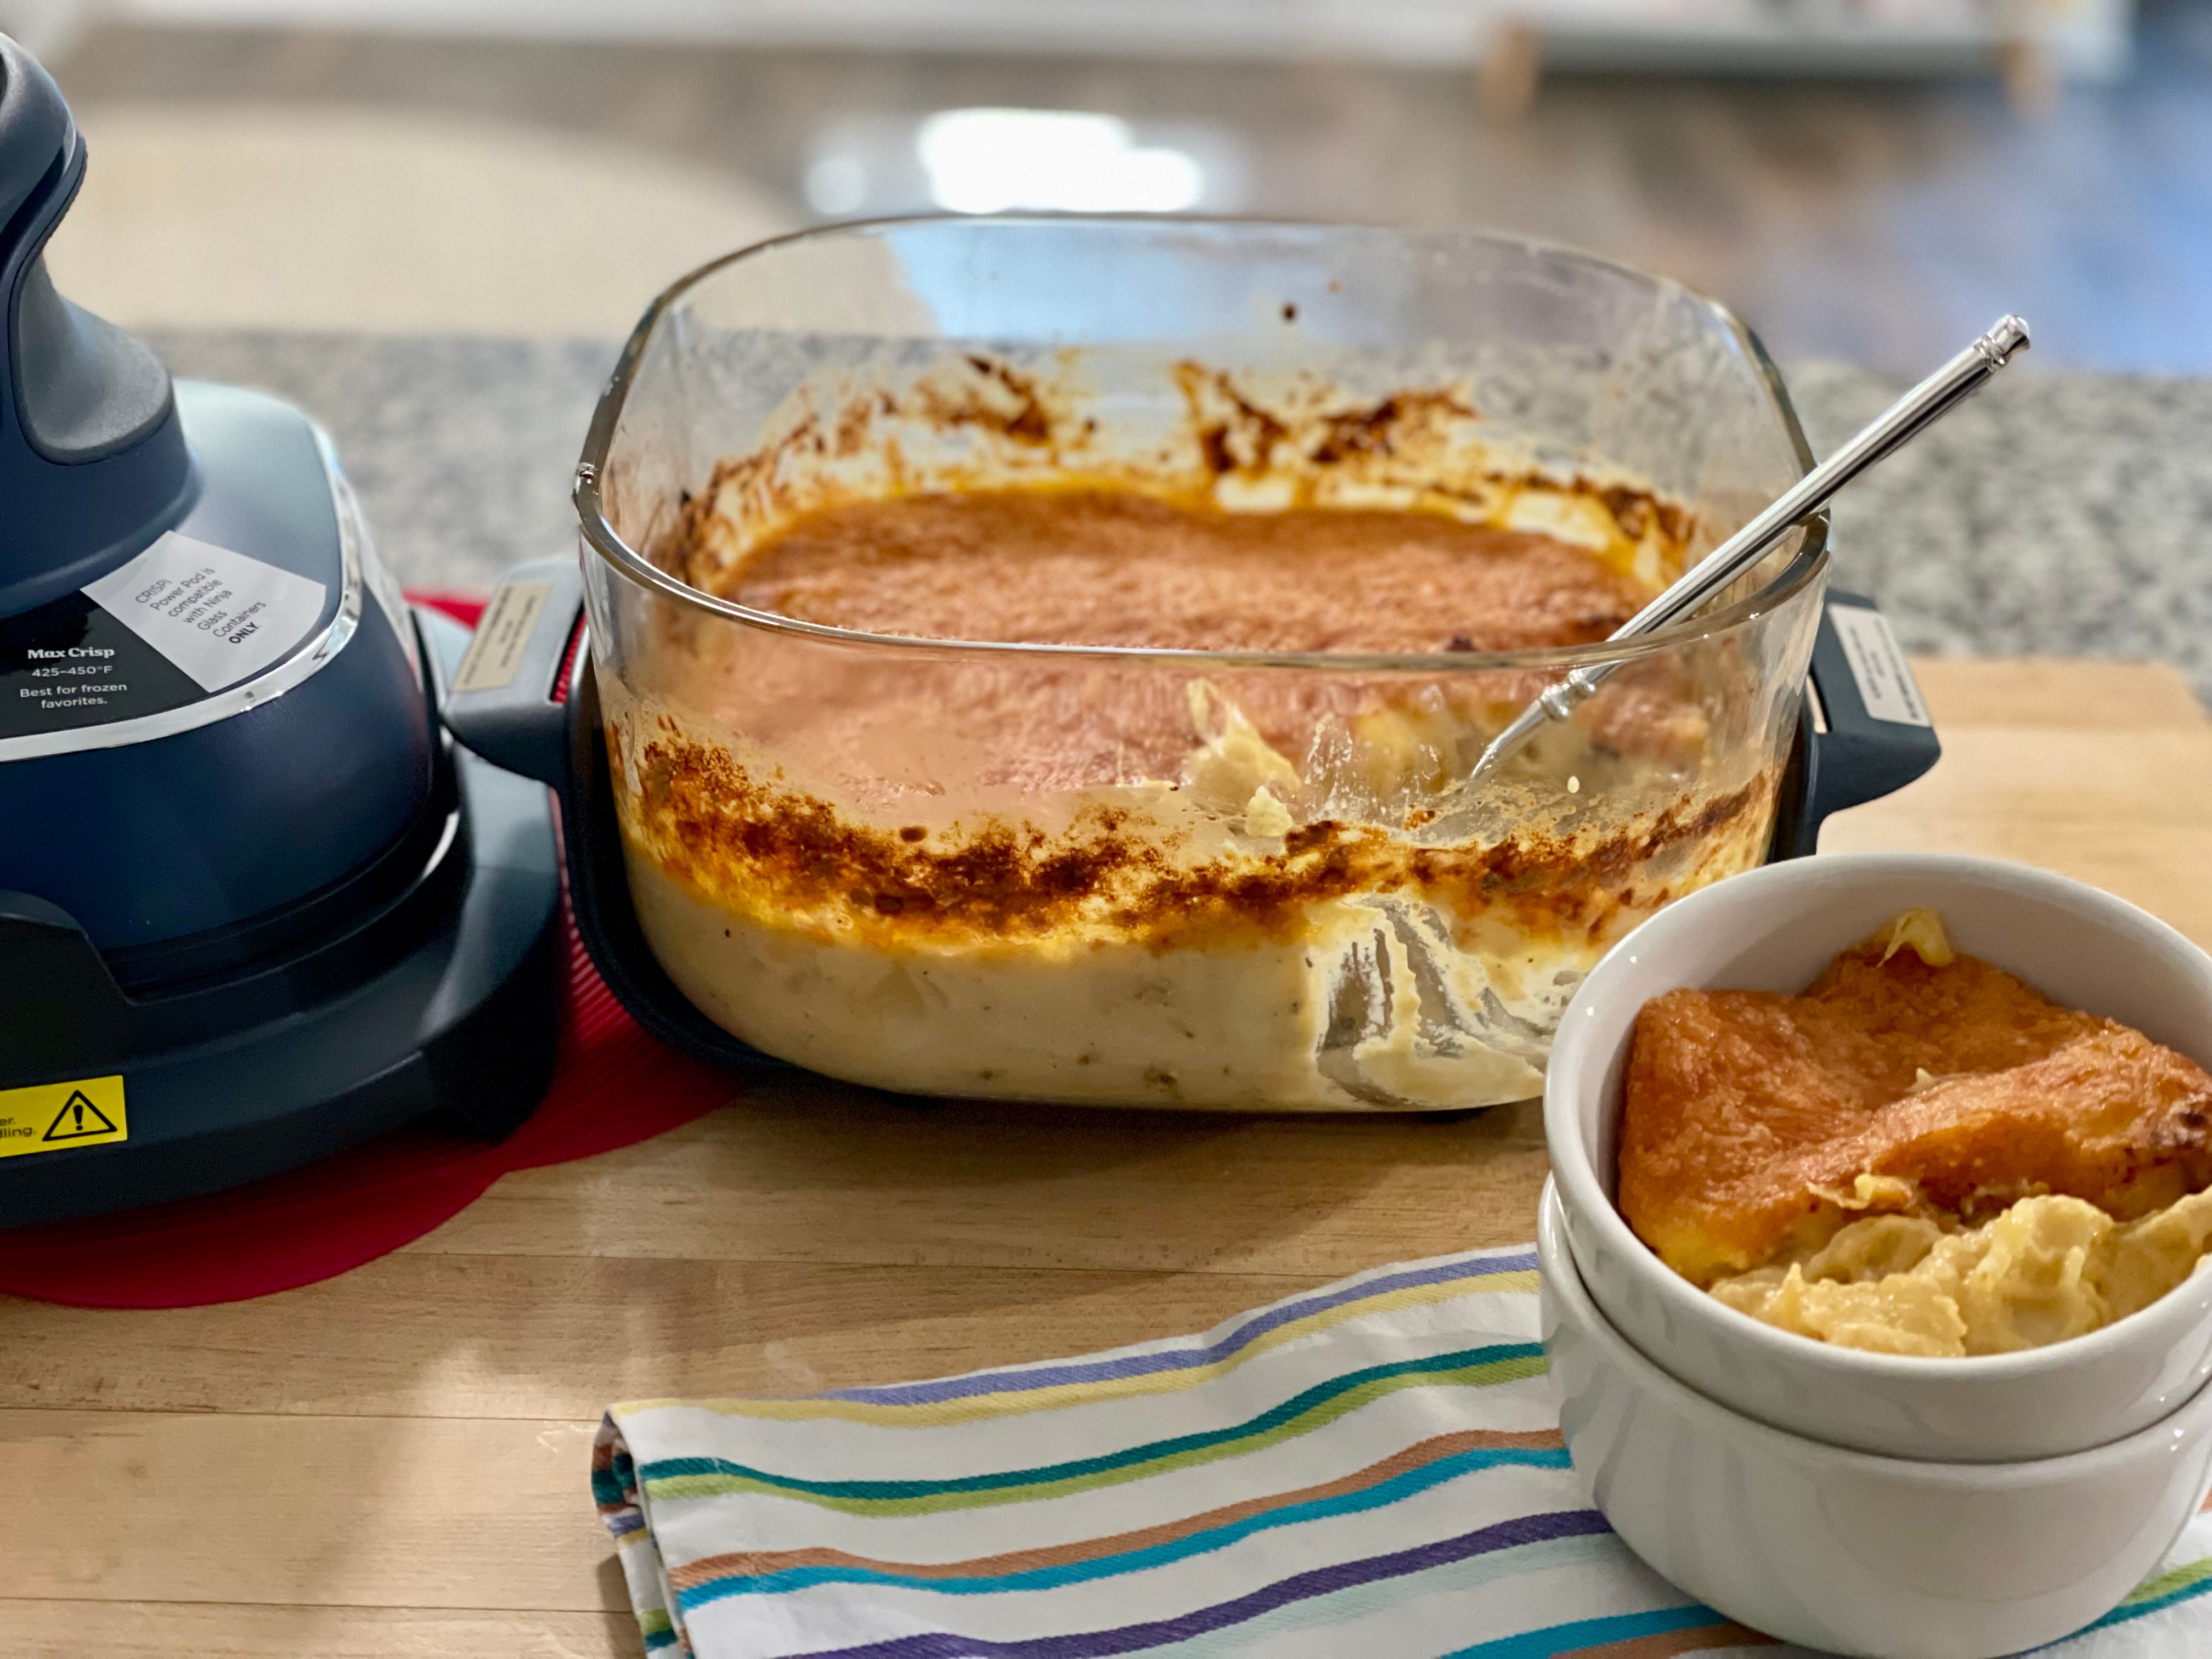
EK: The result was super creamy, not dry at all, but with the crispiest crunchy cheesy crust!! It was sooo much better than baking my No Boil Overnight Mac & Cheese in the oven!
And BTW, the addition of the frozen Butternut Squash elevated the dish and I’ll never make it any other way. Plus it made me feel healthy-ish!!

AU: I know this sounds dumb, but I make croutons in the Crispi all the time, and I love it for that on its own! lol But it’s an amazing tool to have in your kitchen, and is incredibly convenient.
Just imagine all the fun things you can cook in the Ninja Crispi! Make a cherry crumble, bake a cake, reheat leftovers, roast vegetables… oh, and it makes really amazing chicken wings, btw.
**NINJA CRISPI GIVEAWAY**
We’re giving a Ninja Crispi to one of our lucky readers! If you’d like to become a paid subscriber, click the button below. We’ll shout out the winner next week!
*Paid subscribers are automatically entered to win a Ninja Crispi! If you’d like to be eligible, become a paid subscriber by 11:59p PT on December 10, 2024.