SWEET JANUARY > DRY JANUARY
Perhaps you’re one of the millions of people whose new year’s resolution was to “eat healthier” or “exercise more.” Us too… but everything is better in moderation, right? So give yourself a break, and have something dessert-y to satisfy that nagging sweet tooth. We’ve got two BONKERS GOOD desserts that are surprisingly easy to make, and even easier to devour!
CHOCOLATE-DIPPED PEANUT-BUTTER LACE COOKIES
EK: This may be the strangest cookie dough that you’ve ever made.
It’s sugar and eggs, vanilla extract, peanut butter, and mini marshmallows, covered in dark chocolate, and crowned with a pinch of coarse grain salt.
AU: Oh hey there—you’re speaking my language!! These sound like an insane kitchen experiment, and from the looks of the ingredients, are gluten free, too?
EK: Yes, and they defy logic! It doesn’t look like those ingredients would make one of the best cookies that you will ever eat, but you don’t have to take my word for it. Here is what my engineer neighbor (with no culinary background at all) texted me after I left some cookies for her.
“This isn’t like any other cookie! It’s like a cross between a truffle and mousse-y cake. The fluffy peanut butter is delicious, and the salted chocolate adds many layers of flavor.”
EK: I don’t think that I could have said it better myself!
After the peanut-butter cookies are baked and cooled, they are dipped in dark chocolate and sprinkled with coarse sea salt. They could not be simpler to make, but you do need to plan in advance..
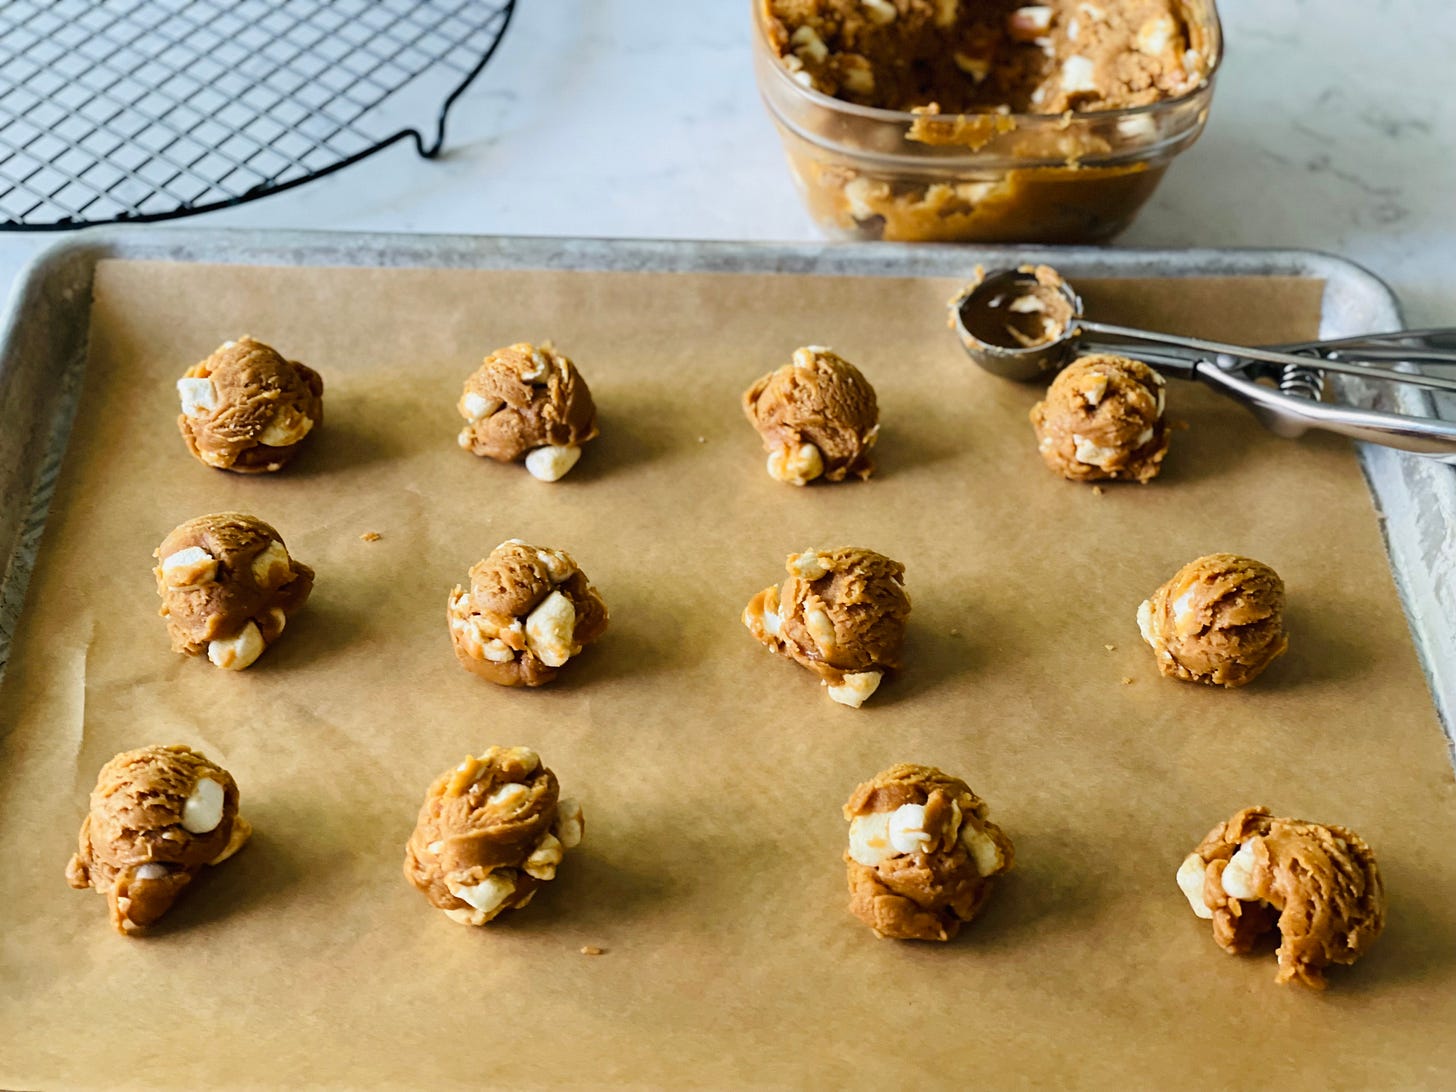
The key to this recipe is making the dough at least 8 hours before you want to bake it, and letting it sit in the refrigerator so that it is cold when you scoop it. It will retain more of its shape and will make nice neat dough balls for freezing. You need to freeze the dough balls for 30 minutes before baking or else they will not hold their shape. I put the whole sheet pan in the freezer before I bake them.
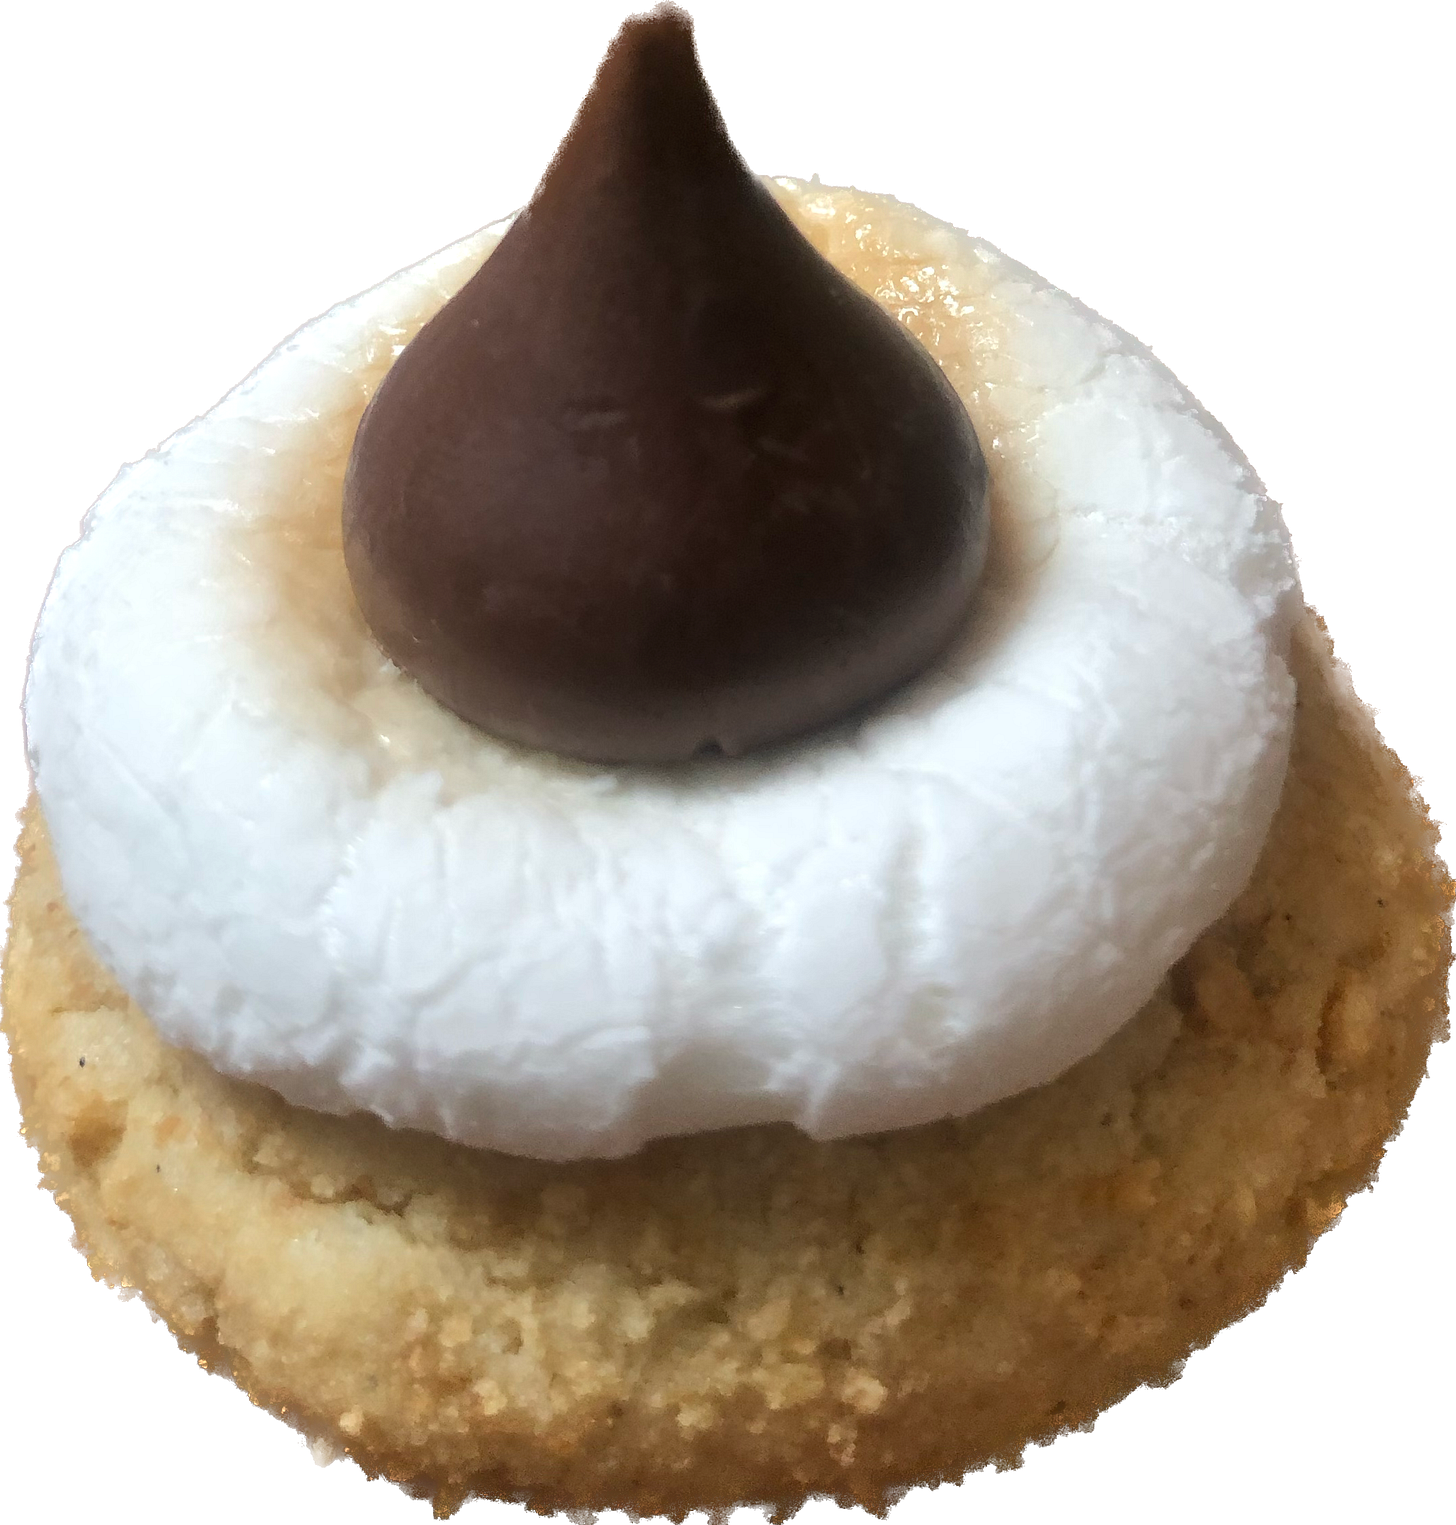
EK: If you are wondering what my inspiration for these cookies was, it was a peanut-butter cookie s’mores that my friend, Heather, made with her son, Jonah, at Thanksgiving. She sent me the gorgeous photo above, and I just knew that I had to make something with all the same flavors!
I was also inspired by the Salted Peanut Butter Cookies from Ovenly. They have a cult following and the commercial “whipped” Skippy peanut butter provides the bulk of the recipe. A couple of eggs and sugar are the supporting ingredients so they are both gluten-free and dairy free for people who are watching those things. They are also peanut-butter-centric for all of use peanut butter lovers.
EK: I love peanut butter, but I adore peanut butter and chocolate together. Anyone else love a Reese’s?! I mixed in the marshmallows to add a chewy texture, and dipped them in dark chocolate reminiscent of a black and white cookie—you could use milk chocolate if you prefer.
Before they bake, you must scoop the cold refrigerated dough and freeze the dough balls for 30 minutes—remember, this prevents them from spreading too much. I used a 4 teaspoon cookie scoop and I think that size is perfect. This scoop is sometimes referred to as a small scoop but they still make pretty big cookies in my book. You can bake 12 per cookie sheet using this scoop. The bigger scoop bakes 6 cookies on a half-sheet pan.
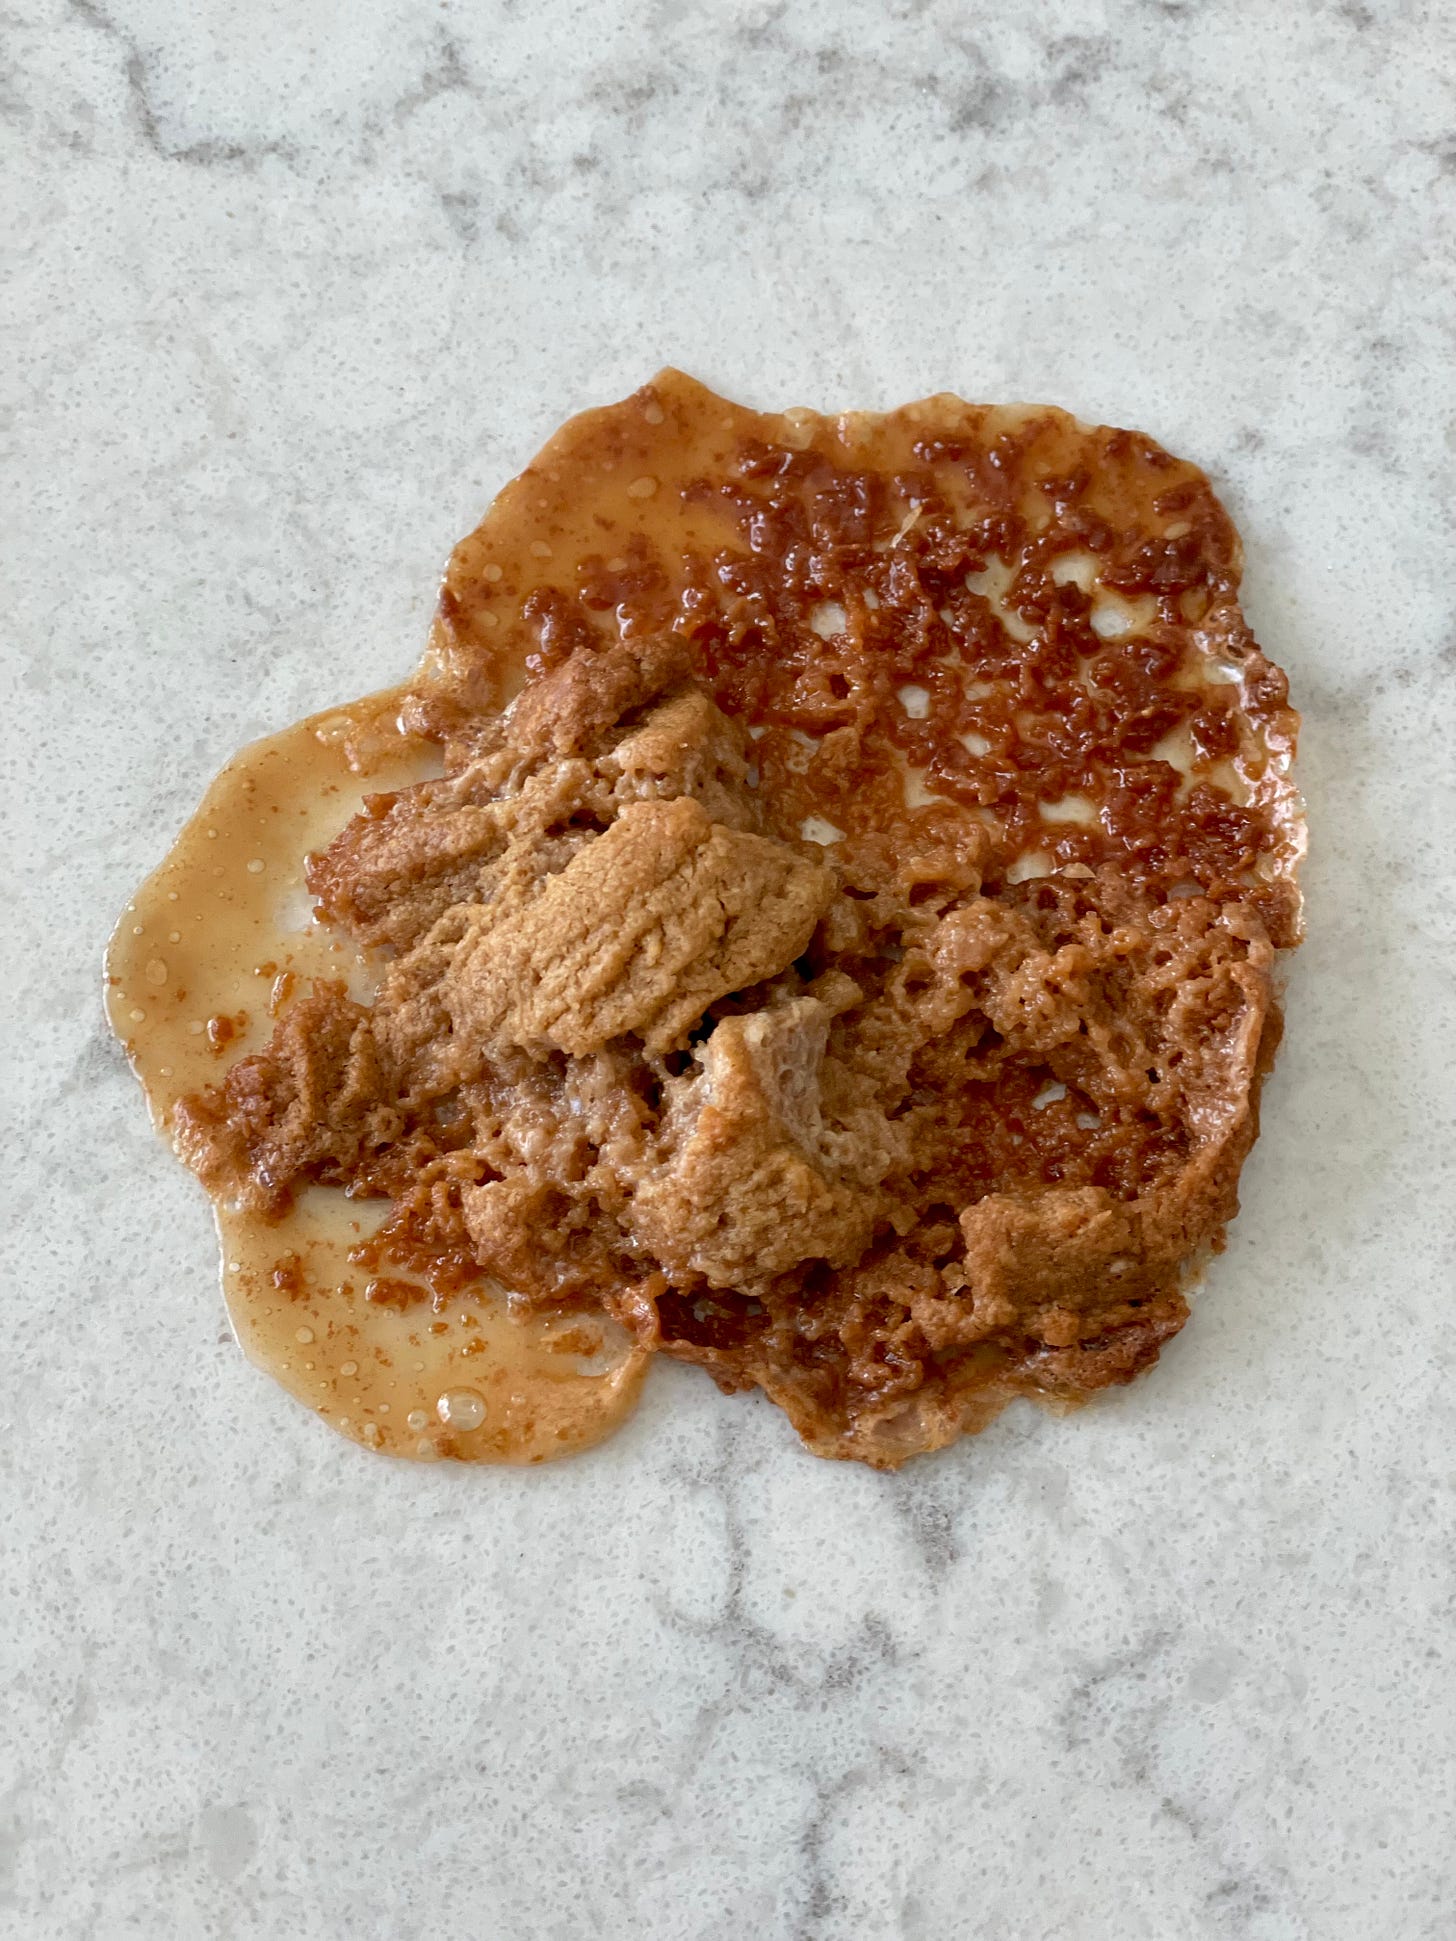
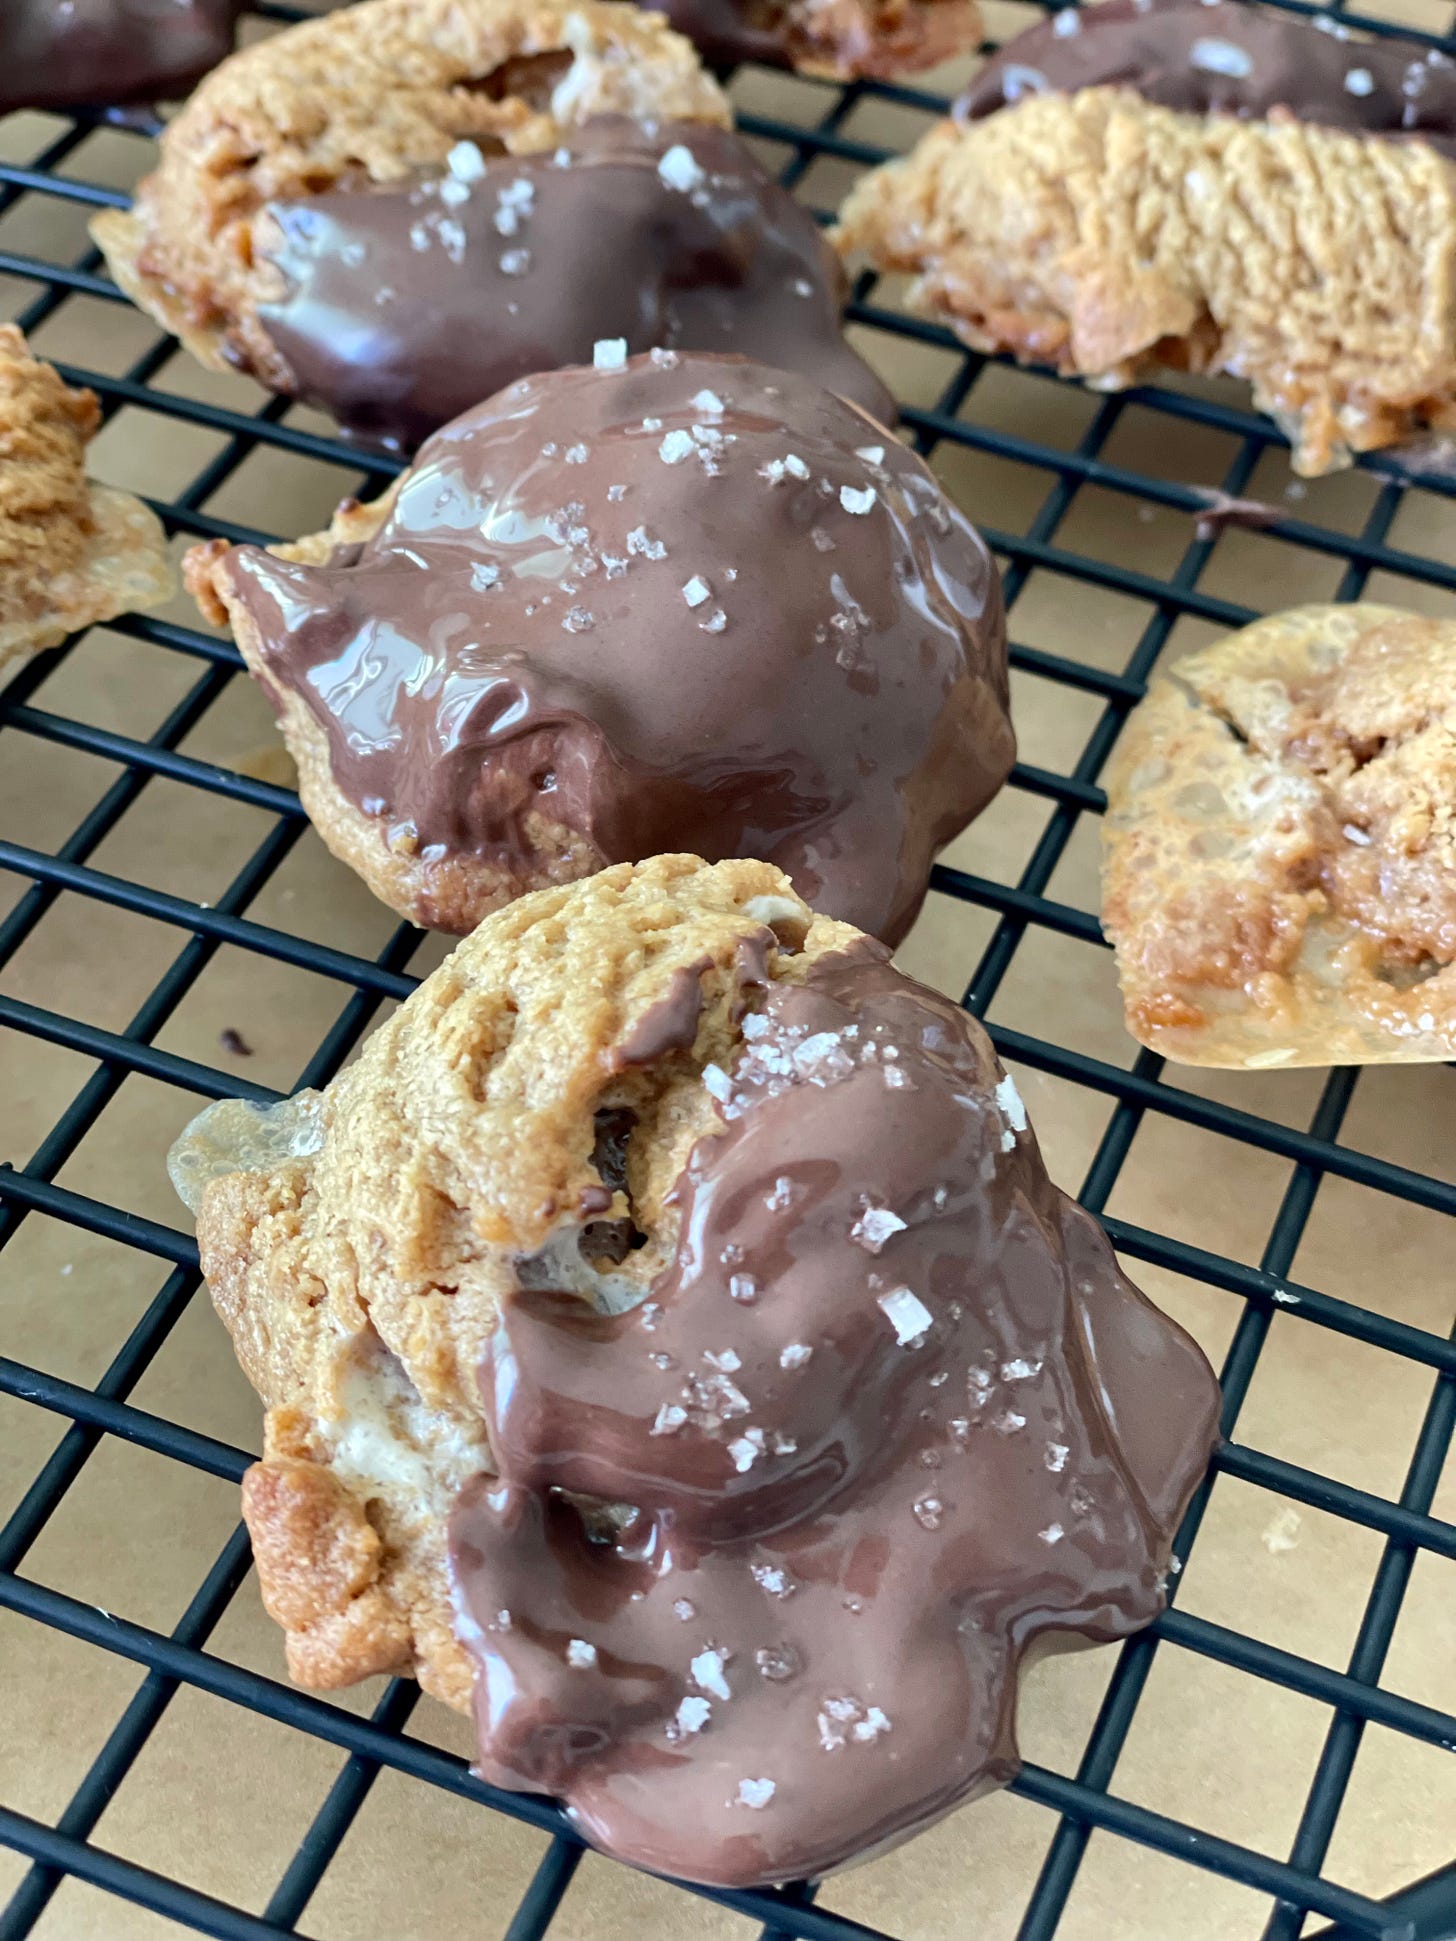
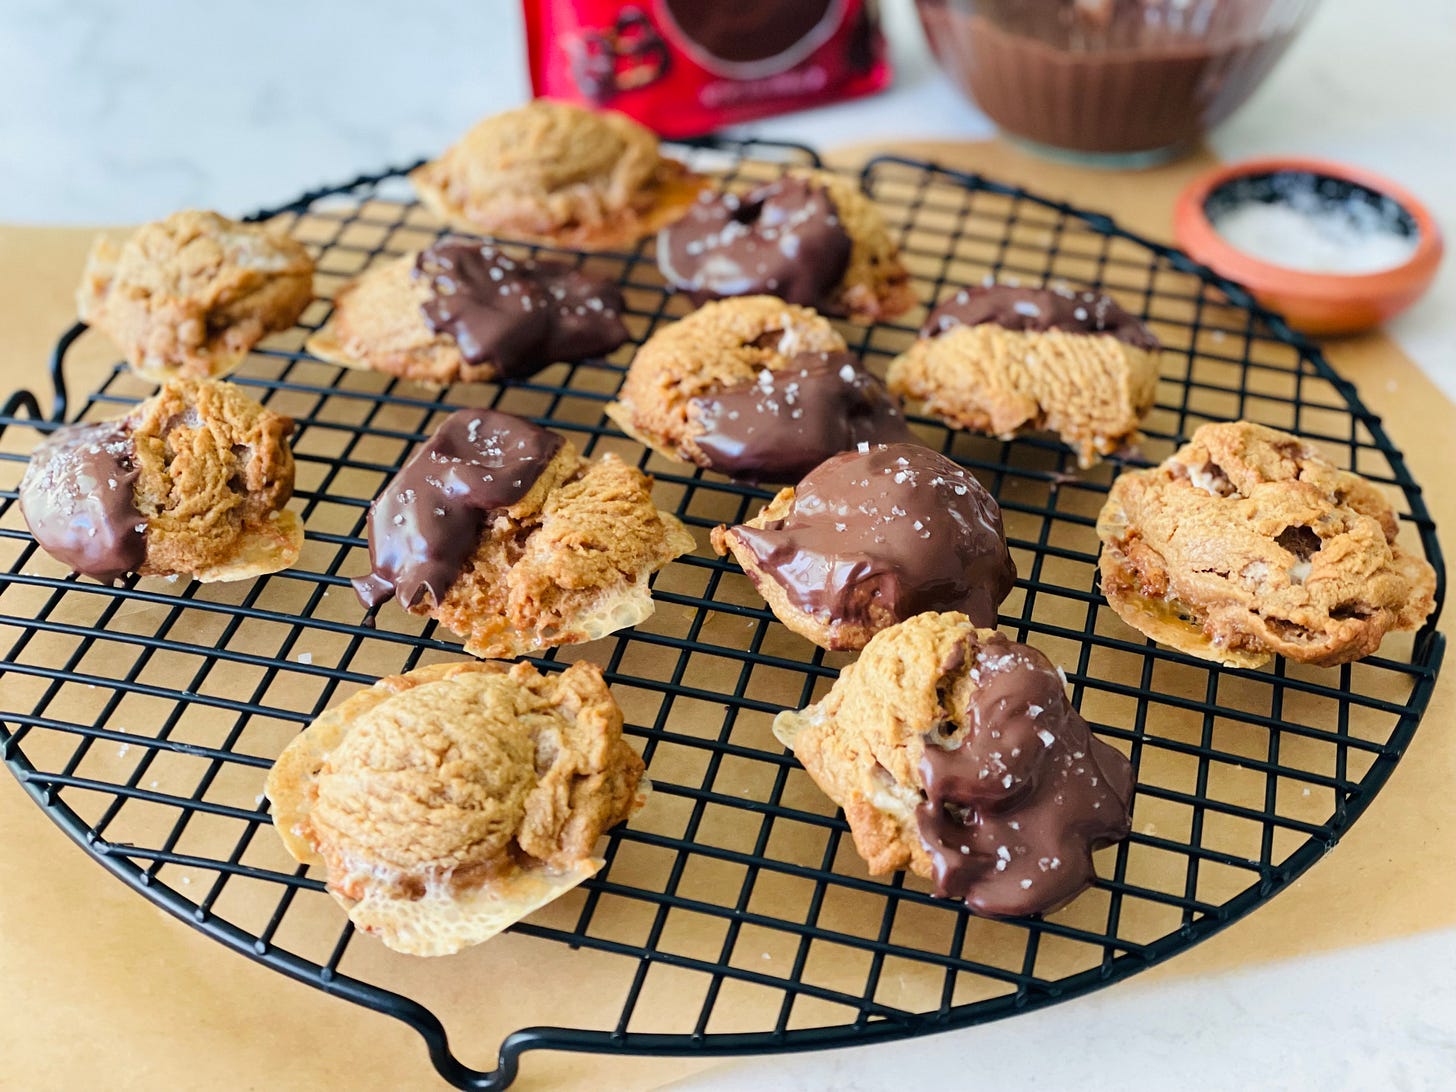
EK: Once baked, The mini marshmallows all but disappear in a glorious, lacey, chewy, crisp puddle. They become the secret ingredient—if you didn’t make ‘n’ bake them yourself, you might not know they are there! The photo above is a particularly lacey example. The more marshmallows in your dough ball, the lacier the cookie will be.
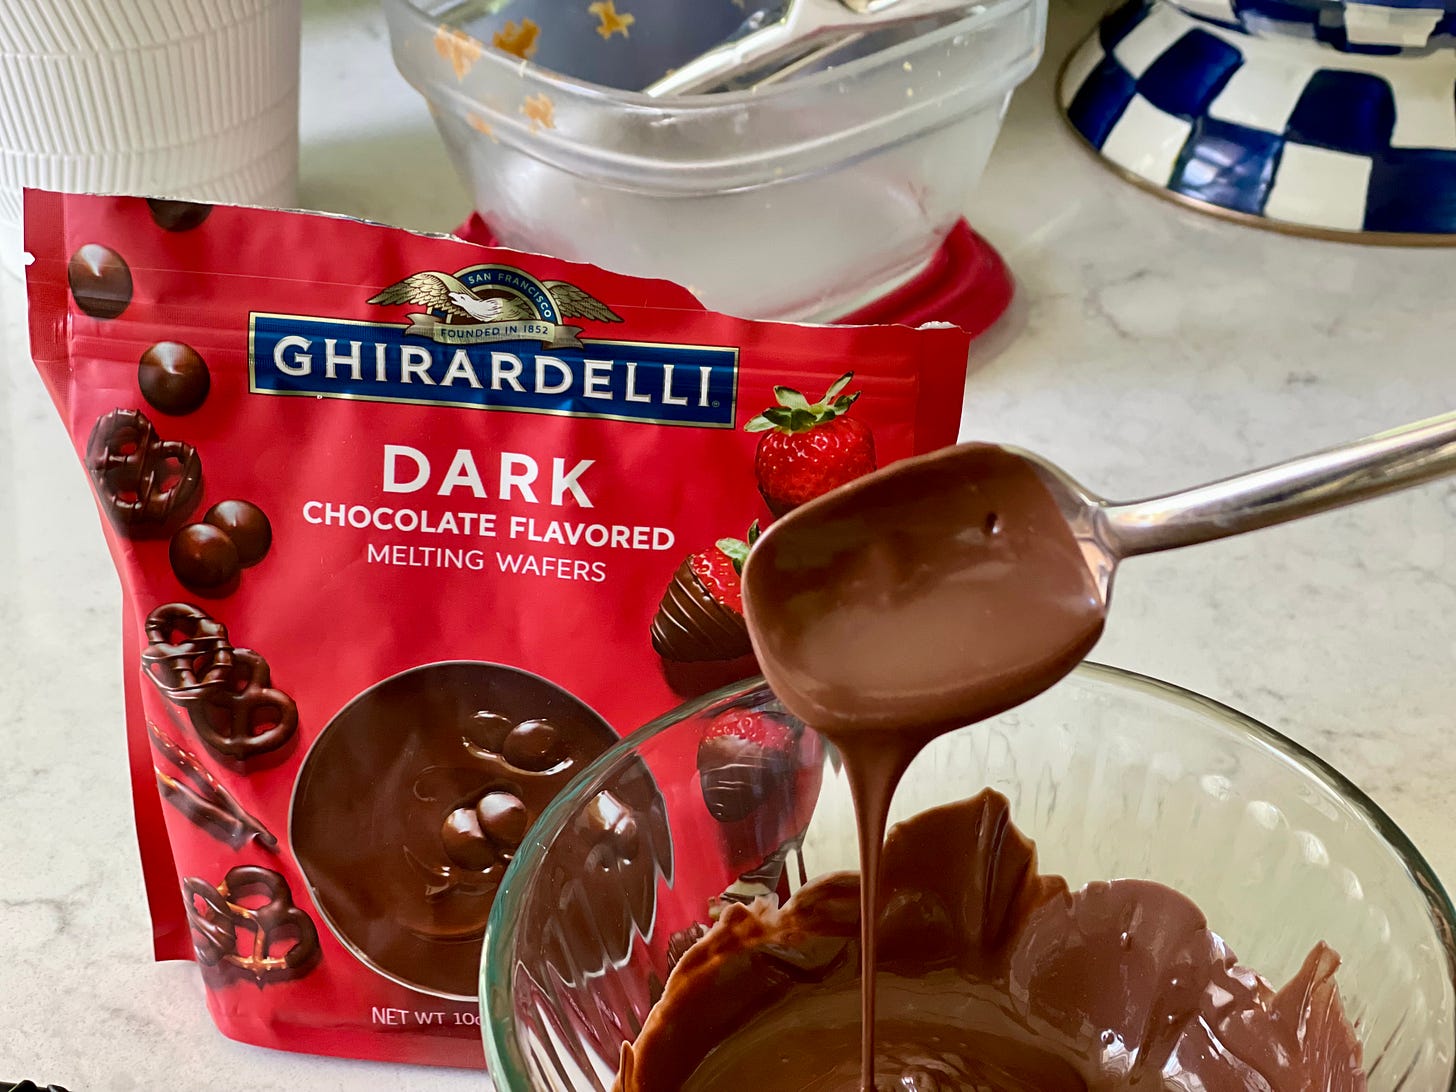
EK: Once the cookies are baked and cooled, it’s time to dip them in chocolate. I learned about the Ghirardelli Dark Chocolate Melting Wafers during the baking frenzy that was 2020/2021.
A woman who wins blue-ribbons for her Kentucky Bourbon Balls, Jennifer Rolfingsmeier (@butterandbliss), clued me into these wafers that do not require tempering and make great dipping/coating chocolate. They melt easily without the chocolate separating, and the chocolate is shiny and delicious. You can literally dip anything in it and it looks (almost) as good as a professional chocolatier!
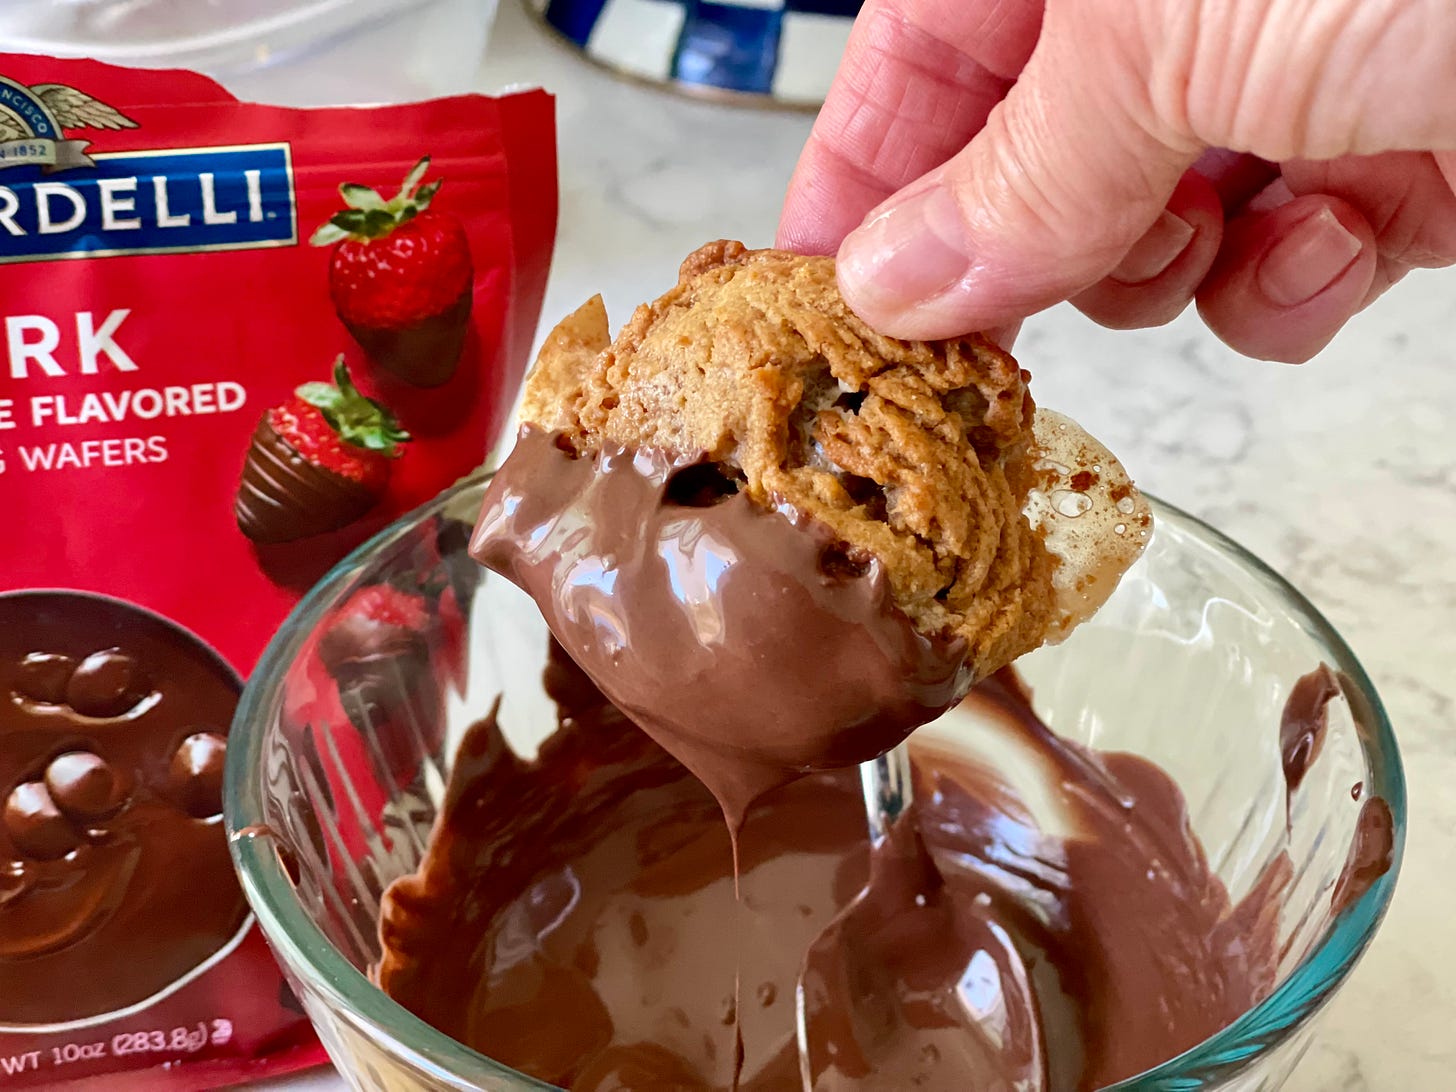
EK: I carefully hold the edge of the cookie and dip it, or spoon the warm chocolate over half the cookie like the iconic NYC Black & White cookies.
It was actually Anthony’s idea to dip the cookies halfway like a B&W cookie, and he was spot on! You can certainly dip the whole cookie but dipping it halfway and salting the chocolate provides the perfect balance that I don’t think you get when you coat the entire cookie in chocolate—I know because I tried it! But if you think “more chocolate = more better,” dunk that cookie in the luscious warm melted chocolate.
AU: I am always sad that we live on opposite sides of the country, but especially right now, because I can imagine us making these together and having a hoot and a holler at the same time!
EK: Ditto on the physical distance between our two kitchens ! But luckily, we share a brain. Once dunked or dipped—AU likes it both ways—place on a cooling rack. As soon as you dip the cookie in the chocolate, you want to sprinkle the salt so it will adhere as the chocolate cools. It’s as simple as melt. dip. cool. eat!
If you are worried about the cookies sticking to the rack, you can place them on a piece of parchment paper. I love this double-sided silicone coated parchment paper that works like a paper SilPat and is great for all kinds of kitchen tasks. You see it in a lot of my photos including the one below where I used it to catch any drips as the cookies are cooling and setting.
The recipe makes about 24-30 cookies depending on how overstuffed your scoop is. They are so rich and satisfying that you might find that you only need one cookie at a sitting—so to speak. Because of this, after I gave some away to my neighbor, I froze the rest and they freeze beautifully! They are just as good after freezing as they are fresh.
Let us know how you like them and if you bake any fun variations on this theme. I think I am going to try crunchy peanut butter the next time I bake them!
SALTED DARK CHOCOLATE PUDDING ELEGANZAAAA!!
AU: Who in the world thinks about pudding anymore? I didn’t until I saw this Epicurious headline and my whole dessert universe changed. Pudding is not something that I’ve ever craved, per se, except for the divine creation that is the Butterscotch Budino at Mozza in LA. I’ve made it at home before, and it is every bit as good as at the restaurant, but it’s A LOT OF WORK.
I also typically like a little more texture in my desserts (I’m not one who likes straight up custard), but the allure of Ovenly’s Salted Dark Chocolate Pudding was both because I know everything the NYC bakery churns out is unbelievably delicious, and also because this recipe is SO SIMPLE!
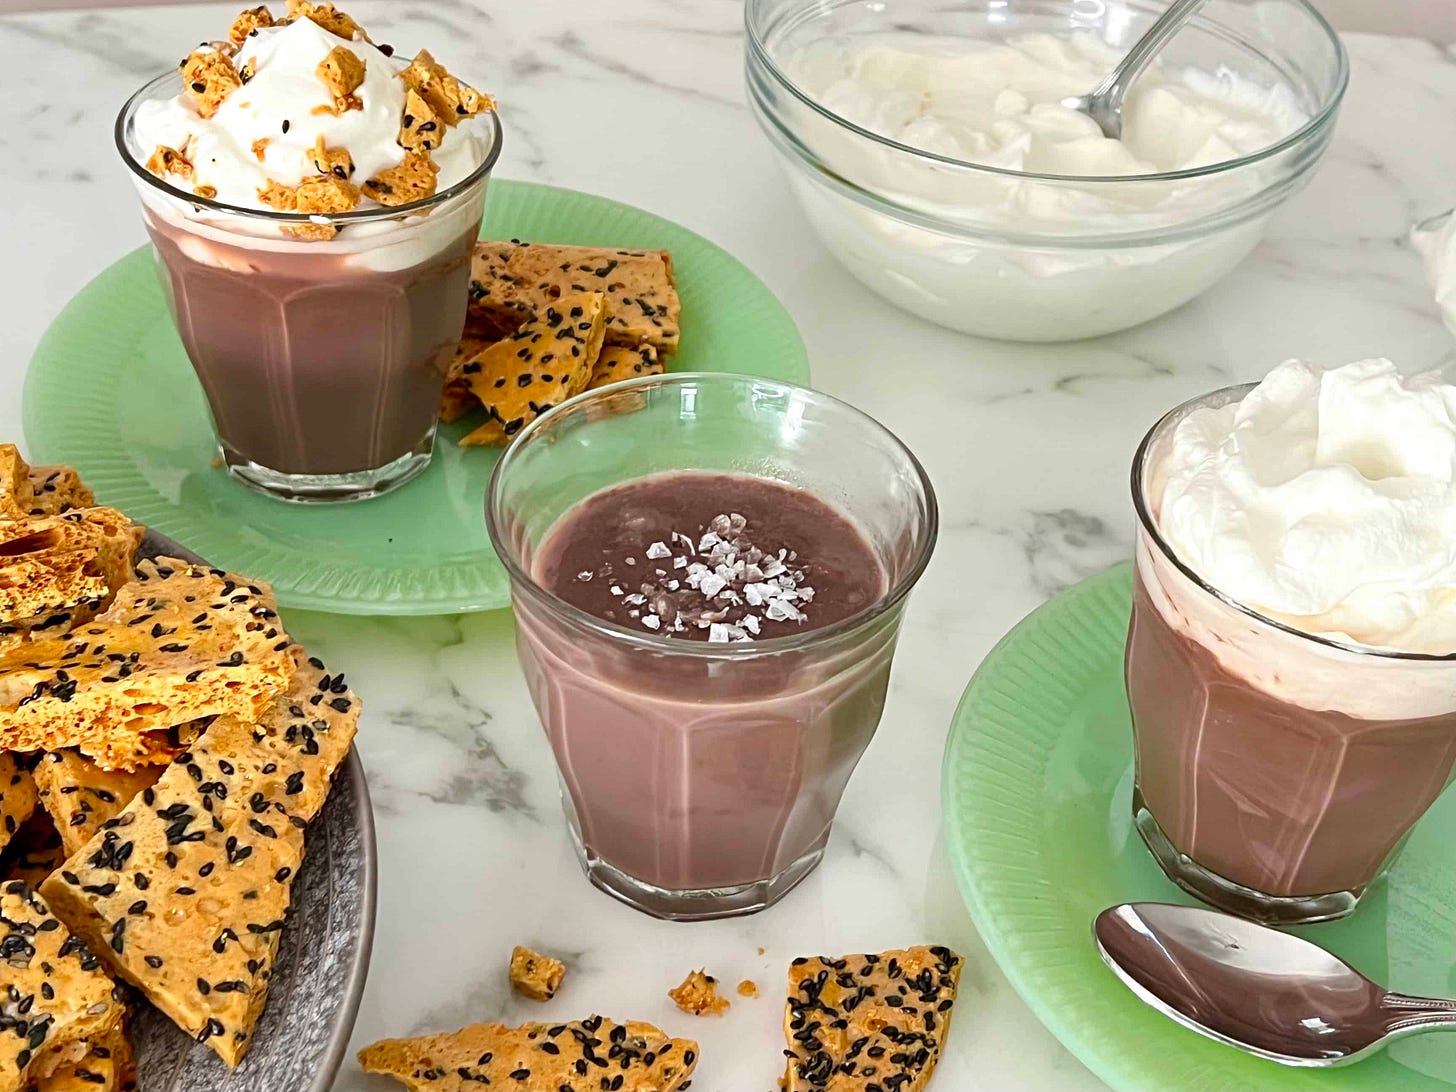
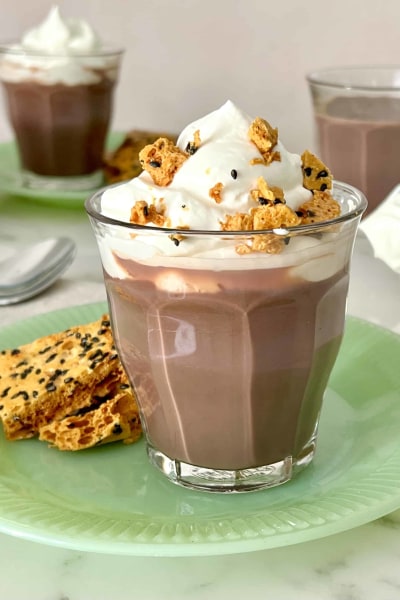
No eggs are required (which means you don’t have to do the whole whisk-until-your-arm-falls-off thing to avoid chocolate scrambled eggs), and there’s no melting chocolate separately and incorporating it delicately into a custard mixture (“You just… FOLD it in!”). In fact, I dare say it’s probably easier than mixing up a box of the instant stuff, but 1,000,000 times better. You can serve it bare bones, naked as the day it was born, eat it directly from the pot, or you can see how I make it FANCY and EXTRA for a dinner-party-worthy dessert! The pudding can be made and refrigerated up to 3 days in advance, and the black sesame honeycomb topping can be made up to 5 days in advance (stored in an airtight container), so it’s a perfect make-ahead dessert for entertaining.
EK: You had me at Black Sesame Honeycomb Topping! No more words needed!
AU: The ingredient list is short and (not too) sweet: dark chocolate, cocoa powder, sugar, salt, vanilla, whole milk, and cornstarch. Obviously, the two most important ingredients are the chocolate and cocoa powder.
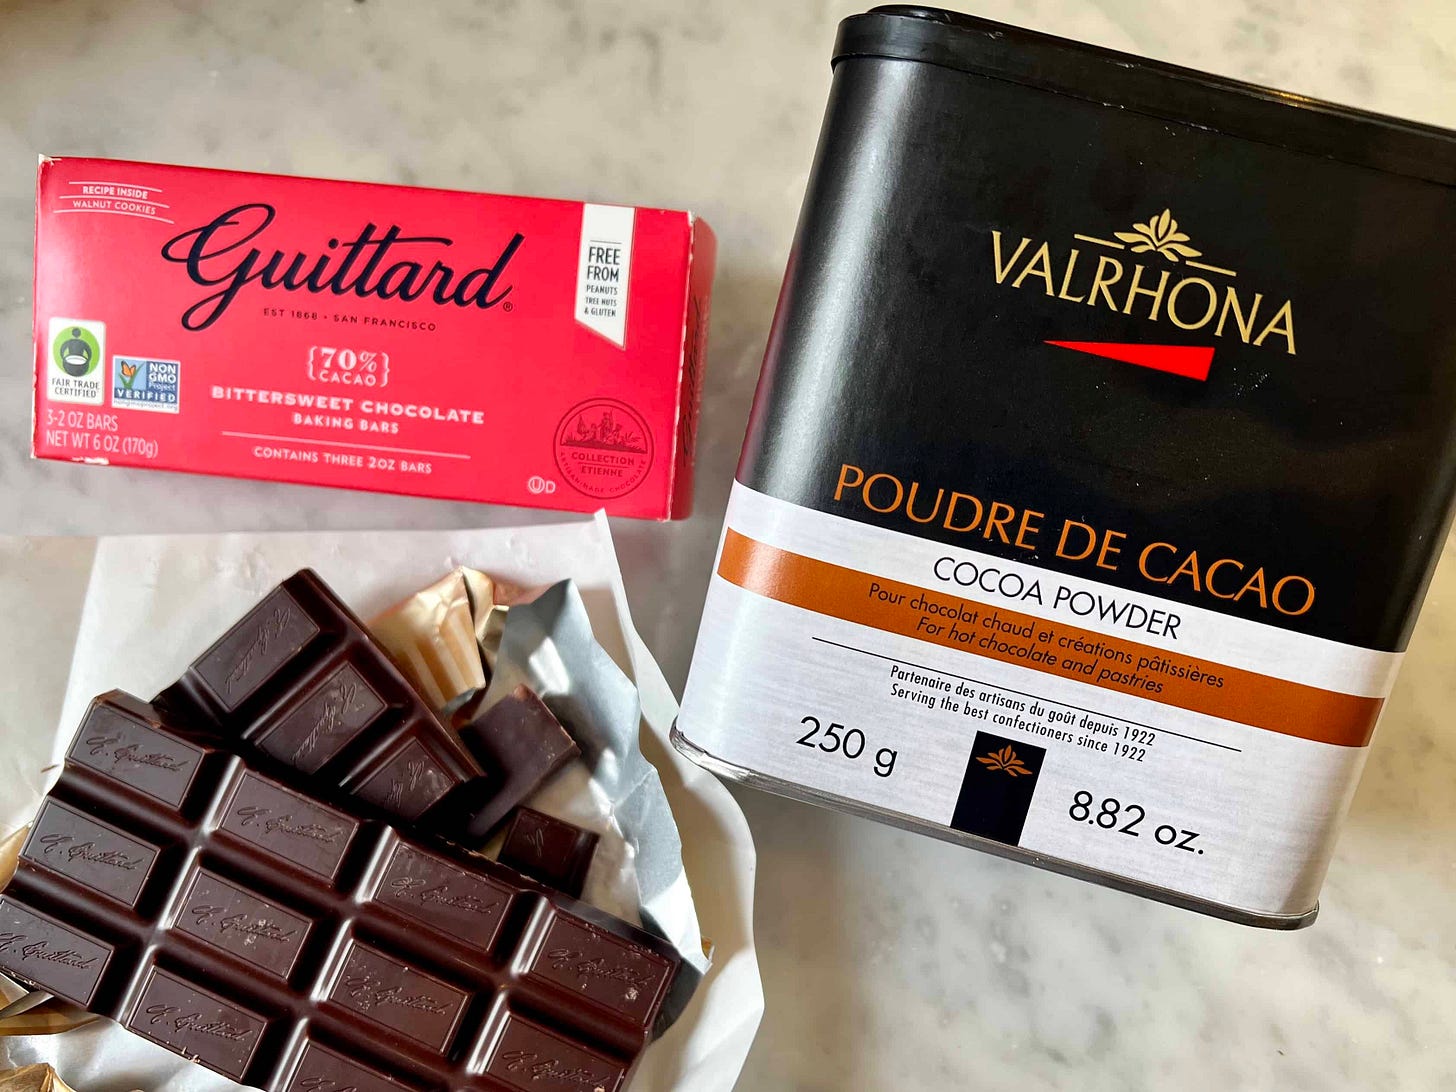
When it comes to chocolate, I always turn to “old reliable,” the same brand I use in my chocolate chip cookies, Guittard. The Guittard 70% Cacao Dark Chocolate Baking Bars are perfect for this recipe, because each bar is 2 ounces—the exact amount you need for a batch of pudding.
For the cocoa powder, I use the dark Valrohna Dutch Process Cocoa Powder. It’s not important that you use Valrohna brand in this recipe (it is good stuff, though!), but it IS important that you seek out a Dutch process cocoa powder.
What is the difference between Dutch process cocoa and regular (also labeled “natural” or “unsweetened”) cocoa powders? So glad you asked. Dutch process cocoa powder has been treated with an alkalizing agent, so it’s less acidic and darker in color. This makes the cocoa taste smoother and richer. Unsweetened cocoa powder is what you’ve probably grown up with… it’s a little redder in color and a less intense chocolate flavor (closer to a “milk chocolate” flavor).
EK: Besides the deeper, richer flavor, the color of Dutch-process makes all your chocolaty desserts look better because the color is darker. I remade my aunt’s famous chocolate pound cake with Dutch process because using the old-school cocoa powder resulted in a pale chocolate-brown cake. Since we eat with our eyes before we taste with our palates, I think the dark deep chocolate-brown is more appealing.
AU: Agreed! Typically, you can substitute one cocoa for another, except when it comes to chemical leaveners, like baking soda and baking powder. The OG “regular” cocoa powder (aka natural, unsweetened) is acidic, so it will be the ingredient that activates the baking soda in certain recipes.
Dutch Process Cocoa has been alkalized, therefore it’s no longer acidic, and if substituted in a recipe that uses baking soda as the main leavener, the baked good may not rise like the recipe intended. This is why most baked goods that include Dutch process cocoa include baking powder, since baking powder only needs a liquid to activate it (not an acidic ingredient).

AU: The pudding-making process couldn’t be simpler: In a small bowl, mix 1/4 cup of the milk with cornstarch to create the slurry that will thicken your pudding, set it aside. Then, in a saucepan over medium heat, combine the remaining milk (1 3/4 cups) with the sugar, salt, vanilla, chocolate, and cocoa powder. Stir until the chocolate pieces have melted (it’s basically the very best hot chocolate you could ever make at this point, btw). Then whisk in the cornstarch slurry. Cook the pudding for 2 minutes until it thickens. You’re done!
I’m not one of those weird warm pudding people (they’re out there!), but after making this a few times, I do understand them now. This saucepan now contains a rich, velvety, intensely chocolatey treat that has the perfect balance of salty and sweet.
You can serve the dark chocolate pudding with a sprinkle of flakey sea salt on top...
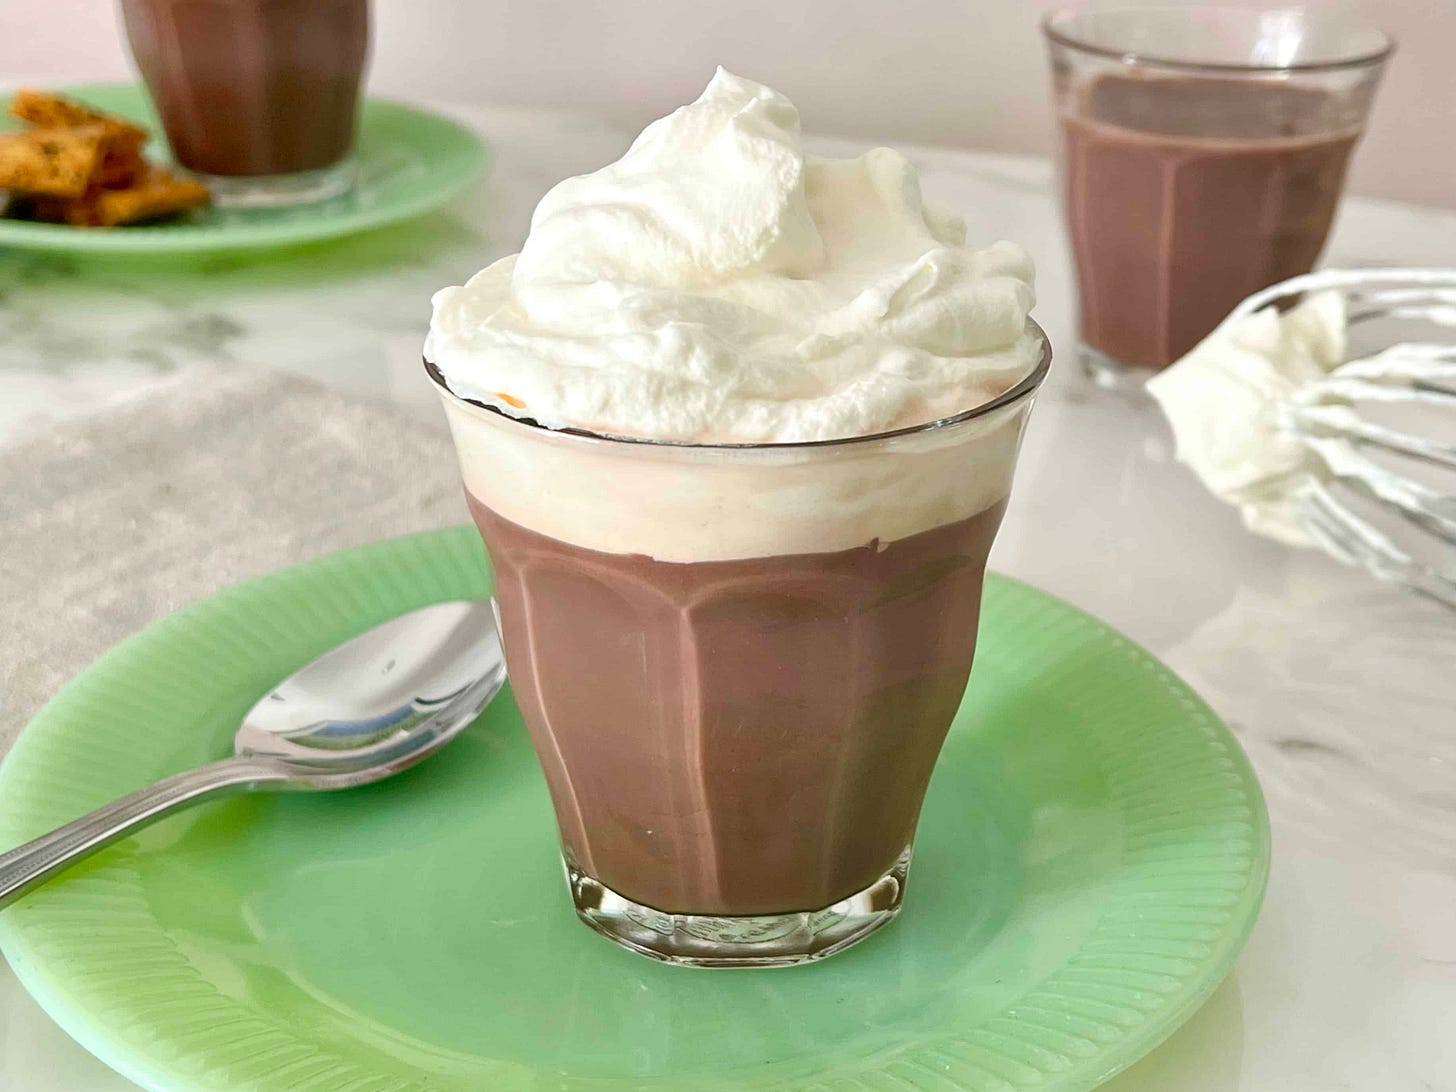
… OR MAKE IT *FANCY* WITH WHIPPED CRÈME FRAÎCHE!!
AU: There’s nothing like a dollop of freshly whipped cream on a perfect pie or cake… but you can take the simple topping over the top by adding just a little bit of crème fraîche (pron: krem fresh) while you “whip it good.”
You can use sour cream in a pinch, but I don’t think it has the same effect. Crème fraîche is a little milder in the tang department, and is twice as rich. Just mix in a little to your lightly sweetened whipped cream, and your guests will wonder why that whipped cream tastes so good!
EK: Don’t skip this step. The addition of crème fraîche is brilliant. It adds just enough rich tartness to the whipped cream to give it more flavor and adds an unmistakeable sophistication to simple chocolate pudding.
AU: A few quick notes:
I add confectioner’s sugar to sweeten my whipped cream because it has a little bit of cornstarch in it, and that helps stabilize the whipped cream. However, it’s still whipped cream, so try not to make it more than a few hours in advance for ultimate floofiness at serving.
If you are going to make it ahead, underwhip the cream slightly, cover it well, and refrigerate until needed. Just before serving, remove it from the refrigerator and whisk it briefly to bring out the full body. A balloon whisk with lots of wires is ideal—too small and too few wires means you’re going to get an extra arm workout!
Conversely, fixing overwhipped cream can be done: Add up to ¼ cup of cold whipping cream and work it in, stirring with a rubber spatula to restore the proper consistency.
Congrats! Now you have a secret weapon that will make every cake, pie, cobbler, and pudding better. Also, can you even think about this whipped topping with fresh strawberries and sweet biscuits in the peak of Summer?!? I die.
Again, you could serve this very fun/festive/nostalgic dessert like this…
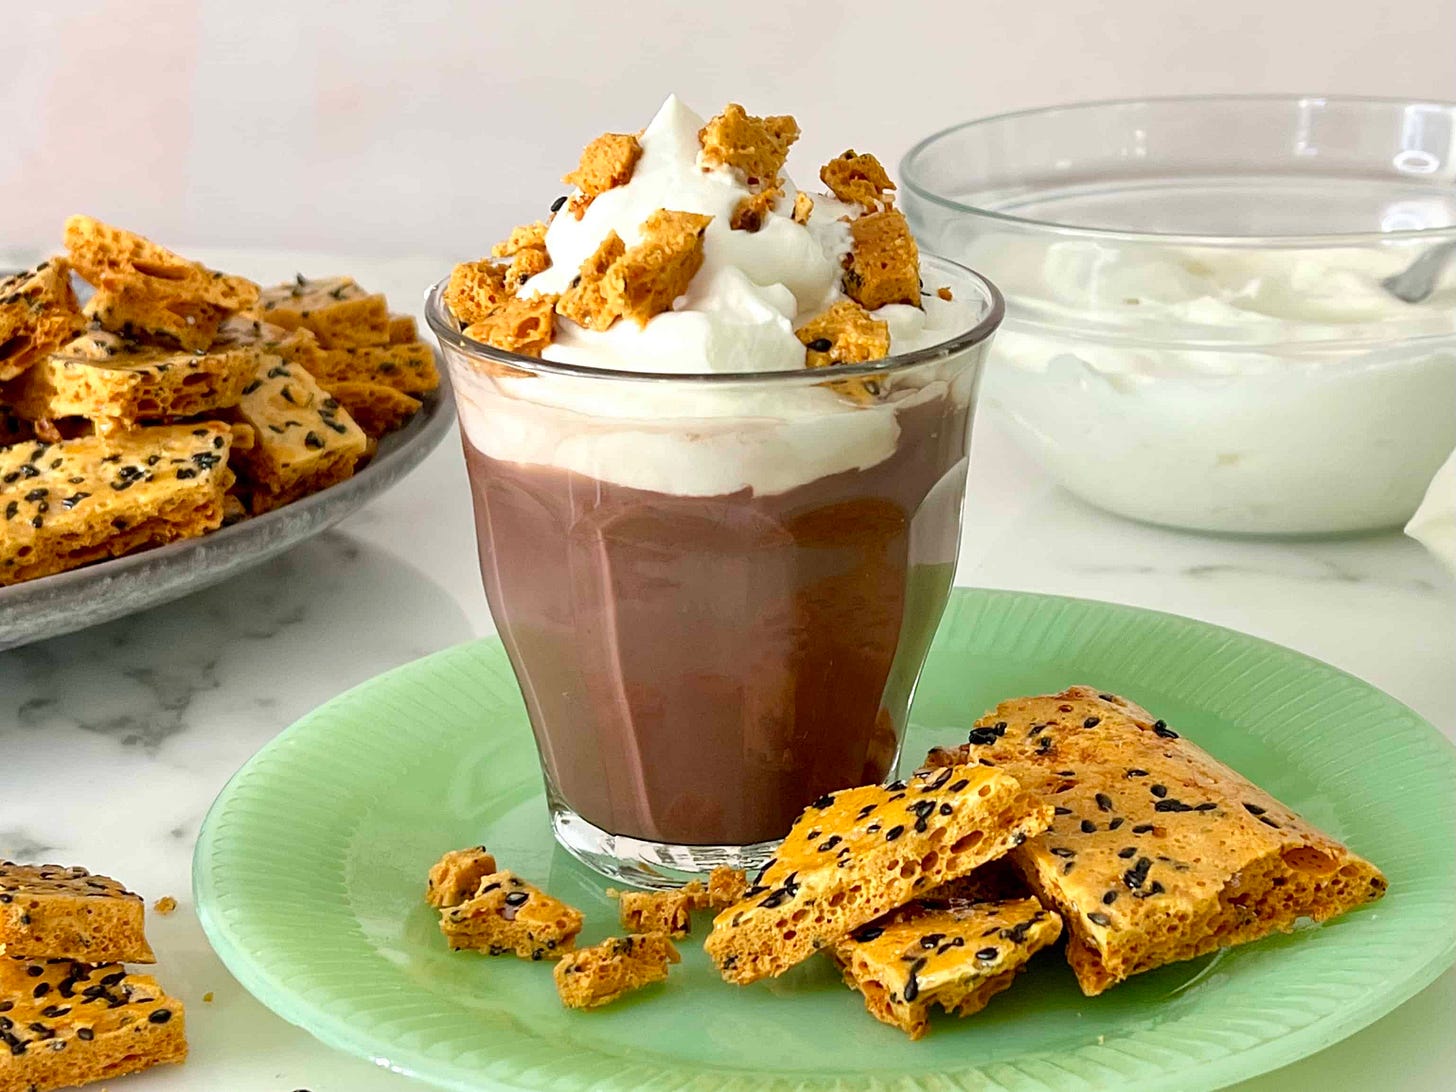
… OR BE *EXTRA* AND ADD BLACK SESAME HONEYCOMB ON TOP!!
AU: Like I said earlier, I like a lil texture with my creamy, dreamy desserts. Make it something that is both caramelly, crunchy, salty, and savory at the same time?!?! Swoon.
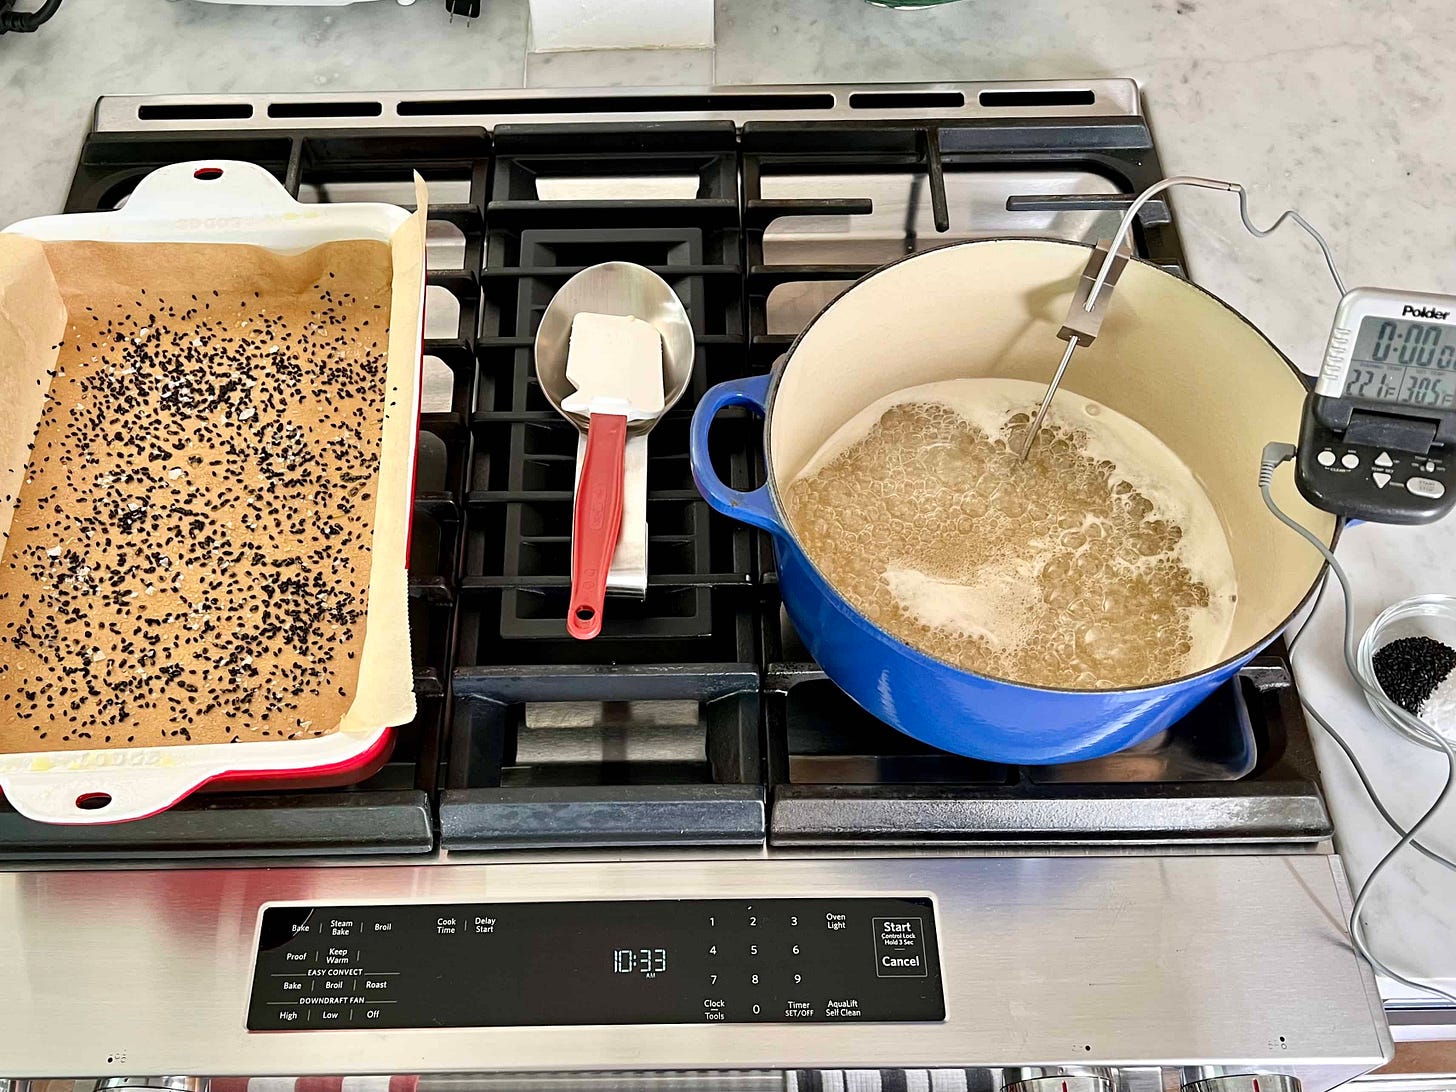
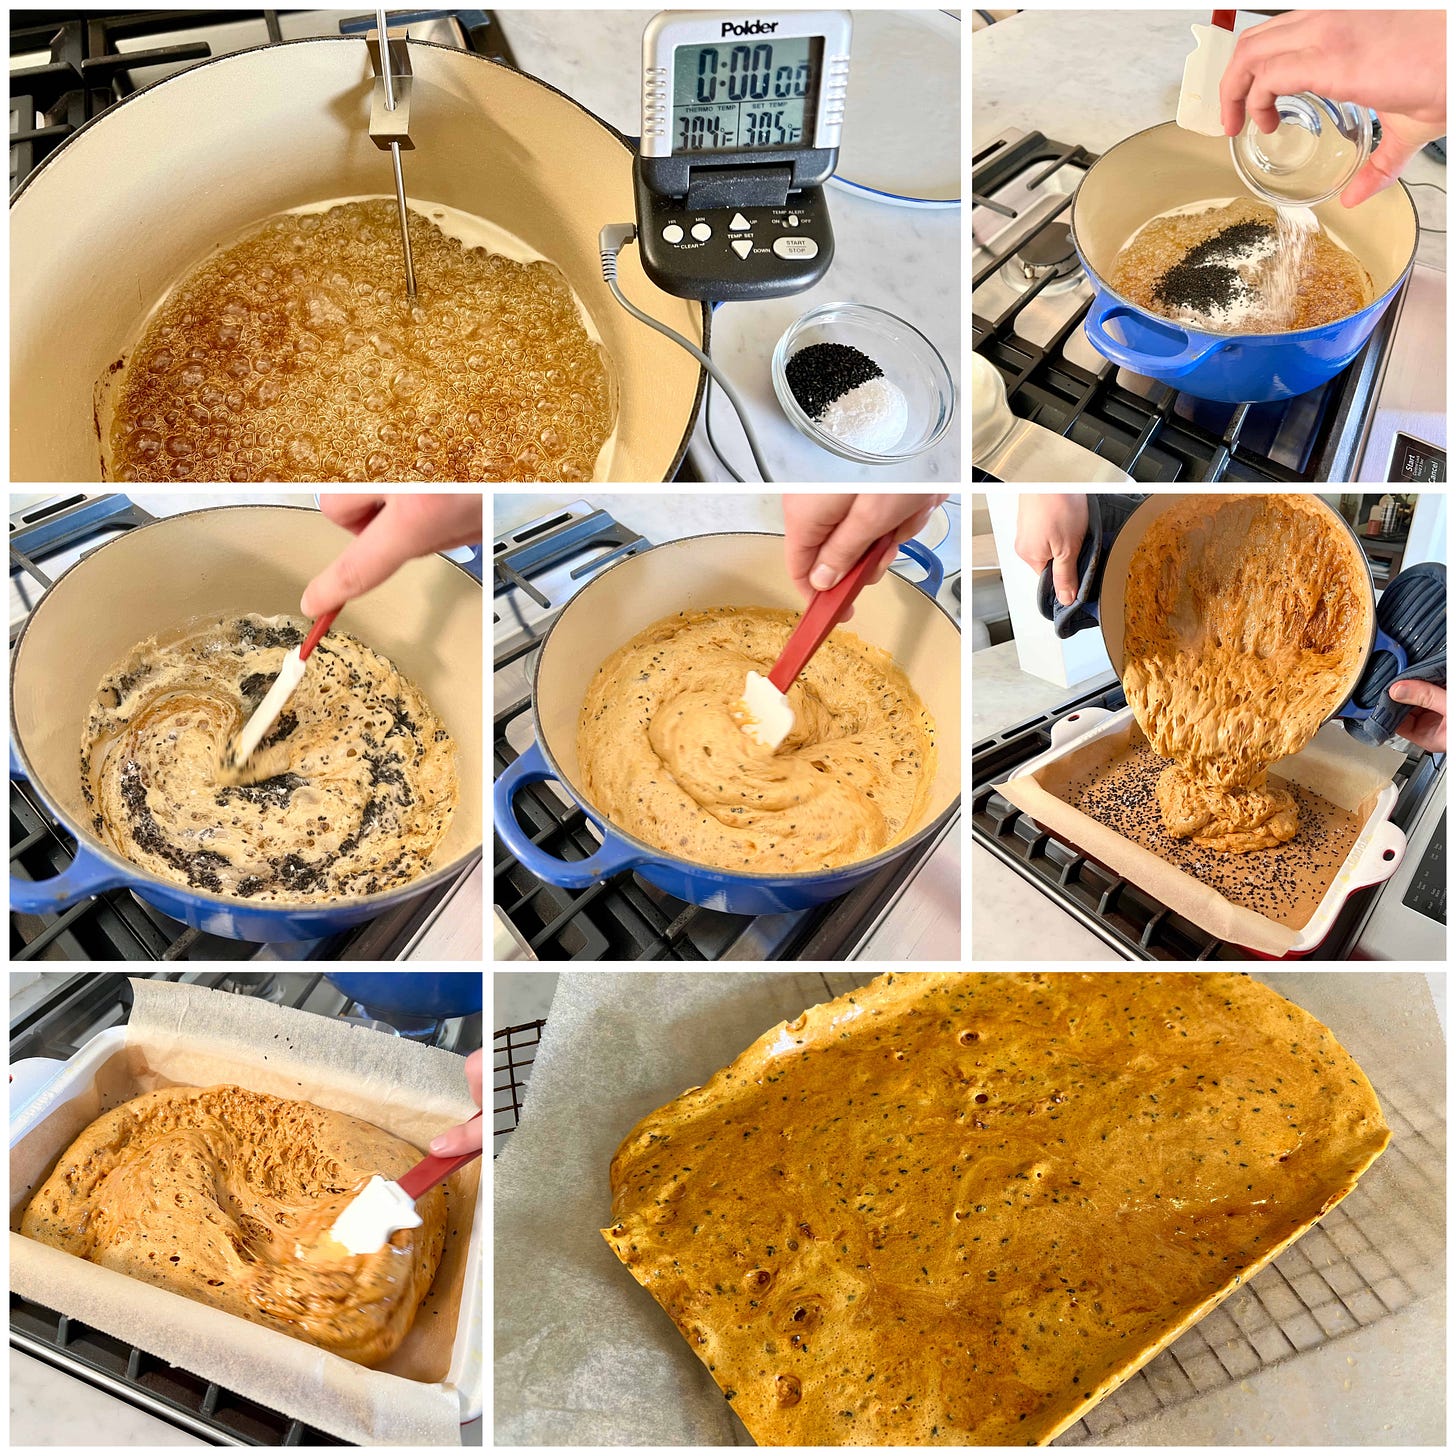
I had never made Honeycomb candy before, but it was so easy! It’s kind of like making a stir fry: you want to have everything ready to go, and within arm’s reach before you start the process.
A candy thermometer, digital thermometer, or instant-read thermometer are essential, as you need to make sure the caramel gets to 305ºF before adding the baking soda.
AU: Then you make a caramel and essentially ruin that caramel by adding baking soda to it (and some black sesame seeds). The baking soda makes the caramel bubble and froth as you pour it into a pan lined with parchment and sprinkled with whatever toppings you’d like (flakey salt and more black sesame seeds).
You may be thinking that this seems like a NIGHTMARE to clean up. I am someone who DEIGNS to do dishes, and I will tell you the cleanup was not terrible! Since it’s basically just sugar, all you have to do is let any leftover or burnt-on candy soak in water for a bit. Poof! It’s gone!
Let the honeycomb cool to room temp for at least two hours. It will sink and deflate some, especially if it’s humid in your area, but that’s fine. Then just break it up into pieces and eat!
EK: Anthony, you are my hero! The Cadbury Crunchie is one of my favorite candy bars and I have been known to buy them by the case online. Now, I can make it myself!
ET VOILÀ!
SALTED DARK CHOCOLATE PUDDING ELEGANZA!
The finished dessert is one that is satisfyingly decadent without being overly sweet. The balance of salty and sweet with varying textures like the crunchy honeycomb, the luscious chocolate pudding, and the tangy and light whipped crème fraîche make this one of my favorite desserts EVAH!!

