Hello to our subscribers! Happy Easter and Happy Passover to all who celebrate! We are both Easter gals, so our cooking tends to skew to the Easter side of the spectrum. And even if you don’t celebrate either holiday, we’ve got two incredible recipes you’ll love to make anyway: Elizabeth’s Deviled Eggs, and one of Anthony’s favorite lamb recipes by Melissa Clark. But they can both be made ahead, so you can enjoy a stress-free holiday. Let’s hop to it…
WHAT’S 4 DINNER?: DEVILED EGGS
Hello Easter! It’s time for chocolate bunnies, lamb, carrots, asparagus and eggs…
EK: Anthony and I agree on pretty much everything—or so I thought until a few days ago when I found out that he doesn’t like—no, he detests—deviled eggs!
AU: Elizabeth, I love you dearly, but I actually abhor a deviled egg. I don’t know where this food phobia came from, but all my life I’ve hated them. And before you ask, “Well, have you tried them?” Yes. I have and I don’t need to do it again.
EK: But I know that most everyone, besides Anthony, LOVES Deviled Eggs and if there was ever a season for Deviled Eggs, it’s Easter! So, I made Deviled Eggs. It was also a great excuse to make them twice in one week, because I am making them again this weekend.
AU: I am the cheese who stands alone, here, I know. Literally everyone in my life loves a deviled egg, and I’m sure your version is the TOPS!!
EK: The hardest thing about making deviled eggs is peeling the hardboiled eggs. We have all—except for AU—been that person who brought pock-marked deviled eggs to the table. Because peeling hard-boiled eggs is such an issue, I have tried every technique that I have ever heard of or read about in search of a foolproof method. A few years ago I thought I had the answer when my friend Kirsten gave me a tip that worked really well; crack the bottoms of the eggs and peel them while they are really hot. That works most of the time, but not always.
The classic way to boil eggs is to start with cold eggs and cold water. But after a particularly disastrous peeling experience, I started my experiments once again. I wanted to see what would happen if I boiled the water and put the cold eggs in the boiling water. I was hoping the shock of the temperature would prevent the egg white from bonding to the inner shell’s membrane. I am not a food scientist, but I thought it was worth a shot.
I tried it and it worked, and by now I have tried it many, many times and I am a convert to the boiling water boiled egg. It might also be the ice water bath shocking the eggs again. I don’t know the why, but I know that it works!
I make them when I want to make an almost runny egg for my avocado toast or any other time a soft-yolk egg is in order. And, each time I have been rewarded with a shell that almost slips off leaving a perfect unblemished egg. I figured, if it works for runny jammy eggs, it will work for hard-boiled eggs.
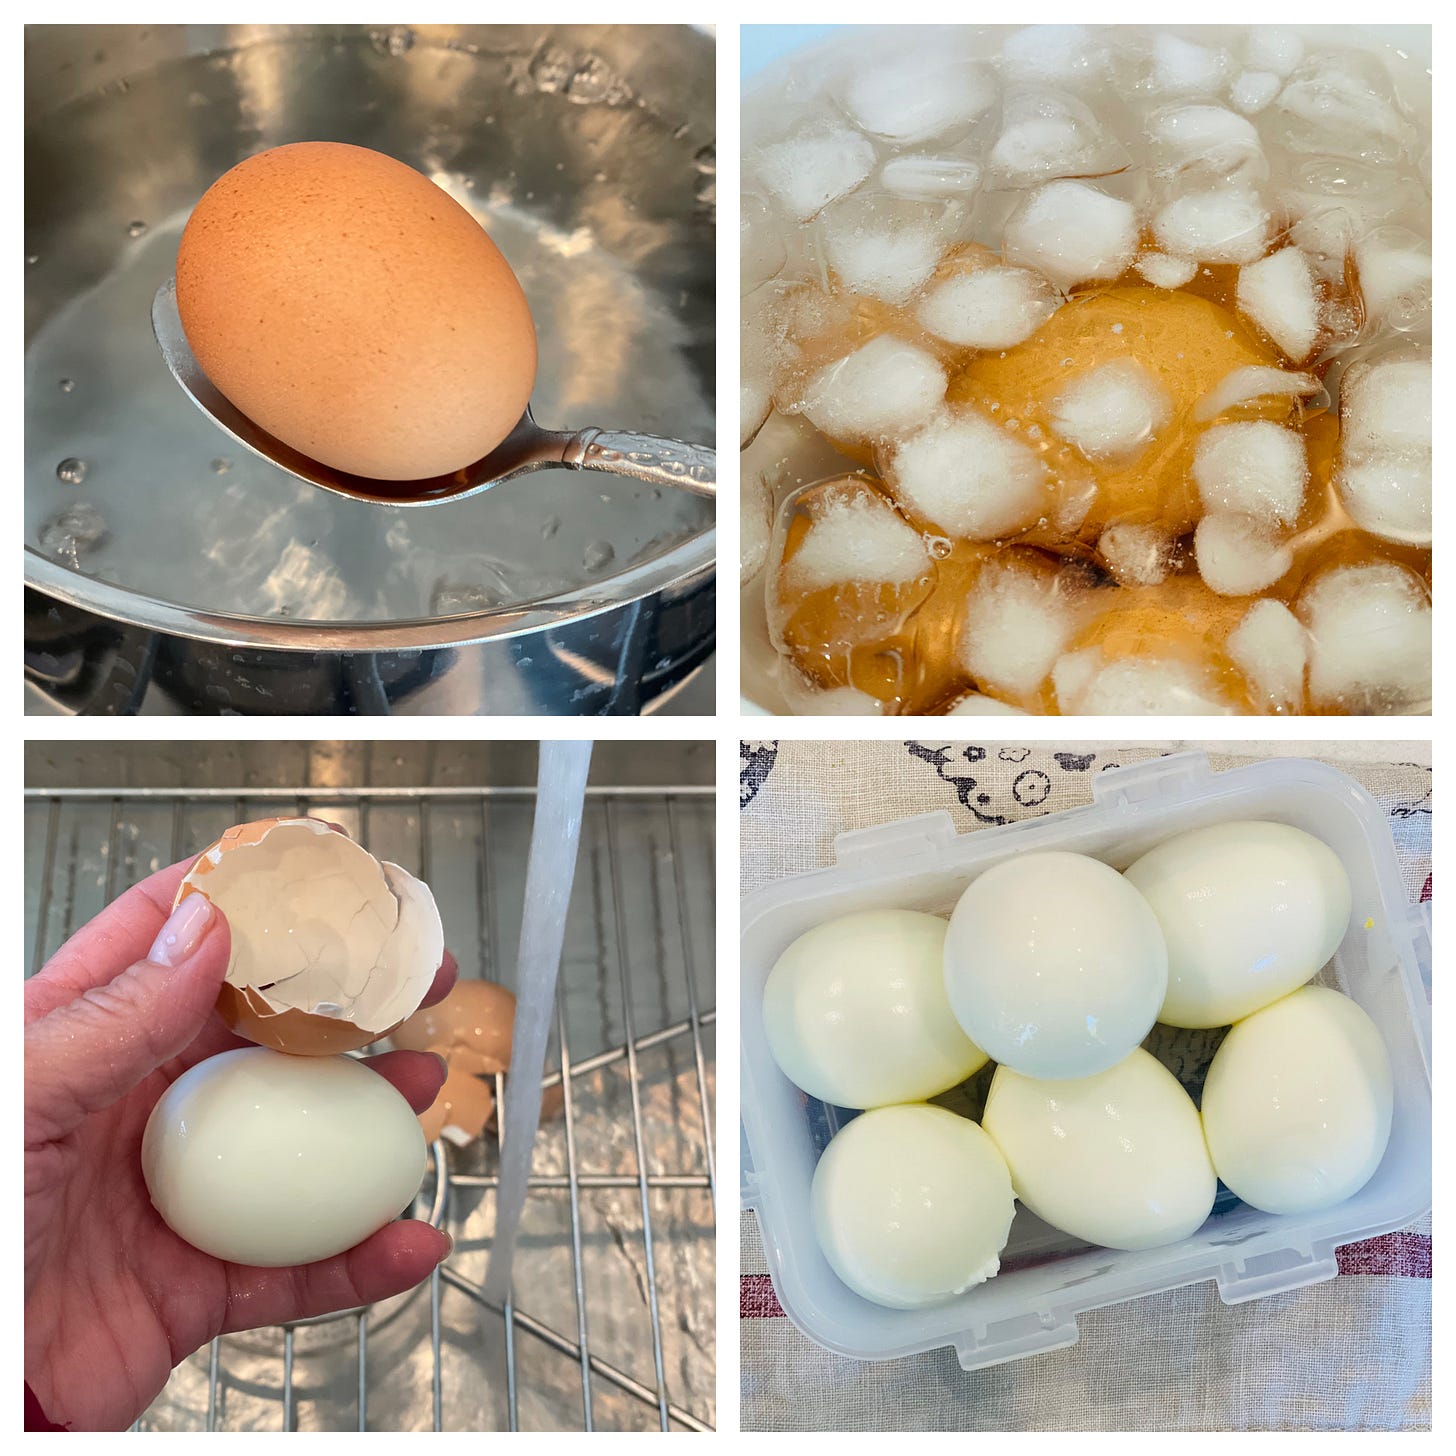
Once you have your perfect hard-boiled and peeled eggs, you are ready to make deviled eggs.
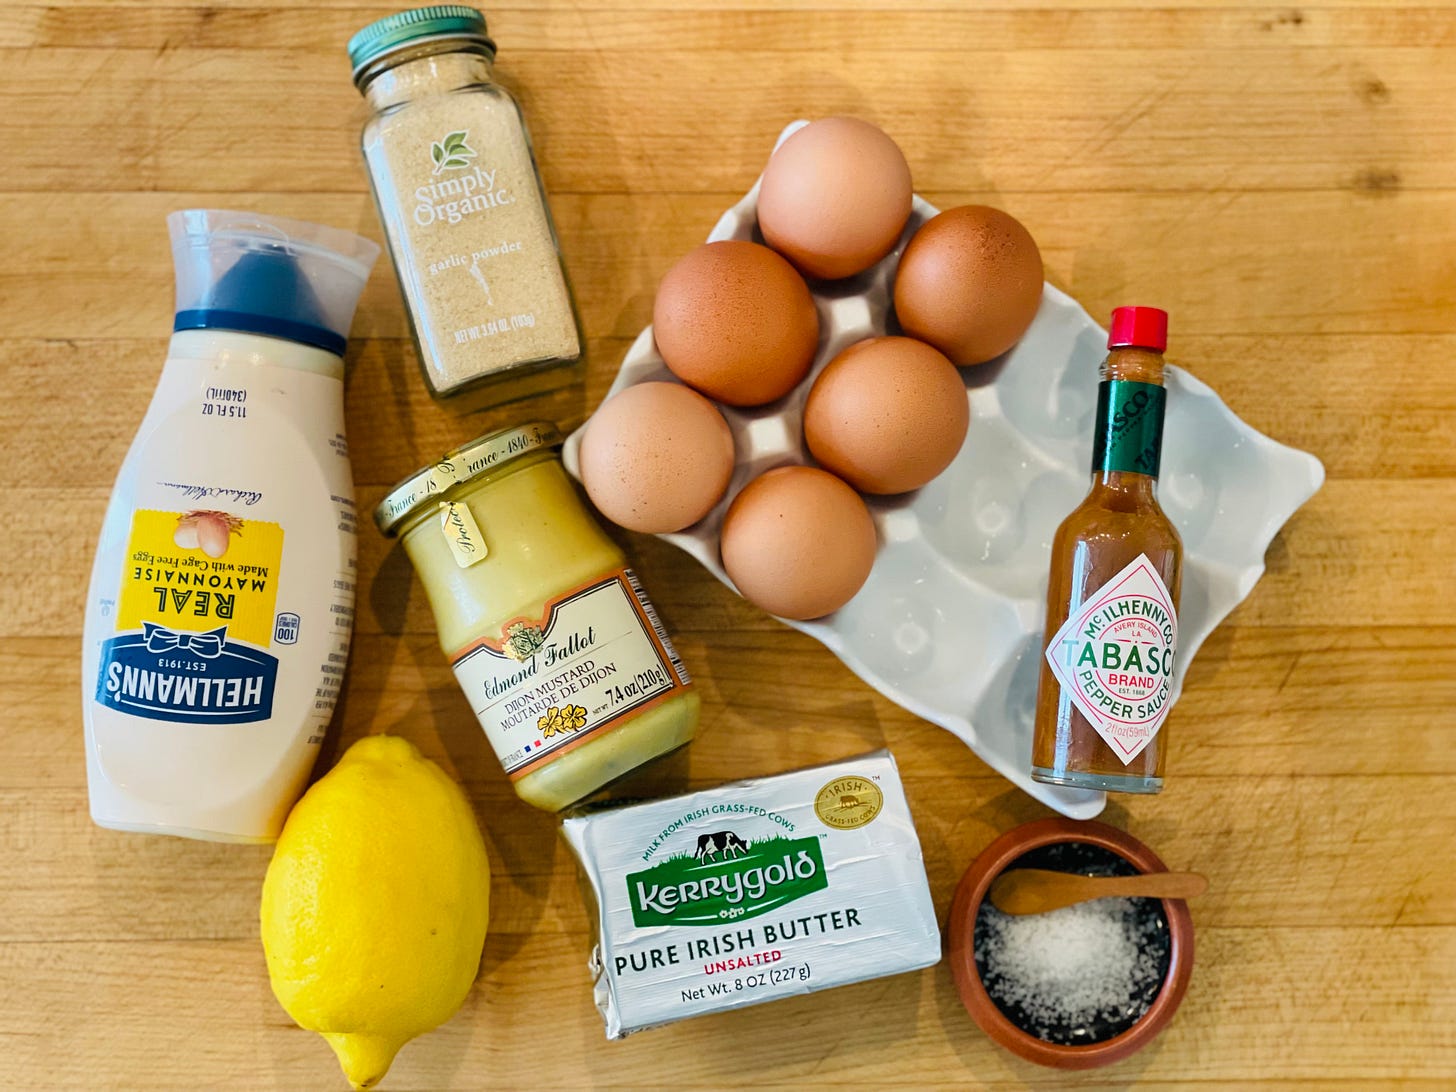
You may already have your favorite recipe and if so, make that. If you are looking for a new recipe or don’t have one, here is my favorite deviled egg recipe. I call is Straight-Up Deviled Eggs because they are plain and simple, and egg-a-licious! I don’t add a lot of ingredients, no pickle relish or onion. They are made creamy and piquant with real mayonnaise, butter, dijon mustard, lemon zest and a bit of juice, and seasoned simply with a pinch of garlic powder and Tabasco.
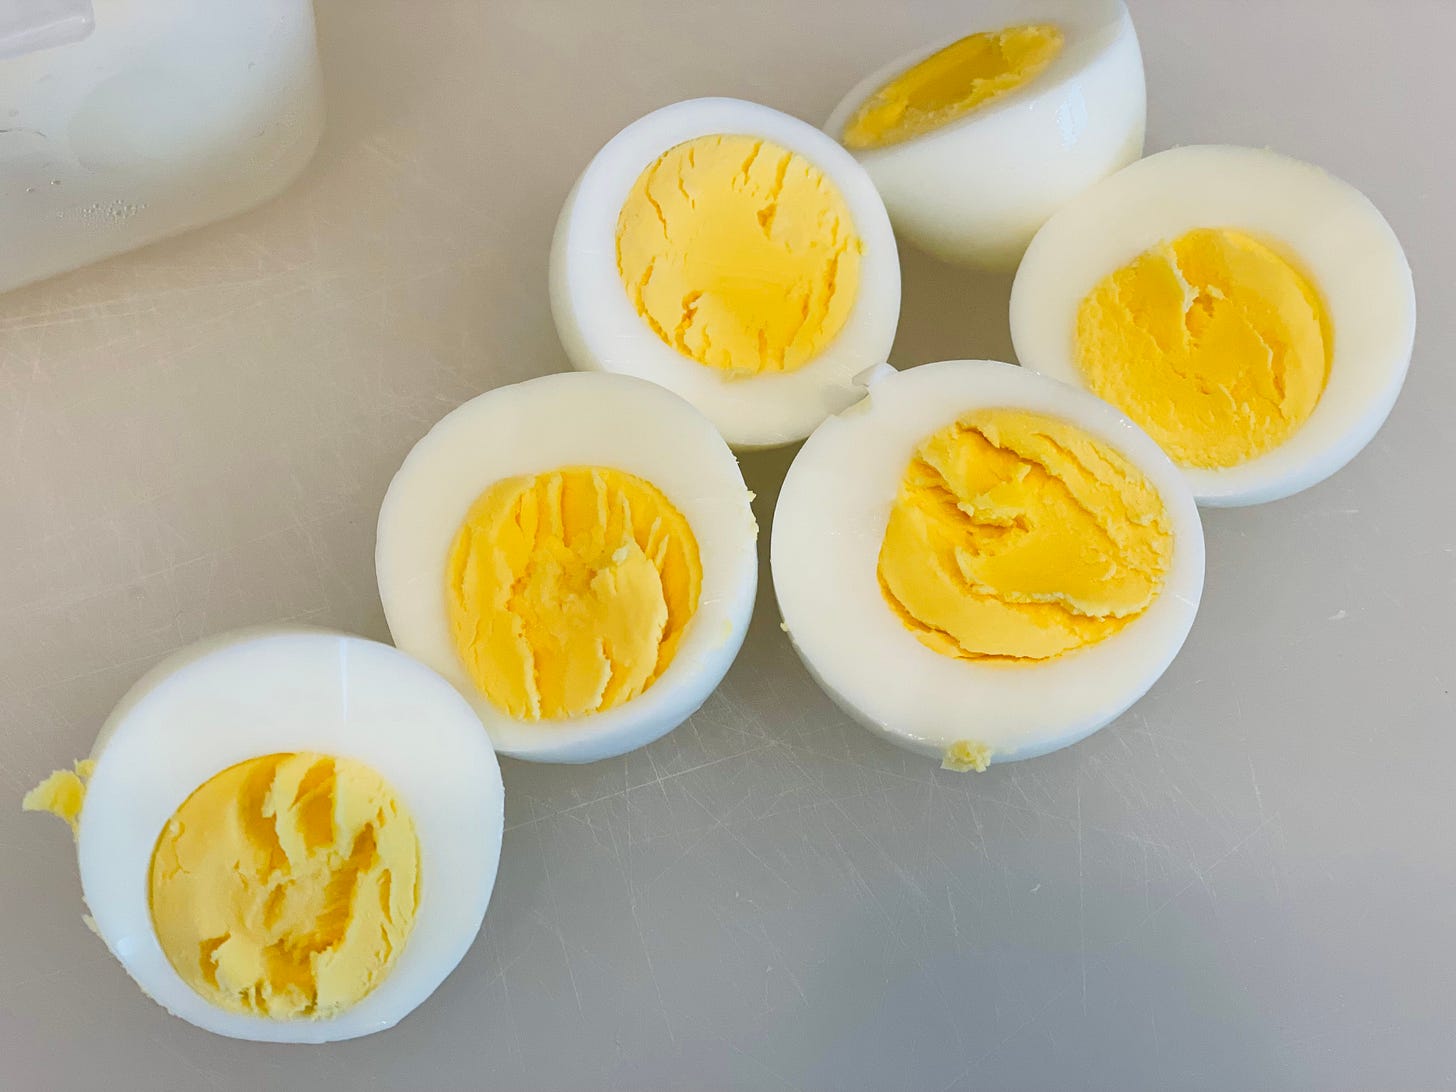
Next up is the cut. I like to cut the eggs across the equator (as Anthony says). It makes them easier to fill and easier to stand up. You might have to cut a sliver off the bottom to steady them, but they never slip ‘n slide like they do when you cut them longways. The filling is easy enough to mix together—just use a fork and mix-and-rest, and mix-and-rest to make sure everything is smooth and well combined. I do this off and on for about 5 minutes.
I have a friend who passes the egg yolks through a sieve before adding the other ingredients to make sure that there are no chunks or lumps in the mixture. If you are a perfectionist, you can do this too, but I just use a fork. And, don’t worry if there are bits of the yolk stuck to the whites, you will be covering this up when you fill the eggs.
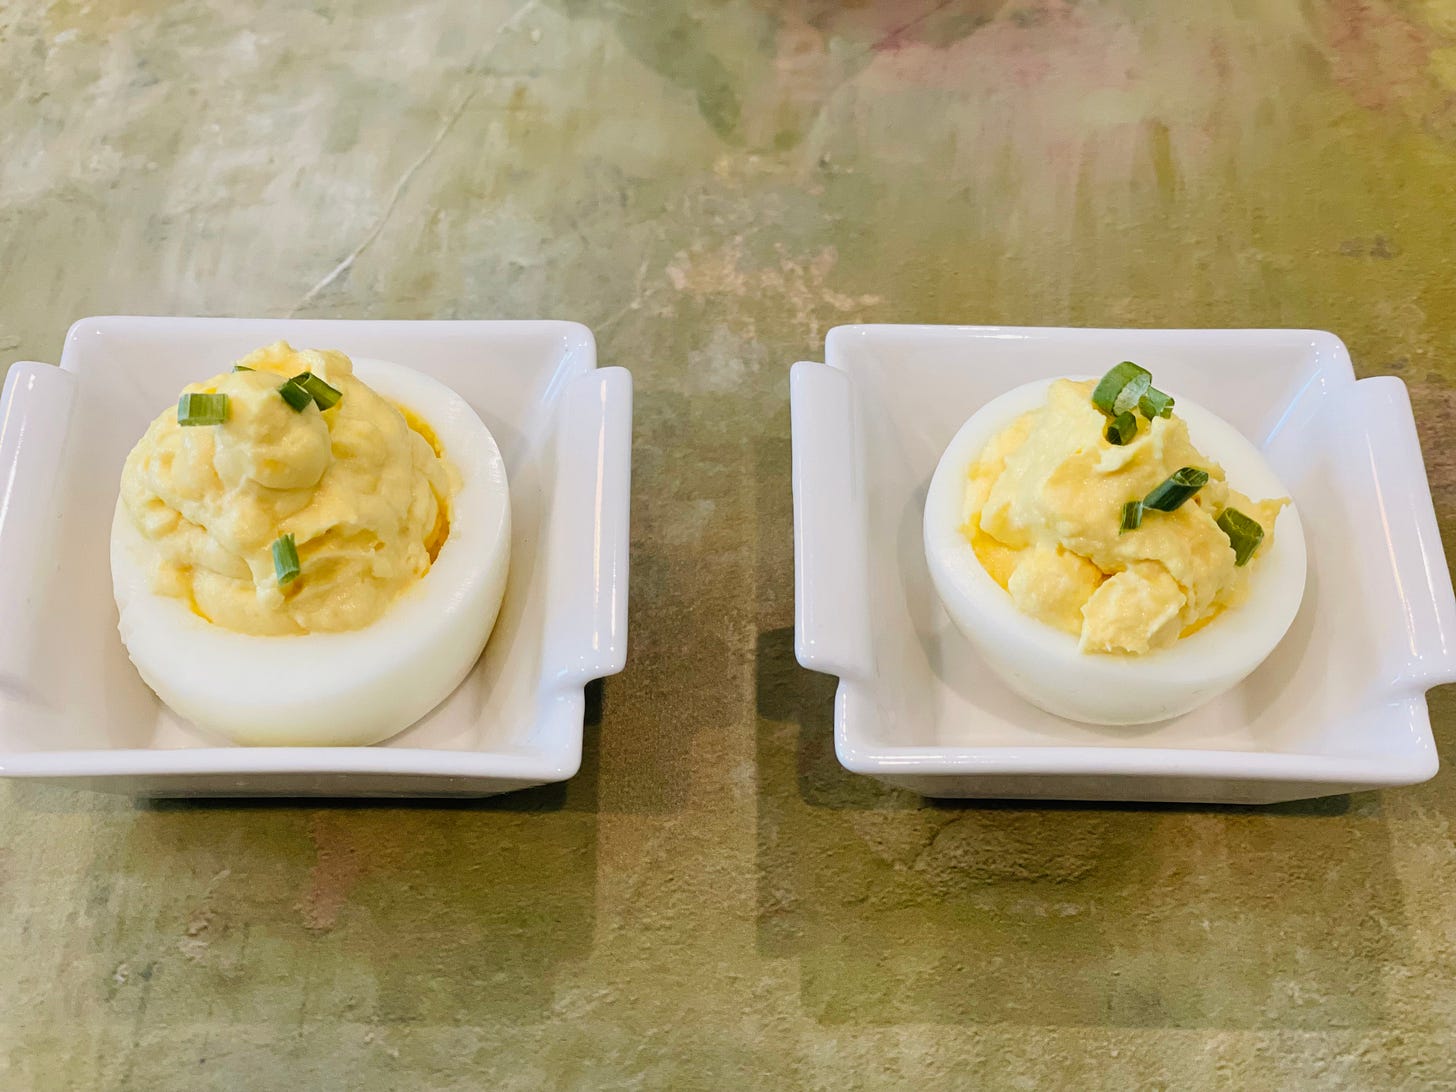
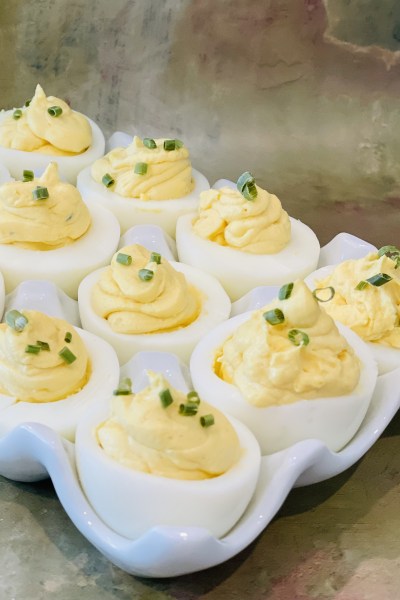
Finally, you are ready to fill your eggs. You can fill them with a small spoon, pastry bag and tip, or a resealable plastic bag. In the photo above, I filled one with a small espresso spoon, and the other with a resealable bag, so you can see the difference. They both look good and taste the same!
For me, using a pastry bag or a resealable plastic bag to fill the eggs is quicker and I think they look smoother too. If you use a pastry bag and a decorating tip, you can also make them look swirly and fancy like cake icing.
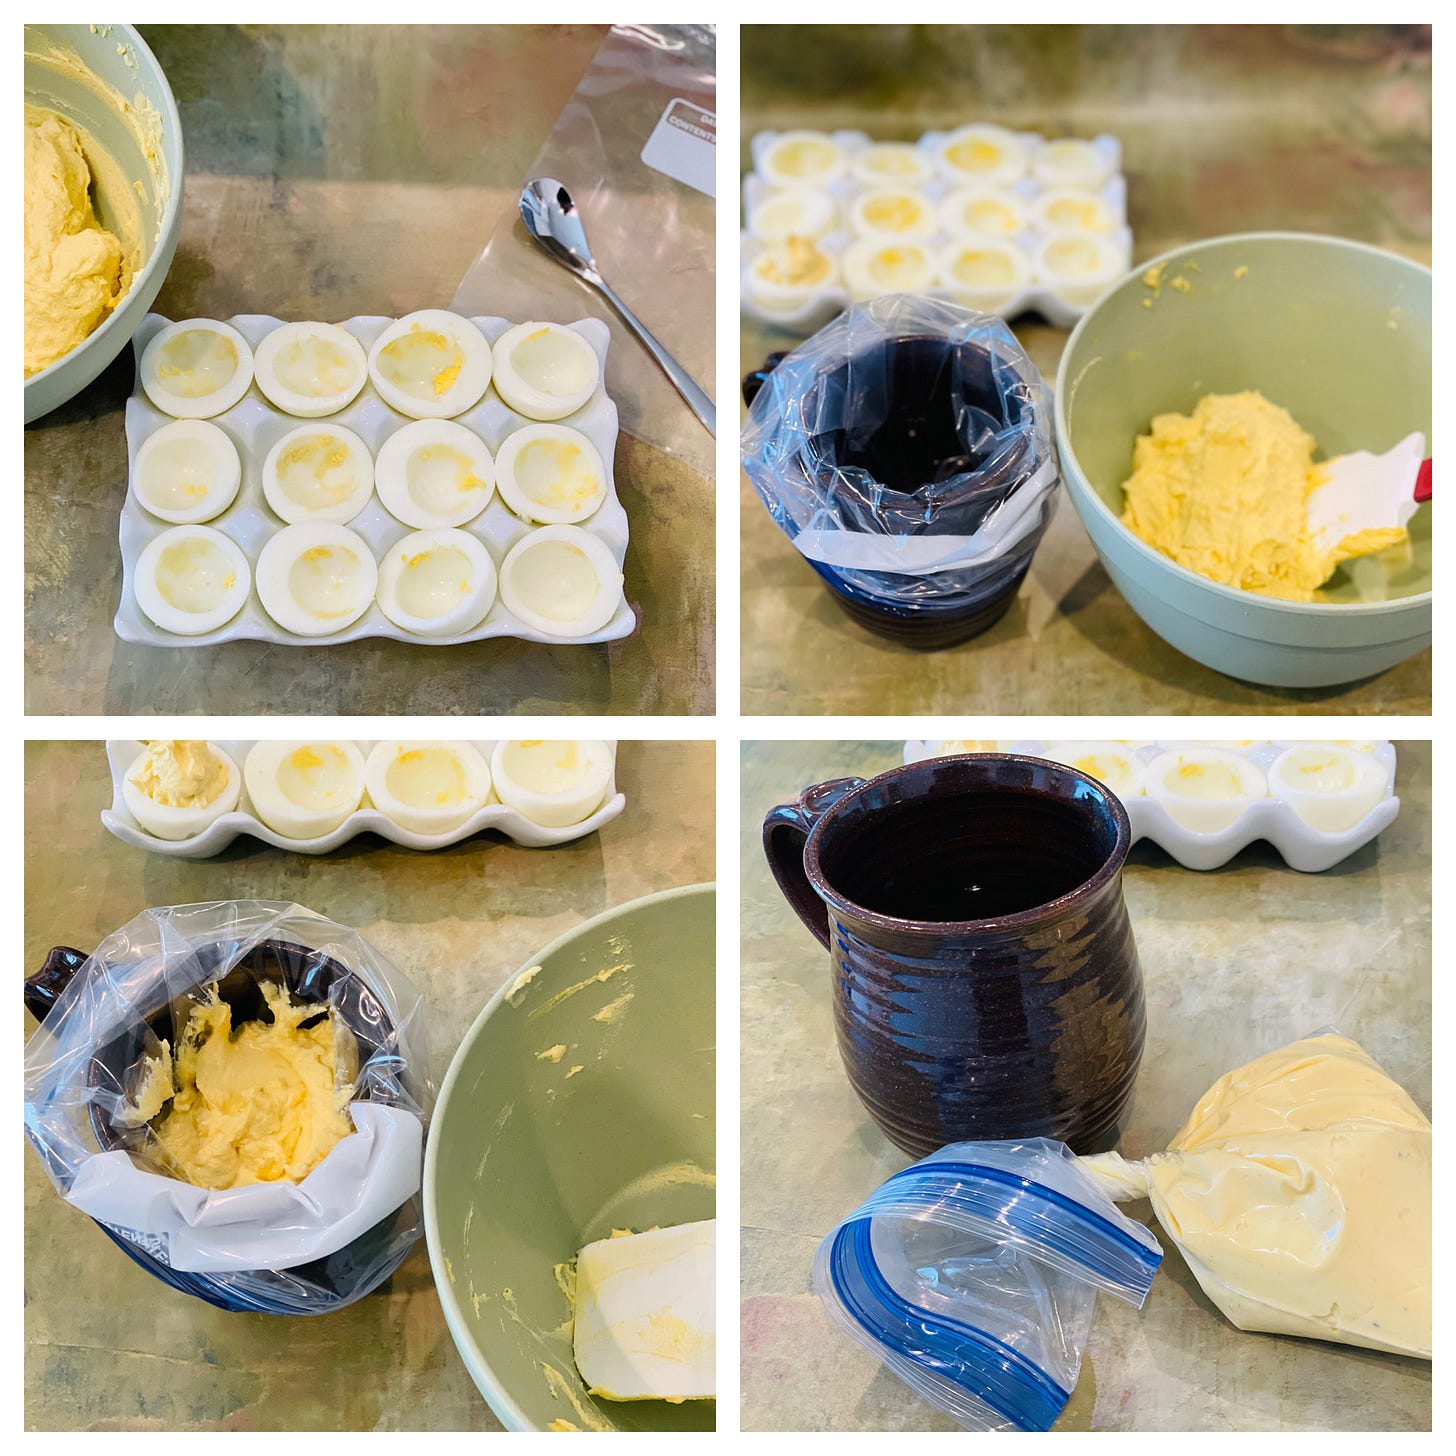
But getting the filling into a pastry bag or a plastic bag can be messy and if you aren’t careful, you can get it all over the bag—wasting the filling and making twisting it a mess. If you look at the photos, you see the coffee mug. That’s my tip…
I fold the bag over and in this case I am using a quart freezer bag because I only have about 1 cup of filling. Using a rubber spatula, I take a generous scoop and “plop” it into the center of the coffee cup. Then I hold the cup by the handle and jiggle it lightly to make the egg filling slide to the bottom. I repeated this procedure three times until the bowl was empty and the filling was all in the bottom of the bag. I removed the bag, twisted it until all the filling was concentrated on one side, cut the point and Viola! a homemade pastry bag.
STRAIGHT-UP DEVILED EGGS
These deviled eggs are a great appetizer or snack. Make them for your Easter meal and all summer long—I especially love tucking them into a beach picnic basket. No matter when or how you serve them, let them come to a cool room temperature before serving, otherwise the filling will be a little hard instead of creamy.
Makes 24 deviled eggs
1 dozen large eggs
1/3 cup Hellmann’s mayonnaise
¼ cup strong Dijon mustard
5 tablespoons unsalted butter, softened
Zest of ½ lemon
1 teaspoon fresh lemon juice
Pinch of garlic powder
2-4 shakes Tabasco
Sea salt to taste
Smoked Paprika or minced fresh chives for garnish
Place the eggs in a large heavy-duty pot of boiling water. Keep the flame on high and let the eggs boil for 12-14 minutes depending on how large they are. If you add an extra test egg, you can peel and cut one at 12 minutes to see if you like the degree of hard-boiled. Place eggs into a bowl of ice water when done.
Peel eggs carefully, keeping whites in tact. One by one, crack and peel under running room-temperature water until all eggs are peeled.
Cut in half cross-wise and remove yolks. Set whites aside on a platter or egg plate.
Break yolks up and mash with a fork until all large pieces are broken up and smooth. If you want to make sure that there are no lumps, you can push the yolks through a fine sieve.
Add mayonnaise, mustard, butter, lemon zest and juice, garlic powder and Tabasco. Stir well. Taste and season with a pinch of sea salt. All of the mix-ins are salty, so you won’t need to add much salt.
Place egg-yolk mixture in a pastry bag or use a small spoon to fill egg white “boats” with “deviled” egg mixture.
Sprinkle with smoked paprika for classic eggs, chives for a fancier-looking version.
Tip: You may need to cut a thin sliver off the bottom of the egg whites to make sure that they “sit” level.
WHAT’S 4 DINNER?: SPRING ROMAN-STYLE LAMB WITH HERBS & PEAS
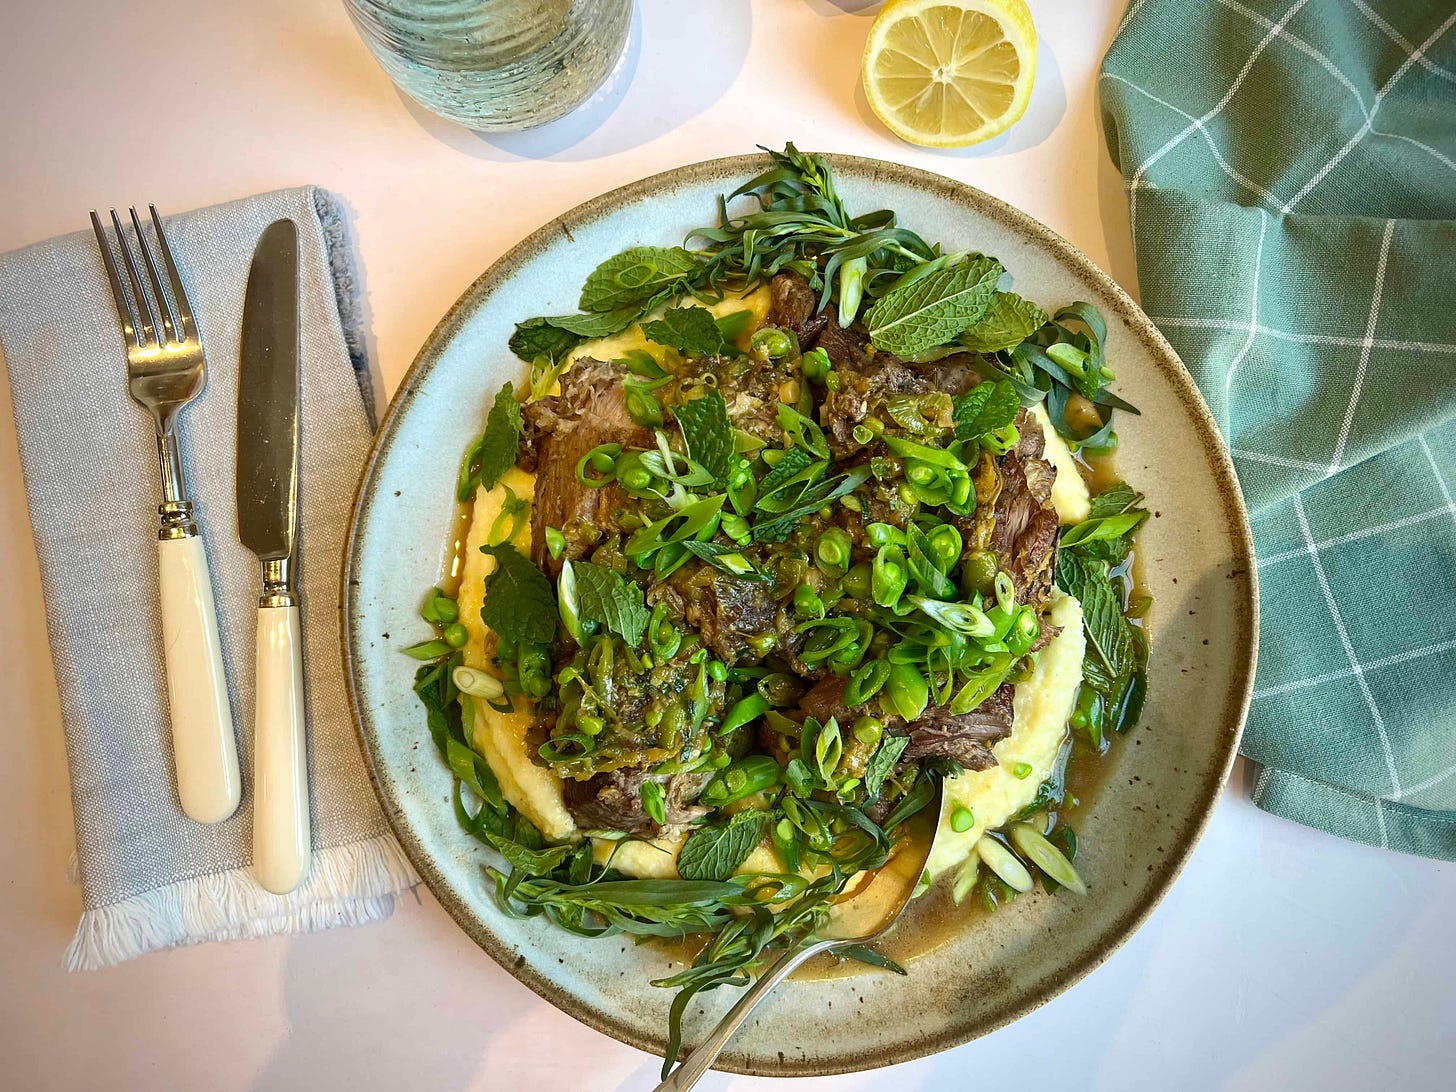
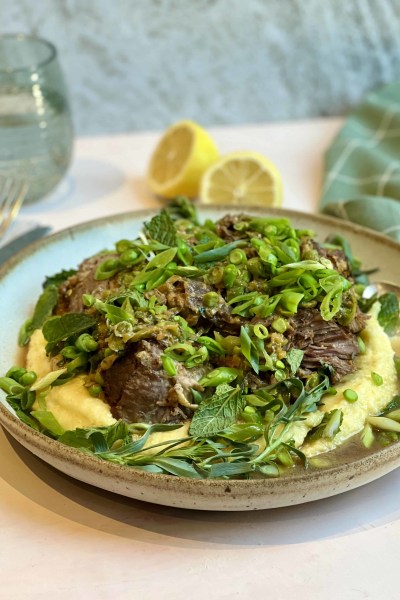
AU: If you’re looking for a perfectly tender, perfectly Springtime, perfectly hands-off recipe that presents like a roast, but isn’t a roast (this is v v niche, isn’t it?), then look no further! With a boldly-flavored sauce that’s punctuated with sweet peas and a melange of herbs, this is how you do red meat in the Spring. I like to serve it over polenta made with plenty of parmesan.
But the best part about this recipe (from Melissa Clark’s “Dinner in an Instant”) is that it’s made entirely in an electric pressure cooker! Or, if you’re so inclined, Mrs. Clark has also tested this recipe for the slow-cooker, so you’ve got two hands-off methods to get a holiday meal on the table!
EK: Yumm! I love a good pressure cooker recipe! Literally takes all the pressure off the cook—if you put a great combination of flavors and ingredients in the pressure cooker, it is foolproof!
AU: First, you marinate the lamb by rubbing grated garlic, rosemary, thyme, salt and pepper all over it. Then you sear the meat using the sauté function on your pressure cooker. After the meat is fully browned all over, you cook leeks, wine, anchovy, red pepper flakes. Return the lamb (and reserved herbs that were used to marinate) to the pot, lock in your lid, and bingo bango you’ve got lamb!
“WHAT DO YOU MEAN HE DON’T EAT NO MEAT?!?!”
OTHER TIPS/TRICKS TO THIS RECIPE:
Clark calls for boneless lamb shoulder, which is a cut that has lots of connective tissue and tough muscle that melts away and becomes tender after braising/a trip in the pressure cooker. I could only find a boneless leg of lamb, which is much leaner without nearly as much fat/connective tissue, so I cooked it for half the time she calls for in the recipe (and still let pressure release naturally).
Make the lamb portion ahead, but wait to add the peas until you’re about to serve it, so they stay bright green and crisp tender.
Add lemon. I’m a lemon maniac, so I can’t get enough lemon. If you feel like it maybe needs more salt, try some lemon juice first. Then add more salt if you feel like it still needs it.
Herbs galore! I love adding all the herbs. The recipe calls for scallions, mint and tarragon, but you could also add parsley, dill, and basil, if you’ve got ‘em on hand. Basically, make this lamb look like a salad.
Peas please. I did have a bag of frozen peas on hand (always do), but I opted instead to thinly slice sugar snap peas (which are bonkers good in LA right now!). You could do the same with snow peas.
Polenta is a favorite that my mom used to make for us with beef stew (like her dad and grandfather did for her). Gone are the days of standing over the stove whisking molten-lava polenta for 30 minutes straight! There are lots of no-stir methods online that are essentially hands-off. I’ve even heard that the microwave can turn out some decent polenta (the sacrilege). I used the porridge setting on my rice cooker and did a 1:5 ratio of polenta to water.
Cook it Slow. If you’d like to make this in a slow cooker, Clark tested that for you! She recommends you sear the lamb, and sauté the aromatics in a skillet, before transferring everything to the slow cooker. Then cook the lamb on high for 5 to 7 hours or low for 8 to 10 hours, adding the peas during the last 5 minutes.
Roman-Style Lamb with Herbs & Peas
“Perfect for Springtime, this ethereally tender lamb has an intense, heady sauce flecked with herbs and sweet green peas. The anchovies add a saline complexity, but aren't at all fishy. Plus, no one will know they are there if you don’t tell them. Serve this with something–bread, rice, polenta, or a spoon–to scoop up the sauce. It’s quite spectacular and you won’t want to miss a drop.”
- Melissa Clark; “Dinner in an Instant”
Serves 6
Ingredients:
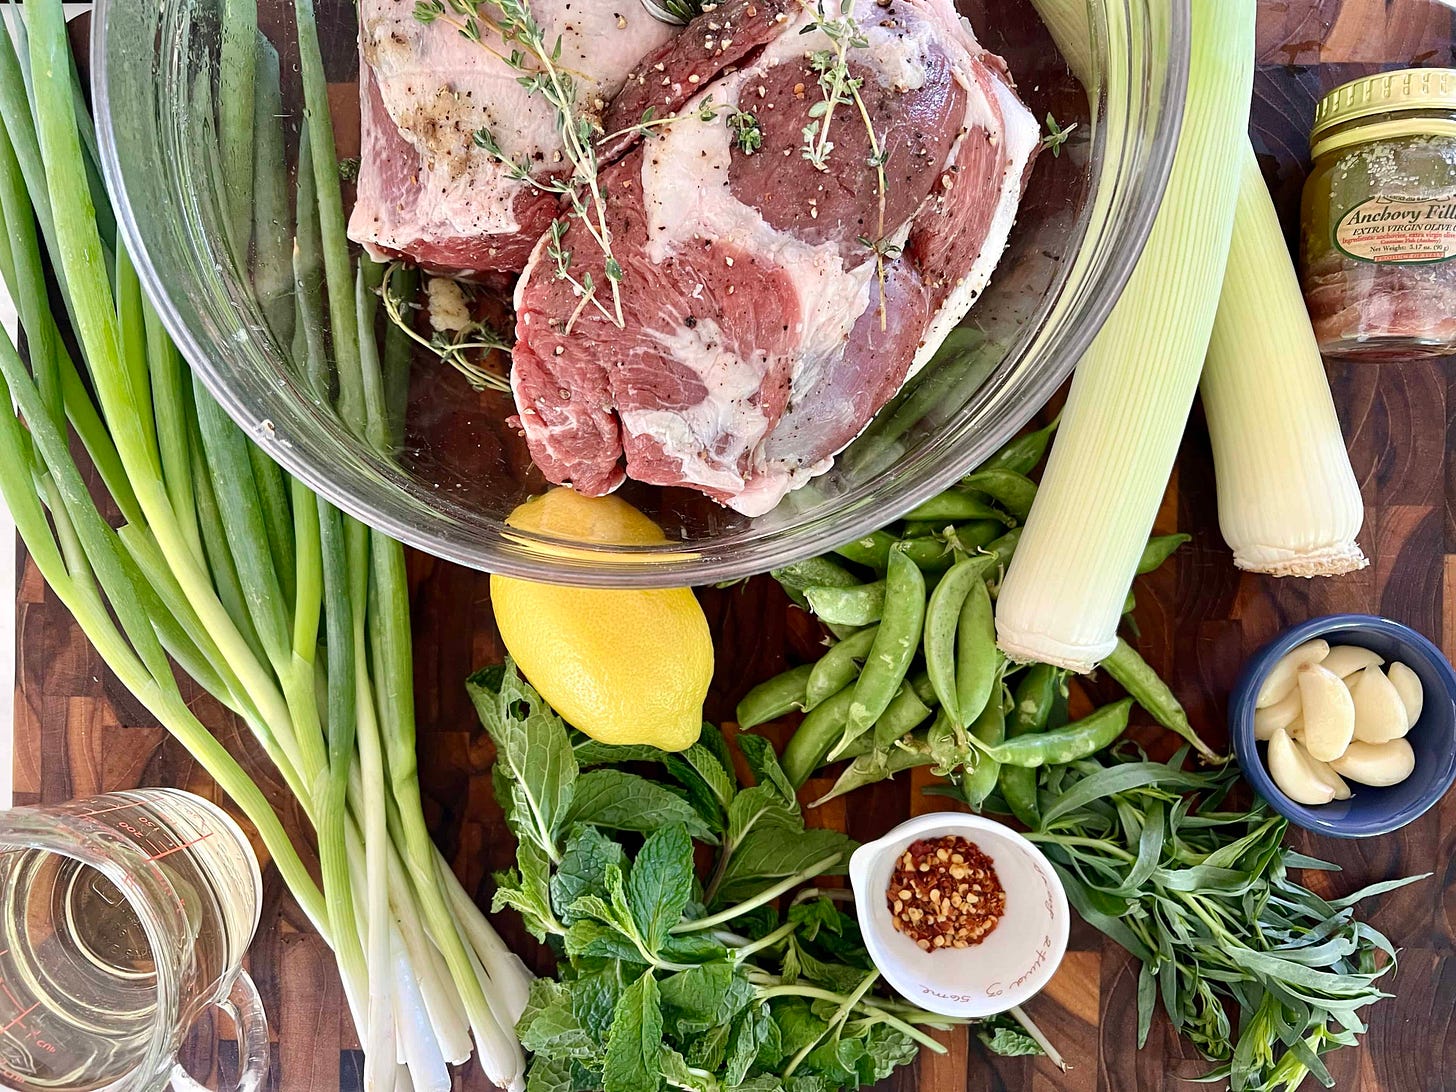
3 ½ pounds boneless lamb shoulder, well trimmed, cut into 2 pieces
9 garlic cloves: 3 finely grated, 6 left whole
2 teaspoons Kosher salt, plus more as needed
½ teaspoon freshly ground black pepper
6 sprigs fresh thyme (lemon thyme is particularly nice here), torn or cut into pieces
4 sprigs fresh rosemary, torn or cut into pieces
2 Tablespoons extra-virgin olive oil
2 leeks (white and light green parts only), or 1 large onion, diced
1 cup dry white wine
6 oil-packed anchovy fillets
Pinch of crushed red pepper flakes
Fresh lemon juice, to taste
1 cup shelled peas, fresh or frozen (do not thaw)
1 Tablespoon chopped fresh tarragon
2 scallions (white and green parts), thinly sliced
Chopped fresh mint and/or more tarragon, for serving
Method:
In a large bowl, toss the lamb with the grated garlic, salt, pepper, and thyme and rosemary sprigs. Cover and refrigerate for at least 1 hour, and preferably overnight.
Brush the herbs off the lamb and reserve. Using the sauté function in the pressure cooker (or a skillet over high heat), heat 1 tablespoon of the oil. Once it is hot, add the lamb. Let it brown for 5 to 7 minutes per side, and then transfer the pieces to a plate.
Add another tablespoon of the oil to the pot (or skillet). When it’s hot, add the leeks and smashed garlic cloves, and sauté until golden, 3 to 5 minutes (if the pot gets too hot and you can’t lower the heat, turn it off for a few minutes and let the leeks cook in the residual heat to keep them from burning).
Add the wine to the pot (or skillet) and simmer, scraping up the browned bits, until it has reduced by half, about 2 minutes. Add the anchovies and red pepper flakes. Return the lamb and reserved herb sprigs to the pot, cover, and cook on high pressure for 50 minutes. Let the pressure release naturally.
Using a slotted spoon, transfer the lamb to a serving platter. Use a fat separator to separate the fat from the juices, or just spoon the fat off the top. Taste the sauce, and add more salt and/or a squeeze of lemon as needed. If the sauce is thin, use the sauté function to simmer it down.
Stir in the peas and tarragon and simmer on the sauté function until the peas are tender (1 to 2 minutes for frozen peas, 2 to 5 for fresh peas). Serve the lamb topped with scallions and mint, and squeeze of lemon juice if desired.
That’s it for this week! As always, if you make our recipes, tag us on the ‘gram (@kitchensitch & @elizabethkarmel), and use the hashtag #whats4dinner. Happy cooking!!


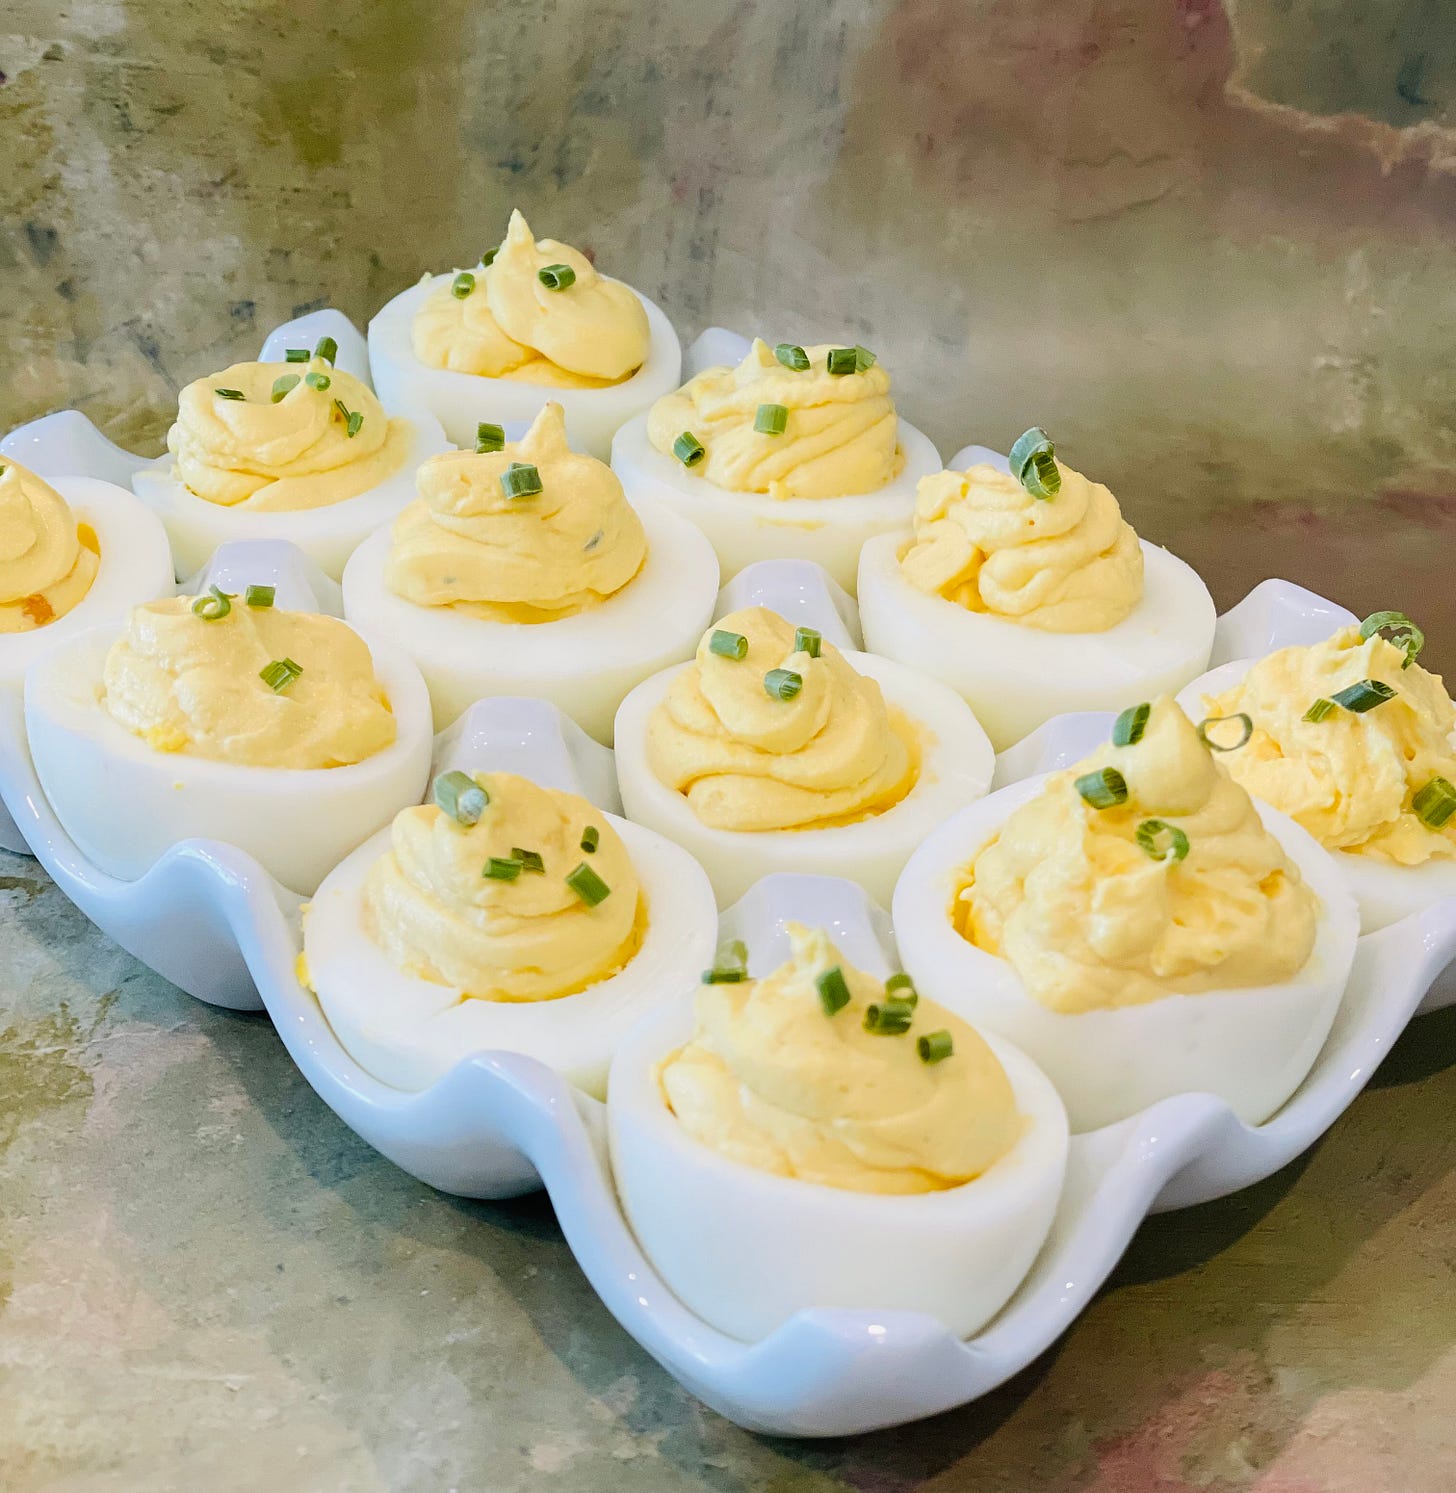



Devilled eggs.... just love them 😍👍