Rabbit rabbit! It’s December First, and that means that holiday baking season is in full swing. Perhaps you made a pie or two at Thanksgiving? Well, Elizabeth has an elegant (and easy!) apple tart that will make you say “Pie? I don’t know her.” And Anthony is going FULL CHRISTMAS with some gingerbread blondies…
AN EASY FRENCH APPLE TART
a.k.a. Tarte Aux Pommes
EK: So last week, I was literally a tart machine! My sister requested that I make a French Apple Tart for Thanksgiving, and it had been so long since I had made one, that I basically created a one-on-one tart intensive for myself. In the end, I made FIVE tarts—both round and rectangular—and I feel like I graduated from Tarte Université.
AU: That is insane! I made ONE damn pie and I thought that was a lot! (But it was very good, btw).
EK: Now I can’t wait to make them again and with variations on the fillings. During the process, I fell in love with the 14-inch rectangular tart pan. I like the classic 9.5 inch round, but the rectangle is a show-stopper!
AU: They do make everything seem a little more elegant, no?
EK: They really do! Here’s what I learned: It’s quite simple to make a tart, but it is as much assembly as it is baking, so it’s easier to make the dough and the filling in advance. Each part of the tart is really beginner level baking:
Mixing a tart dough that is like making a simple sugar cookie dough,
A homemade applesauce
Slicing apples and arranging them
Breaking it down, it doesn’t seem like such a big undertaking. Yes, you need to plan in advance, but you’ll be happier. :)
Besides those three steps, you will need some specialty equipment and you may need to order them, like I did. I actually ended up using 3 brands of tart pans and discovered that the coated non-stick pans from Fox Run were the easiest to work with.
In addition, you will need sheets of 12 x 16-inch parchment paper, a rolling pin, a dough cutter/bench scraper and a pastry brush.
If you don’t know what a dough cutter is, know that they are quite handy and cooks and pastry chefs, bread bakers etc., alike use them all the time.
Dough Cutters/Bench Scrapers: this is a very nice tool to have and I use it for lots of different things. It cuts the disc of tart dough evenly and cleanly, and helps lift the dough, once you’ve rolled it out. If you bake and cook a lot, check out this interlocking set of three styles. The three variations include a dough cutter, a curved edge scraper, and a flat edge scraper, so it’s basically three tools in one.
In the barbecue world, this is the tool that everyone uses to move to meat to the plate or butcher paper after it’s been sliced, it operates like a flat scoop.
EK: Now that you have your equipment, it’s time to make the tarts!
Make the Dough: You will be using a stand mixer so this won’t take long at all. Like cookies, you will cream the butter and sugar together on low-to-medium speed, until combined. The only trick here is Do Not Over Mix. You will add the rest of the ingredients—egg yolks, flour, salt—and it will have the texture of cookie dough.
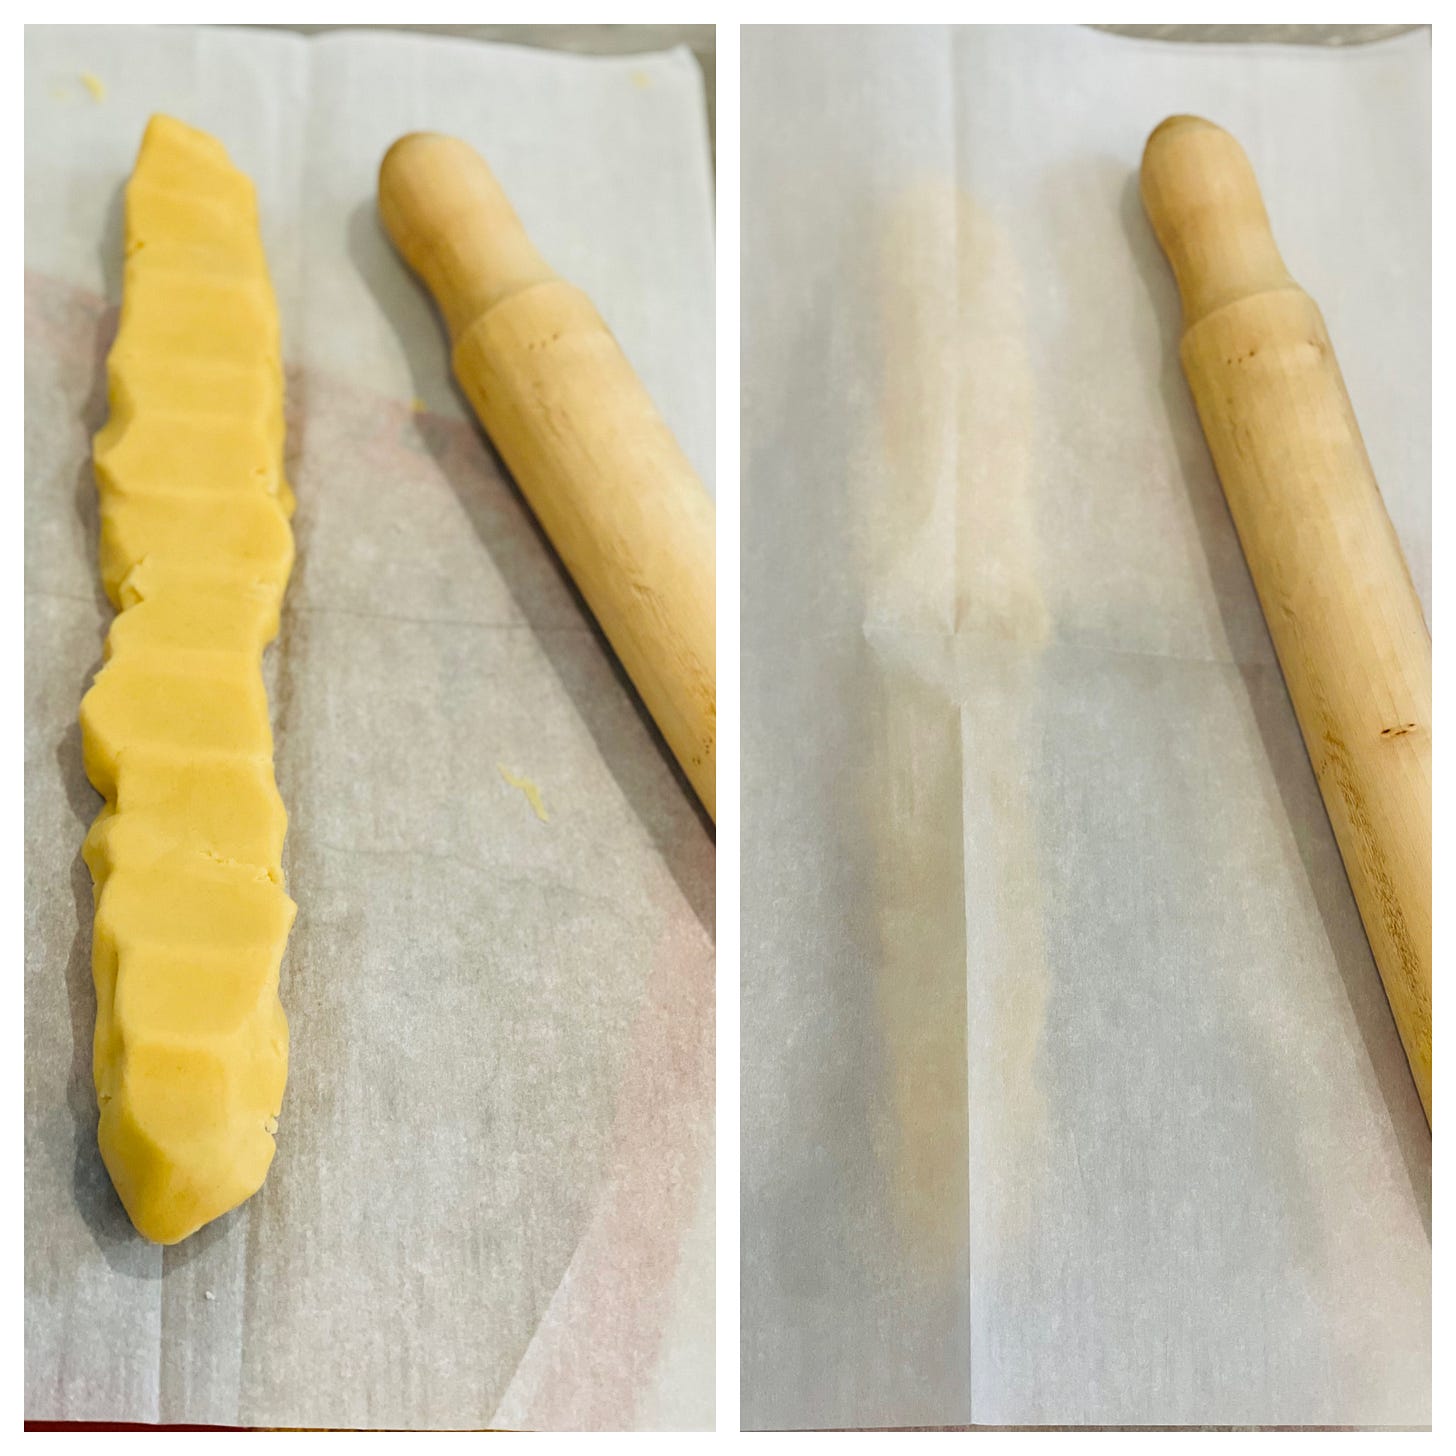
Once it comes together in a ball, shape the dough into a disk and place in the center of a piece of 12” x 16” parchment paper, and fold in the edges to seal. Cut the disc down the middle [or in quarters like I did] with a dough cutter.
Let dough rest in the refrigerator for at least 4 hours or up to 3 days. If storing for more than a few hours, I place the parchment covered dough in a resealable bag, so that it doesn’t absorb any refrigerator odors.
Next up: Make the Filling. You can make the apple-sauce filling up to 3 days in advance, and keep tightly covered in the refrigerator.
You are basically making applesauce. The chunks of apples have enough liquid in them that if you cook them in a covered pot, they will miraculously cook down into a delicious, fragrant, homemade applesauce. I make a version of this to serve with grilled/roasted meats and sausage. If you have a potato masher you can use it to make the apples smooth or use a large blending fork. Since this is your filling, you want it to be very thick, but not chunky.
Roll the Dough and Make the Tart:
When ready to use: Unfold the parchment paper and place dough in the center. Cover with another piece of parchment paper. Using a rolling pin, roll to an even thickness of about ¼ inch. I roll between 2 pieces of parchment paper so that I don’t have to add any flour to the dough.
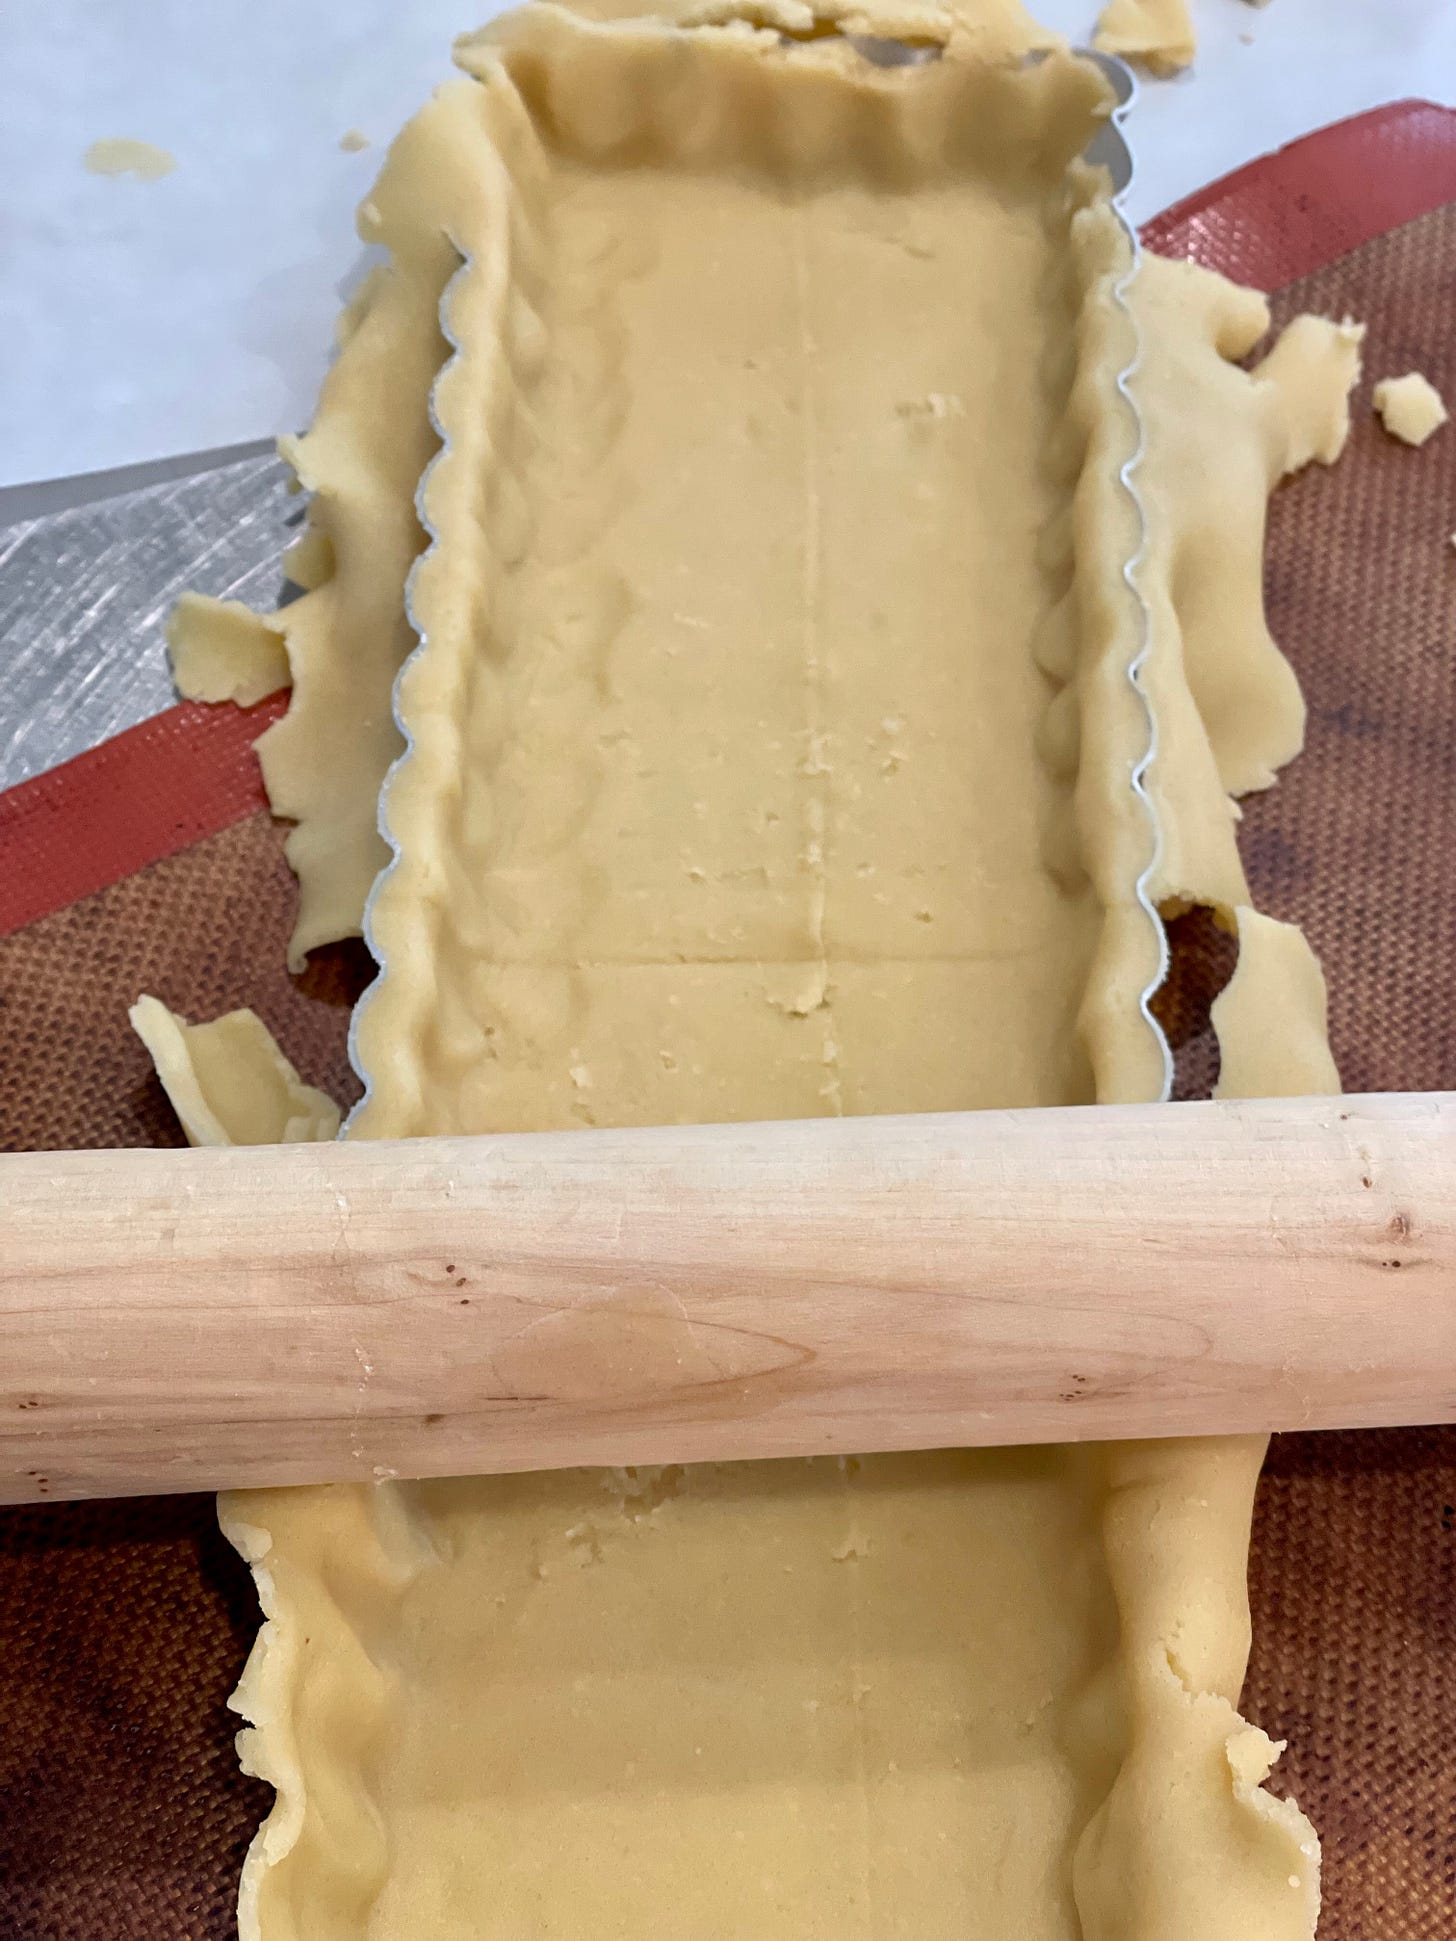
To transfer the dough to the pan, place the pan in the center of the dough. Using the parchment paper as a guide, flip the pan over. Carefully remove the parchment paper.
Once it is right side up, the dough will be draping the pan. You want to make sure that the delicate dough fills the corners tightly and an easy way to do this is let gravity help. Working left to right, carefully lift the edges in stages holding the dough straight up. The weight of the dough will fall downward to fill the frame of the tart pan.
When you have done this for the whole pan, you can trim the edges cleanly by rolling the rolling pin over the top of the tart pan. If you have a hole in the crust or need to add more to the sides, simply pinch a small piece of the dough from your scraps and “patch the hole.” It will stick and the crust will become seamless.
** Most recipes call for a pre-baked tart crust, but I found that it was an unnecessary step in this recipe using the sweet tart dough above. **
Assemble & Bake the Tart:
Preheat oven to 375°F and place the oven rack in the upper third of the oven.
Cut the small apples that you will use as topping into slices that are about 1/8th of an inch thick. These days you can find huge apples in the store. These work for the applesauce but will be too large for the decorative apple slice topping.
I find it easiest to peel the apple, slice off one “cheek” (about a quarter of the apple), then place the flat side on my cutting board to slice. Repeat this process, and you’ll be left with a rectangular core. This gives you slices with a straight edge. I do this before I fill the cold tart shell with the applesauce.
Next, spread the cold applesauce in the pastry shell making sure that it is even and goes almost to the top.
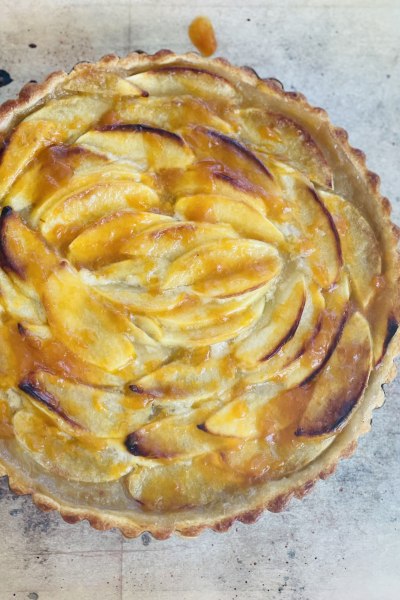
Cover the applesauce with the apple slices and make sure that they are closely overlapping. You can arrange them in a layer of concentric circles for a round tart or shingled in the rectangular tart pan.
Note: For the round pan, it’s easier to start by laying out a flat circle of the apple sliced as close to the edge as possible, then start overlapping from that point. For the rectangle pan, place two flat slices at one end of the rectangle and then add two slices that overlap in the middle. If you have any gaps, you can “sneak” an apple slice into the gap.
Next, lightly brush all over with heavy cream and sprinkle with sugar. This helps keep the apples from drying out and promotes caramelization.
Finally, it’s time to bake the tart! It will take about 30-40 minutes to bake. Set your timer for 20 minutes, so that you can gauge the progress and add to the timer, as necessary. I set the timer for 30 minutes and added two 5 minute increments for each tart I baked making my total cook time 40 minutes, but every oven is different.
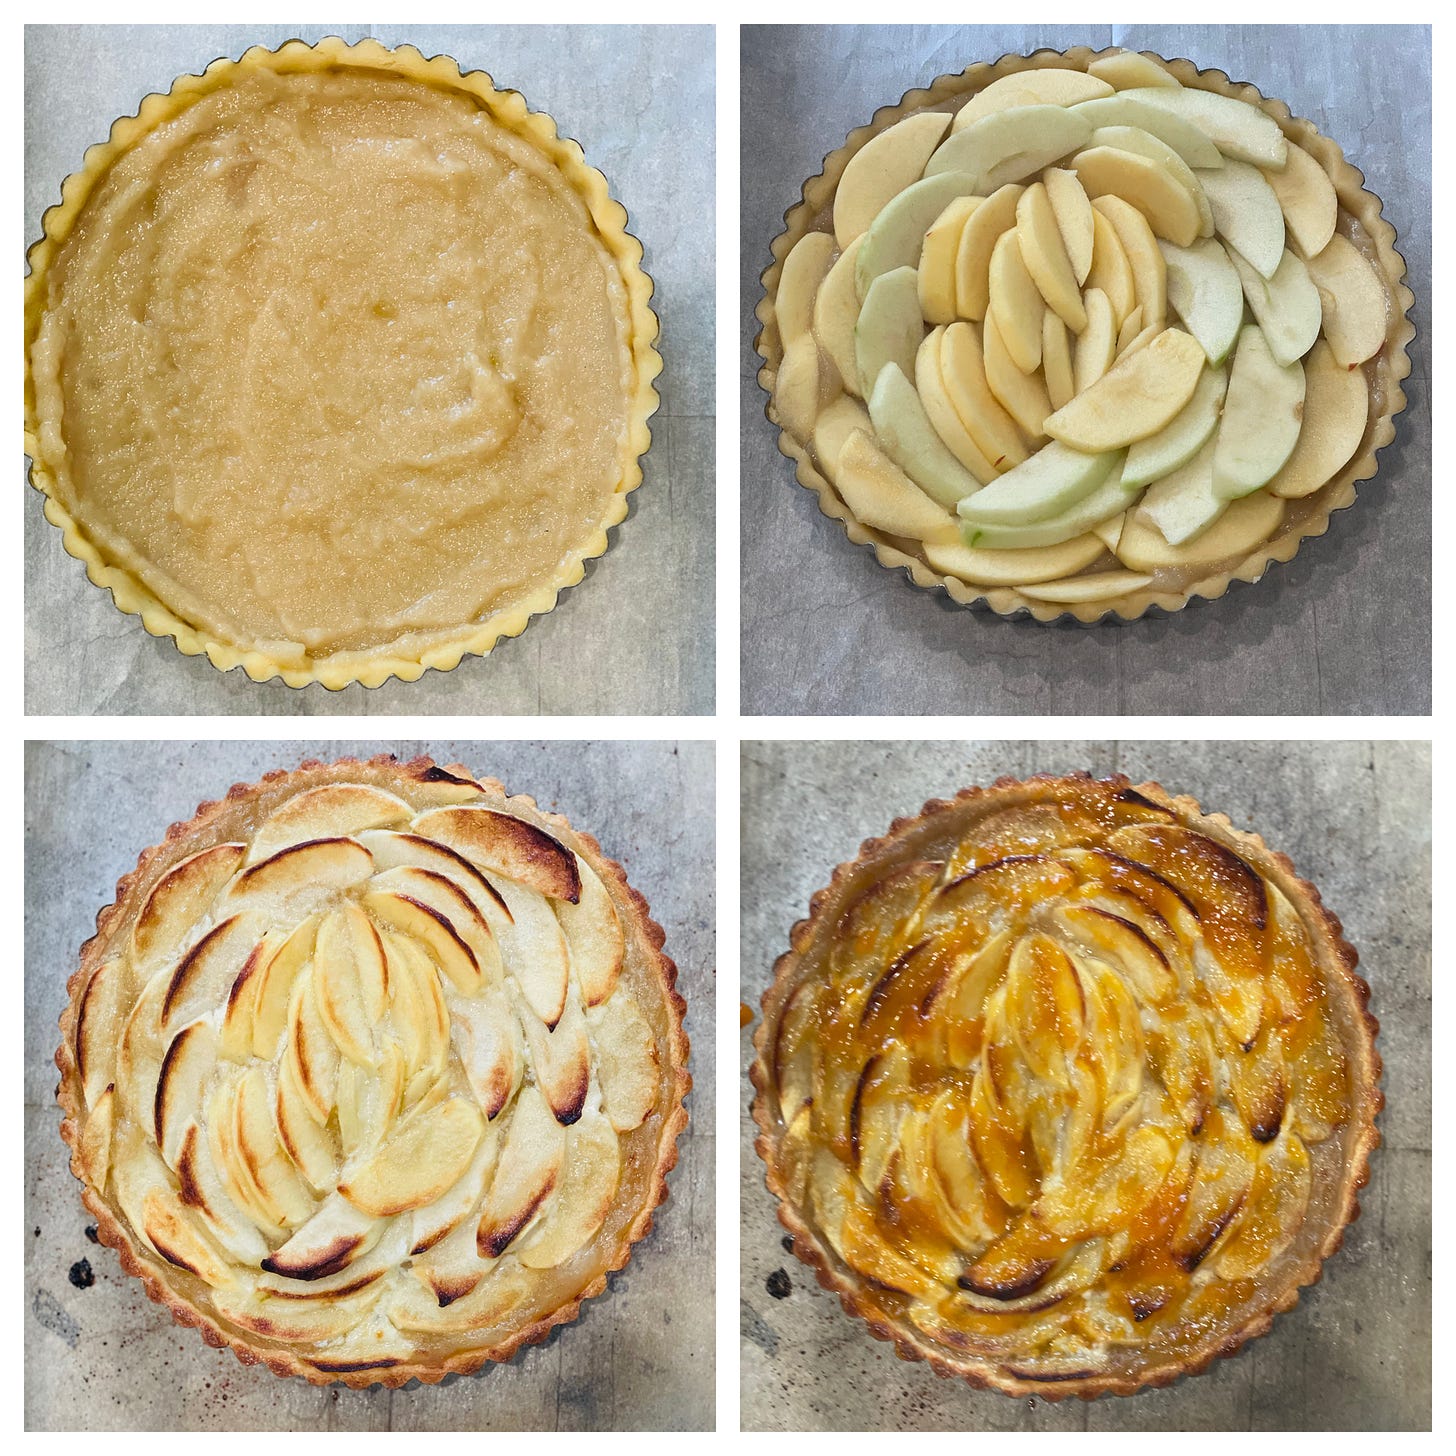
I love the rustic look of slightly burnished apple edges, and my round tarts got properly “singed” as they baked, but I needed to place my rectangular tarts under the broiler for 1-2 minutes at the end of the cooking time to get more color. If you do this, do not step away, as it will burn very quickly!
Once the tart is done, you will glaze it with warmed apricot jam for a nice sheen.
Once the tart cools, you can serve it at room temperature or cold with (or without) homemade whipped cream.
Bon Appétit!!!! ENJOY!!
SANTA WANTS GINGERBREAD BLONDIES… AND SO WILL YOU!
AU: One thing about me is that I’m a cookie person. I will take a cookie over cake any day…
EK: I am firmly on Team Cake—and captured my favorites, including your fabulous Earthquake Cake in my book, Steak & Cake but I am also on Team Cookie! I’m not wishy-washy, I just love all the sweets :) I don’t need to tell you—the creator of the Perfect Chocolate Chip Cookie—there is nothing better than a great cookie. And, if I am honest, I find myself making cookies more than cake because they are so easy to make and so easy to eat. Cookies are the OG ‘Grab and Go’!
AU: Exactly! Listen, I’m not kicking anyone out of bed here, but if you’re asking me to choose… I’m going cookie (which includes the genus of bars & brownies) or pie (genus of cobblers, crisps, buckles, etc included). Sorry cake. That’s just the way I feel. It’s not you, it’s me (lol this is hardly a hot take).
Anyways, before you @ me, there is a place where I draw a line in the cookie world, and that’s roll-and-cut cookies. Like, they’re cute and all, but can’t I just make ‘em in a pan instead? Wouldn’t we all be happier if we could just skip to the eating part?!?
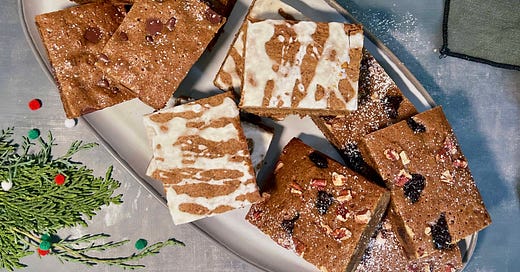
Which is why I developed a recipe for GINGERBREAD BLONDIES. Typically, when you have a gingerbread craving (it’s a thing), you have to either go the cake route (we already know my feelings on this), or the roll-and-cut gingerbread person route.
I wanted a chewy, dense, crispy-at-the-edges gingerbread that is packed with all those warm holiday spices like clove, allspice, cinnamon, nutmeg, and of course, ginger. So I started cobbling together a plain blondie recipe… Then I took inspiration from my own college experience…
AU: As a young undergrad at the University of Texas at Austin, I frequented a fine dining establishment known as Magnolia Cafe at least once a week. It was open 24 hrs, so I would often go and study there (I’m sure they LOVED that). I would get the “Mag Mud,” which is an ethereal concoction of queso, black beans, guac, and pico. And, as a Table Sweet®, I would always order their gingerbread pancakes. These things were huge—the size of the plate itself—and were so fluffy, and so crispy around the edges. Truly a perfect pancake.
Years later, I got to travel back to the Austin, TX area while producing Emeril Lagasse’s Breakfast in Bed for Good Morning America. Every year, we would surprise a deserving mom on Mother’s Day with breakfast (and lots of surprises!) cooked up by Emeril himself. As the producer, I always tried to pull menu inspiration from a local place, and when we landed in Wimberly, TX, I knew Magnolia Cafe’s legendary gingerbread pancakes had to be on that breakfast tray.
I called Magnolia Cafe and told them how their restaurant truly helped shape me as a person, and they were generous enough to give me the TOP SECRET RECIPE for their gingerbread pancakes!! I was shocked to learn that the secret ingredient, the one that made these pancakes so dark and rich with a deep flavor… was coffee!
Just like my 10-Year Chocolate Chip Cookies, I decided to include a little instant espresso powder to lend that same depth of flavor. In addition, there’s plenty of brown sugar (you can use light or dark—whatever you have on hand), warm spices, molasses, and butter.
But the first run of this recipe was too cakey for me (here we go again), so I did some research and found that adding a bit more liquid sweetener will produce a chewier texture! I tried adding more molasses, but it ended up tasting too molasses-y. So then, I turned to corn syrup. Corn syrup—that ol’ standby—adds some sweetness, but it’s actually less sweet than other liquid sugars. This gave the blondies a perfect chewy texture and a balanced flavor.
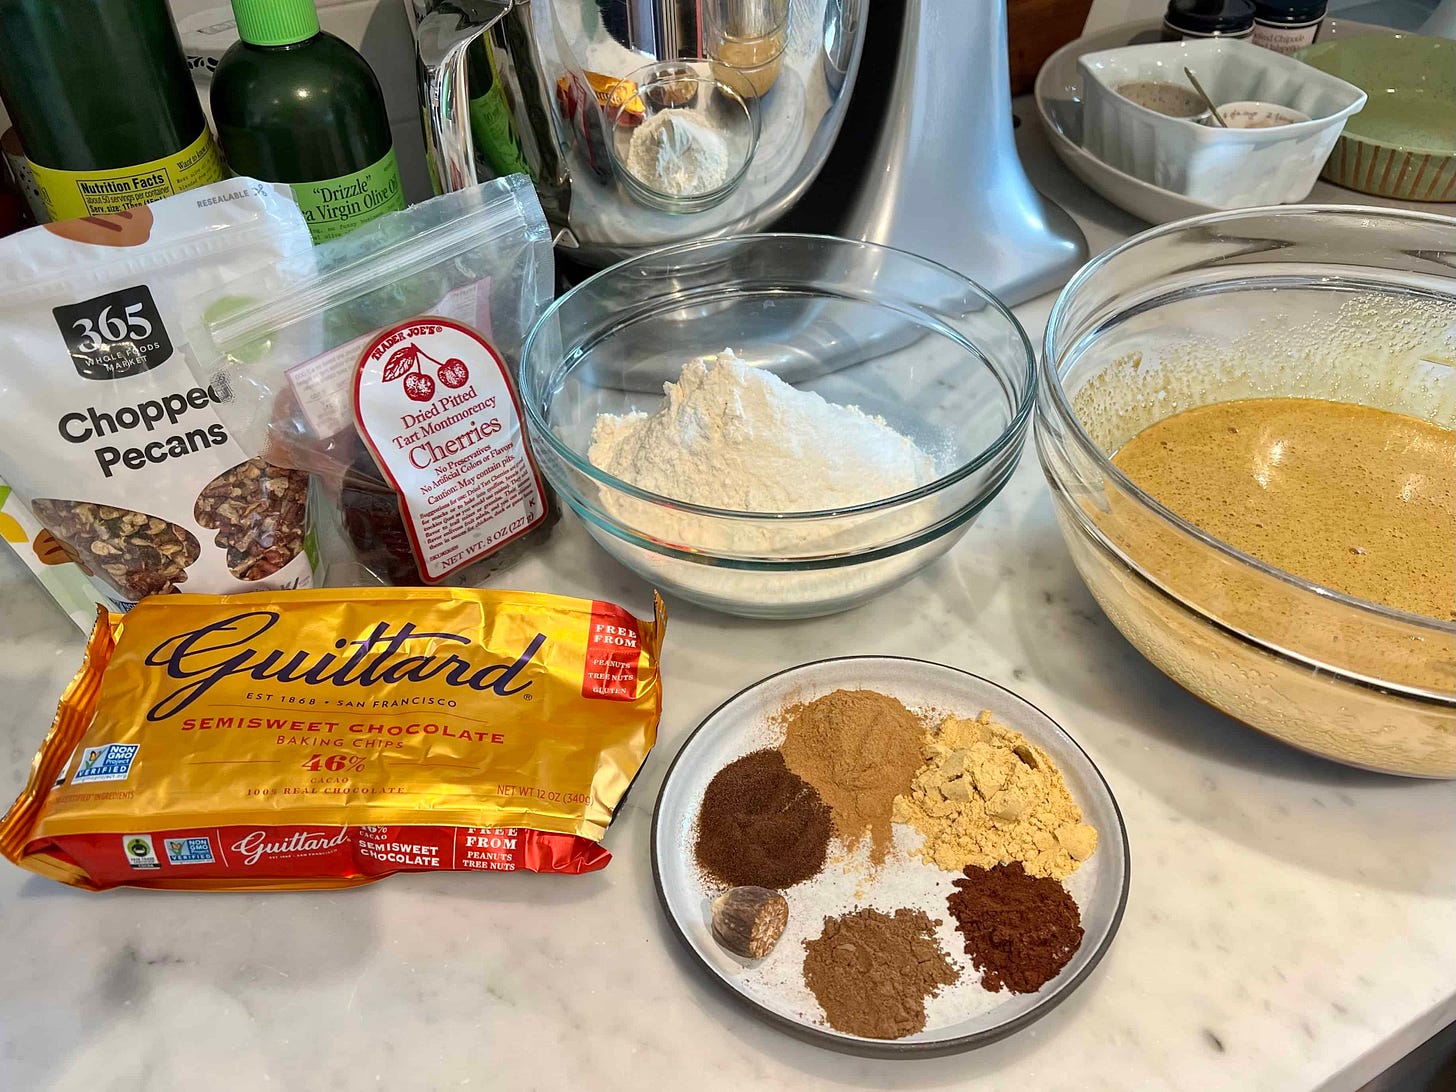
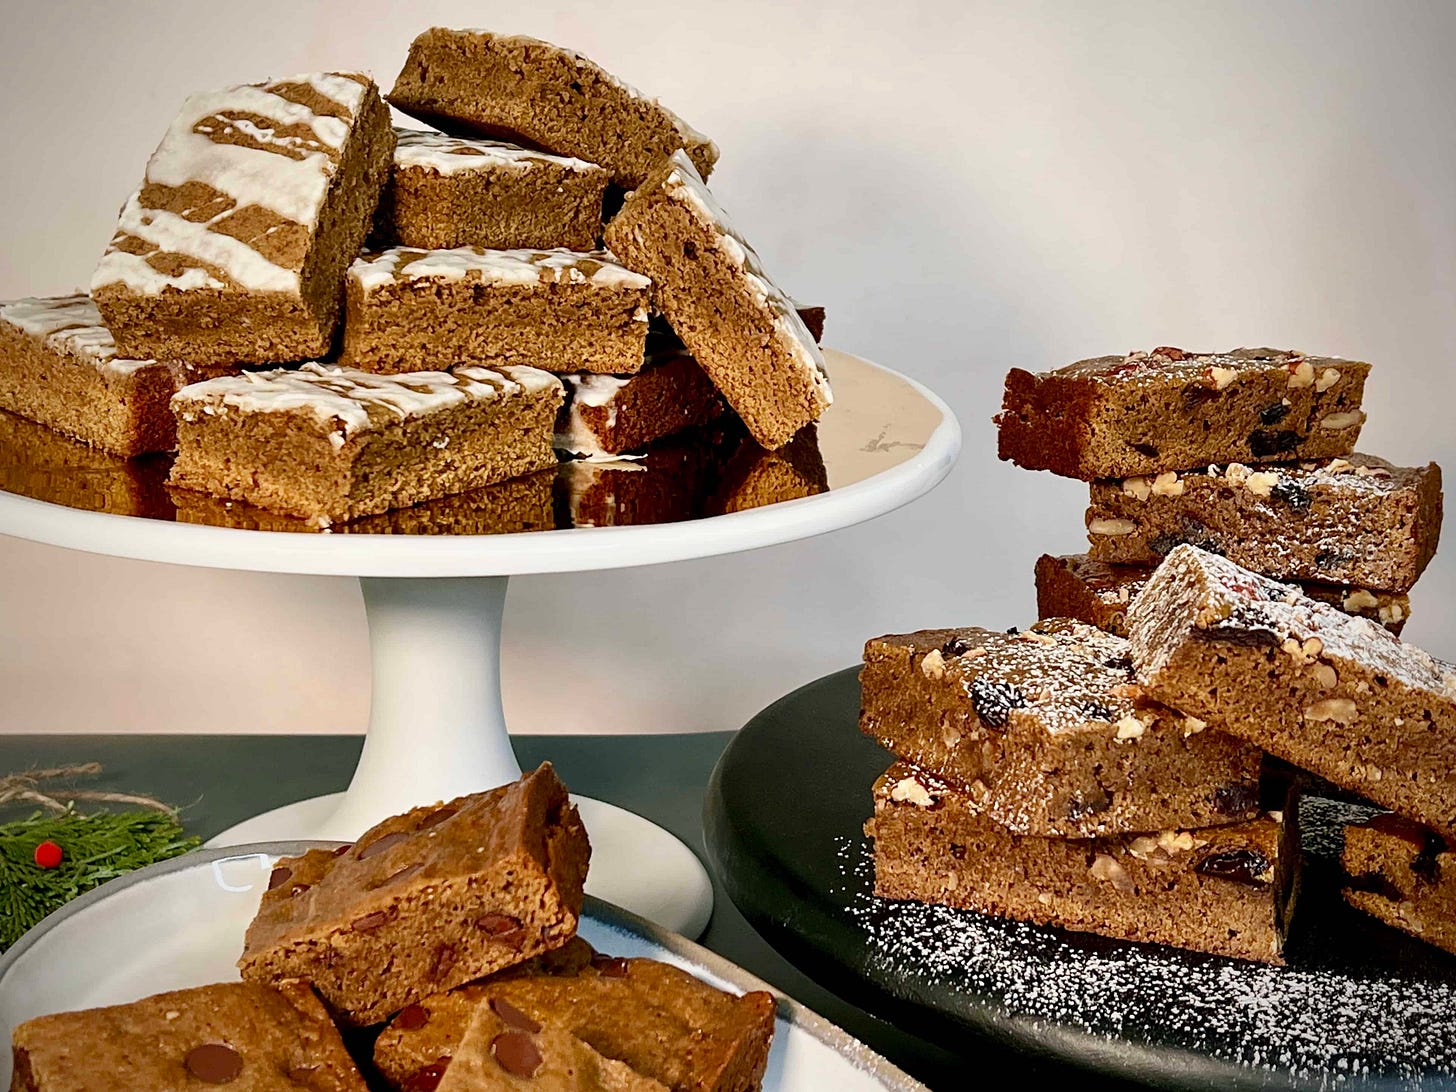
AU: To really nail the spice and texture, I made the first few batches “straight up” without any accoutrement. If you want to go FULL GINGERBREAD, then add nothing more than drizzle of an eggnog glaze for a delicious, unadulterated bite. But if you’re someone who needs a bit more texture, perhaps some interesting flavor contrasts, I loved when I mixed in some toasted pecans and dried cherries! The pops of fruity cherry were a welcome contrast to the crunchy, toasty pecans.
But for all the chocoholics out there, I tested a version with semi-sweet chocolate chips… and I gotta say there aren’t enough gingerbread/chocolate combos out there, y’all.
Oh, and PSA: if you want to make non-gingerbread blondies, just omit the spices (keep the espresso powder), and bump up the vanilla to 2 tablespoons!
Either way you make ‘em, I know Santa would appreciate if you left some out for him this year!

