
GRILL IT OFF : WEEK THREE
A Reader Request For Rack of Lamb and Grilled Eggplant, and a Better Grill Brush Without Any Bristles

I hope you’ve been enjoying this Grill It Off! series. Thank you all for your questions, suggestions and messages! What I’ve been trying to show is that you can make great-tasting food in very little time, without complicated recipes, simply by using your outdoor grill, the basic tenets of the Grilling Trilogy, and the foods you already love. Plus, I just found a new kind of grill brush that makes cleaning your grill grates a breeze!
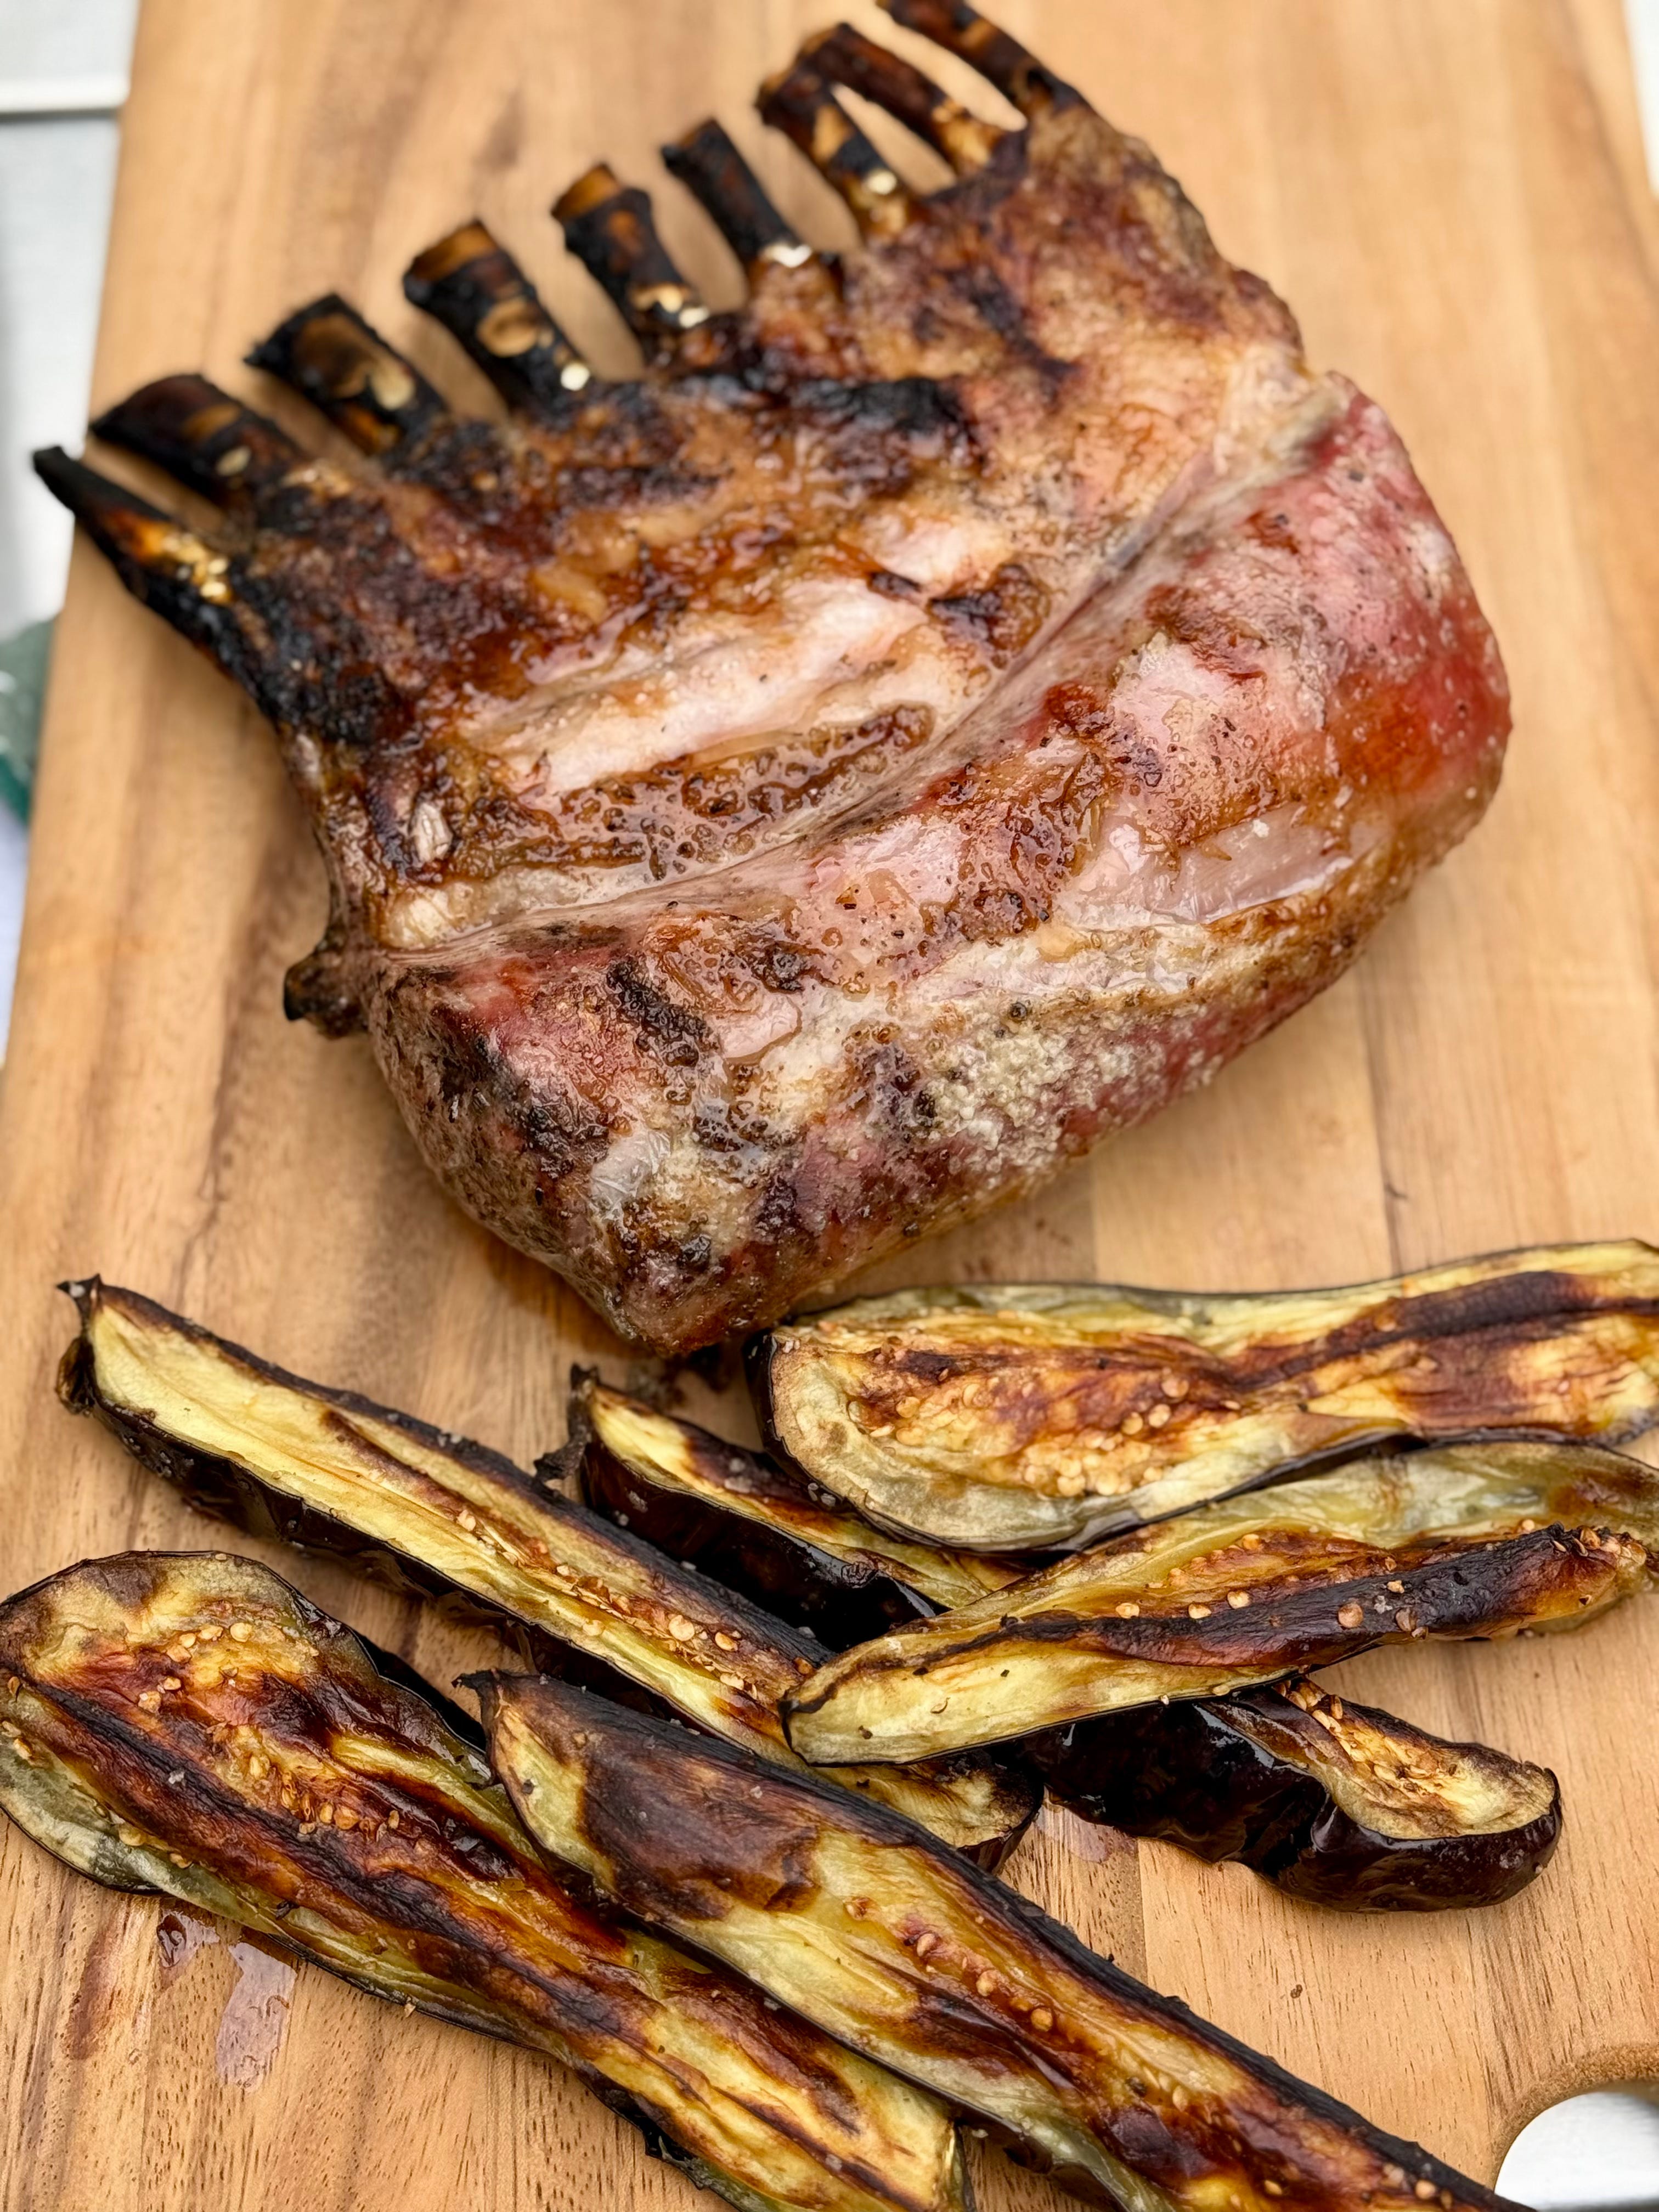
Speaking of which, a reader asked me how to grill a small rack of lamb without a fussy recipe, and another wanted to know how to grill eggplant so it doesn’t dry out. I hadn’t made either in a while, and they struck me as the perfect pair. So this week, we’re grilling a whole rack of lamb and eggplant for dinner!.
It’s quicker and easier than you might think to grill a rack of lamb. The meat is so flavorful on its own that you really don’t need more than olive oil, salt, and pepper. If you love a good crust, I’m a fan of brushing the lamb with Dijon mustard and sprinkling it with herbes de Provence, but this time I kept it simple.
Depending on the size, a rack of lamb will be ready in under 30 minutes. The rack I cooked weighed 1.57 pounds and was an Australian rack from Costco. I’m a big fan of their lamb—it’s consistently tender, well-trimmed, and always available.
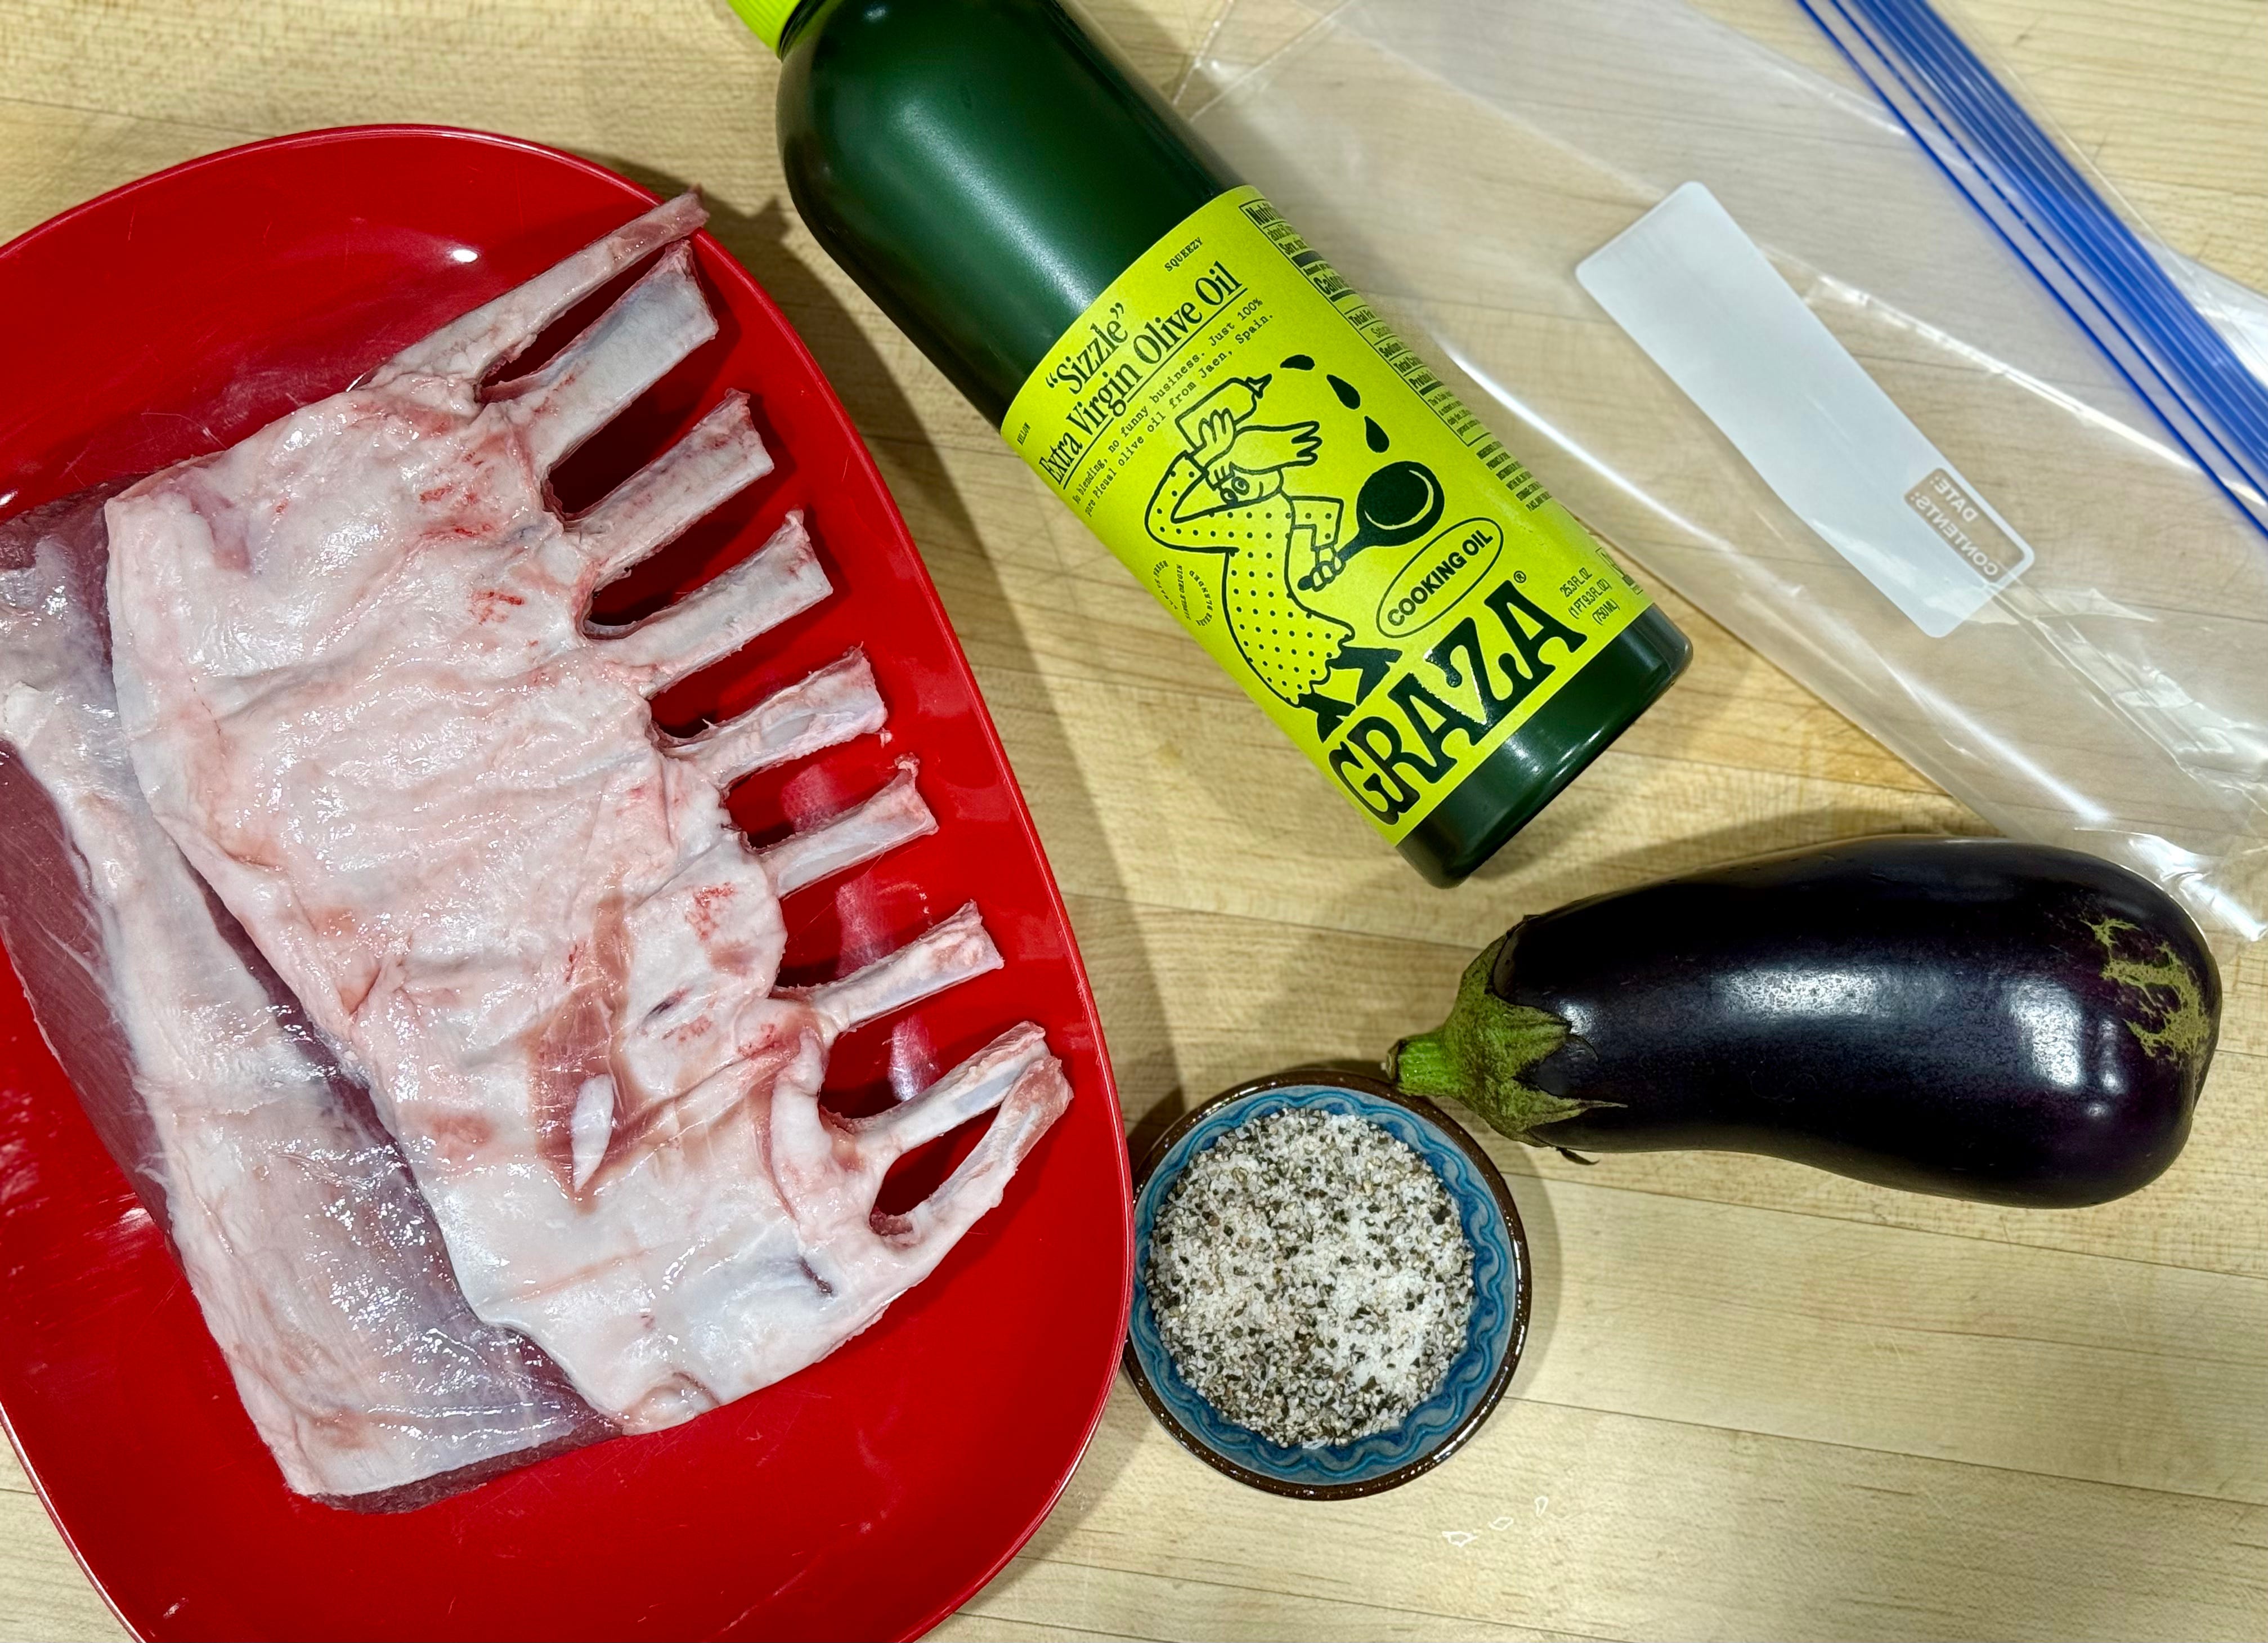
About 40 minutes before I wanted to eat, I preheated the grill with all the burners on high. While the grill heated, I prepped both the lamb and the eggplant, coating them lightly with EVOO, and seasoning them simply with salt and pepper.
A little note about eggplant, if you think that eggplant needs to be salted and drained, I’m here to tell you that it is not necessary for grilling—I don’t know what it’s necessary for, but definitely not grilling.

I look for the smallest, heaviest eggplant I can find; they should feel dense for their size. Smaller eggplants tend to have fewer seeds and a creamier texture. I like to cut them into spears—this one gave me six good-sized pieces. I sliced it lengthwise, then cut each half into spears, the way you might cut a pickle.
The reader who inspired ,y choice of eggplant wanted to know how to grill it without it drying out. The answer in a word is EVOO!! If you make sure that the entire piece has a list coating of EVOO, it will not dry out. If you don’t oil it, it will dehydrate as it cooks and I guarantee you that it will dry out! EVOO is your grill’s best friend—followed by salt and pepper and the indirect grilling method!
(See the bottom of this newsletter for a refresher on the grilling methods)
The easiest way to evenly coat eggplant with olive oil is to put the spears in a reusable bag, add a little EVOO, and gently massage them through the bag. Once coated, a light sprinkle of salt and pepper is all they need.
For both the lamb and the eggplant, the key is indirect heat. When the grill is preheated, usually about 10 minutes, reduce the heat and turn the middle burner off. You want to make sure that the burner under the lamb is completely OFF. You are looking for a medium-high indirect heat of about 450-500 degrees Fahrenheit. On my grill, that means that the two end burners are on medium high, the next burners are o low and the middle burner is OFF.

The eggplant also needs indirect heat and I like to cook the eggplant on the warming rack directly above where the lamb is positioned on the main grate. It’s almost foolproof as you can see in the last photo of the process above.
Cook the lamb and the eggplant for 20-30 minutes, depending on size and the doneness you like.
I prefer my rack of lamb medium to medium-rare. I find you get more flavor when it’s cooked just a touch longer so the fat has time to cook and render out. Since lamb is fattier than other meats and the fat has a gamier flavor, I think it tastes better wen it’s medium rare rather than very rare.
I grilled today’s rack for 25 minutes to an internal temperature of 132 degrees Fahrenheit, seared it fat-side down for 1 minute and let it rest for 10 minutes and my chops were juicy, tender and bursting with flavor.

That timing was perfect for the eggplant as well. I didn’t sear it first—the deep caramelization and browning you see in the photo came naturally from the indirect heat. This gentle cooking prevents burning, intensifies the flavor, and allows the inside of the eggplant to become silky and perfectly tender. Just before serving, I like to drizzle a little extra EVOO over the slices for a finishing touch!
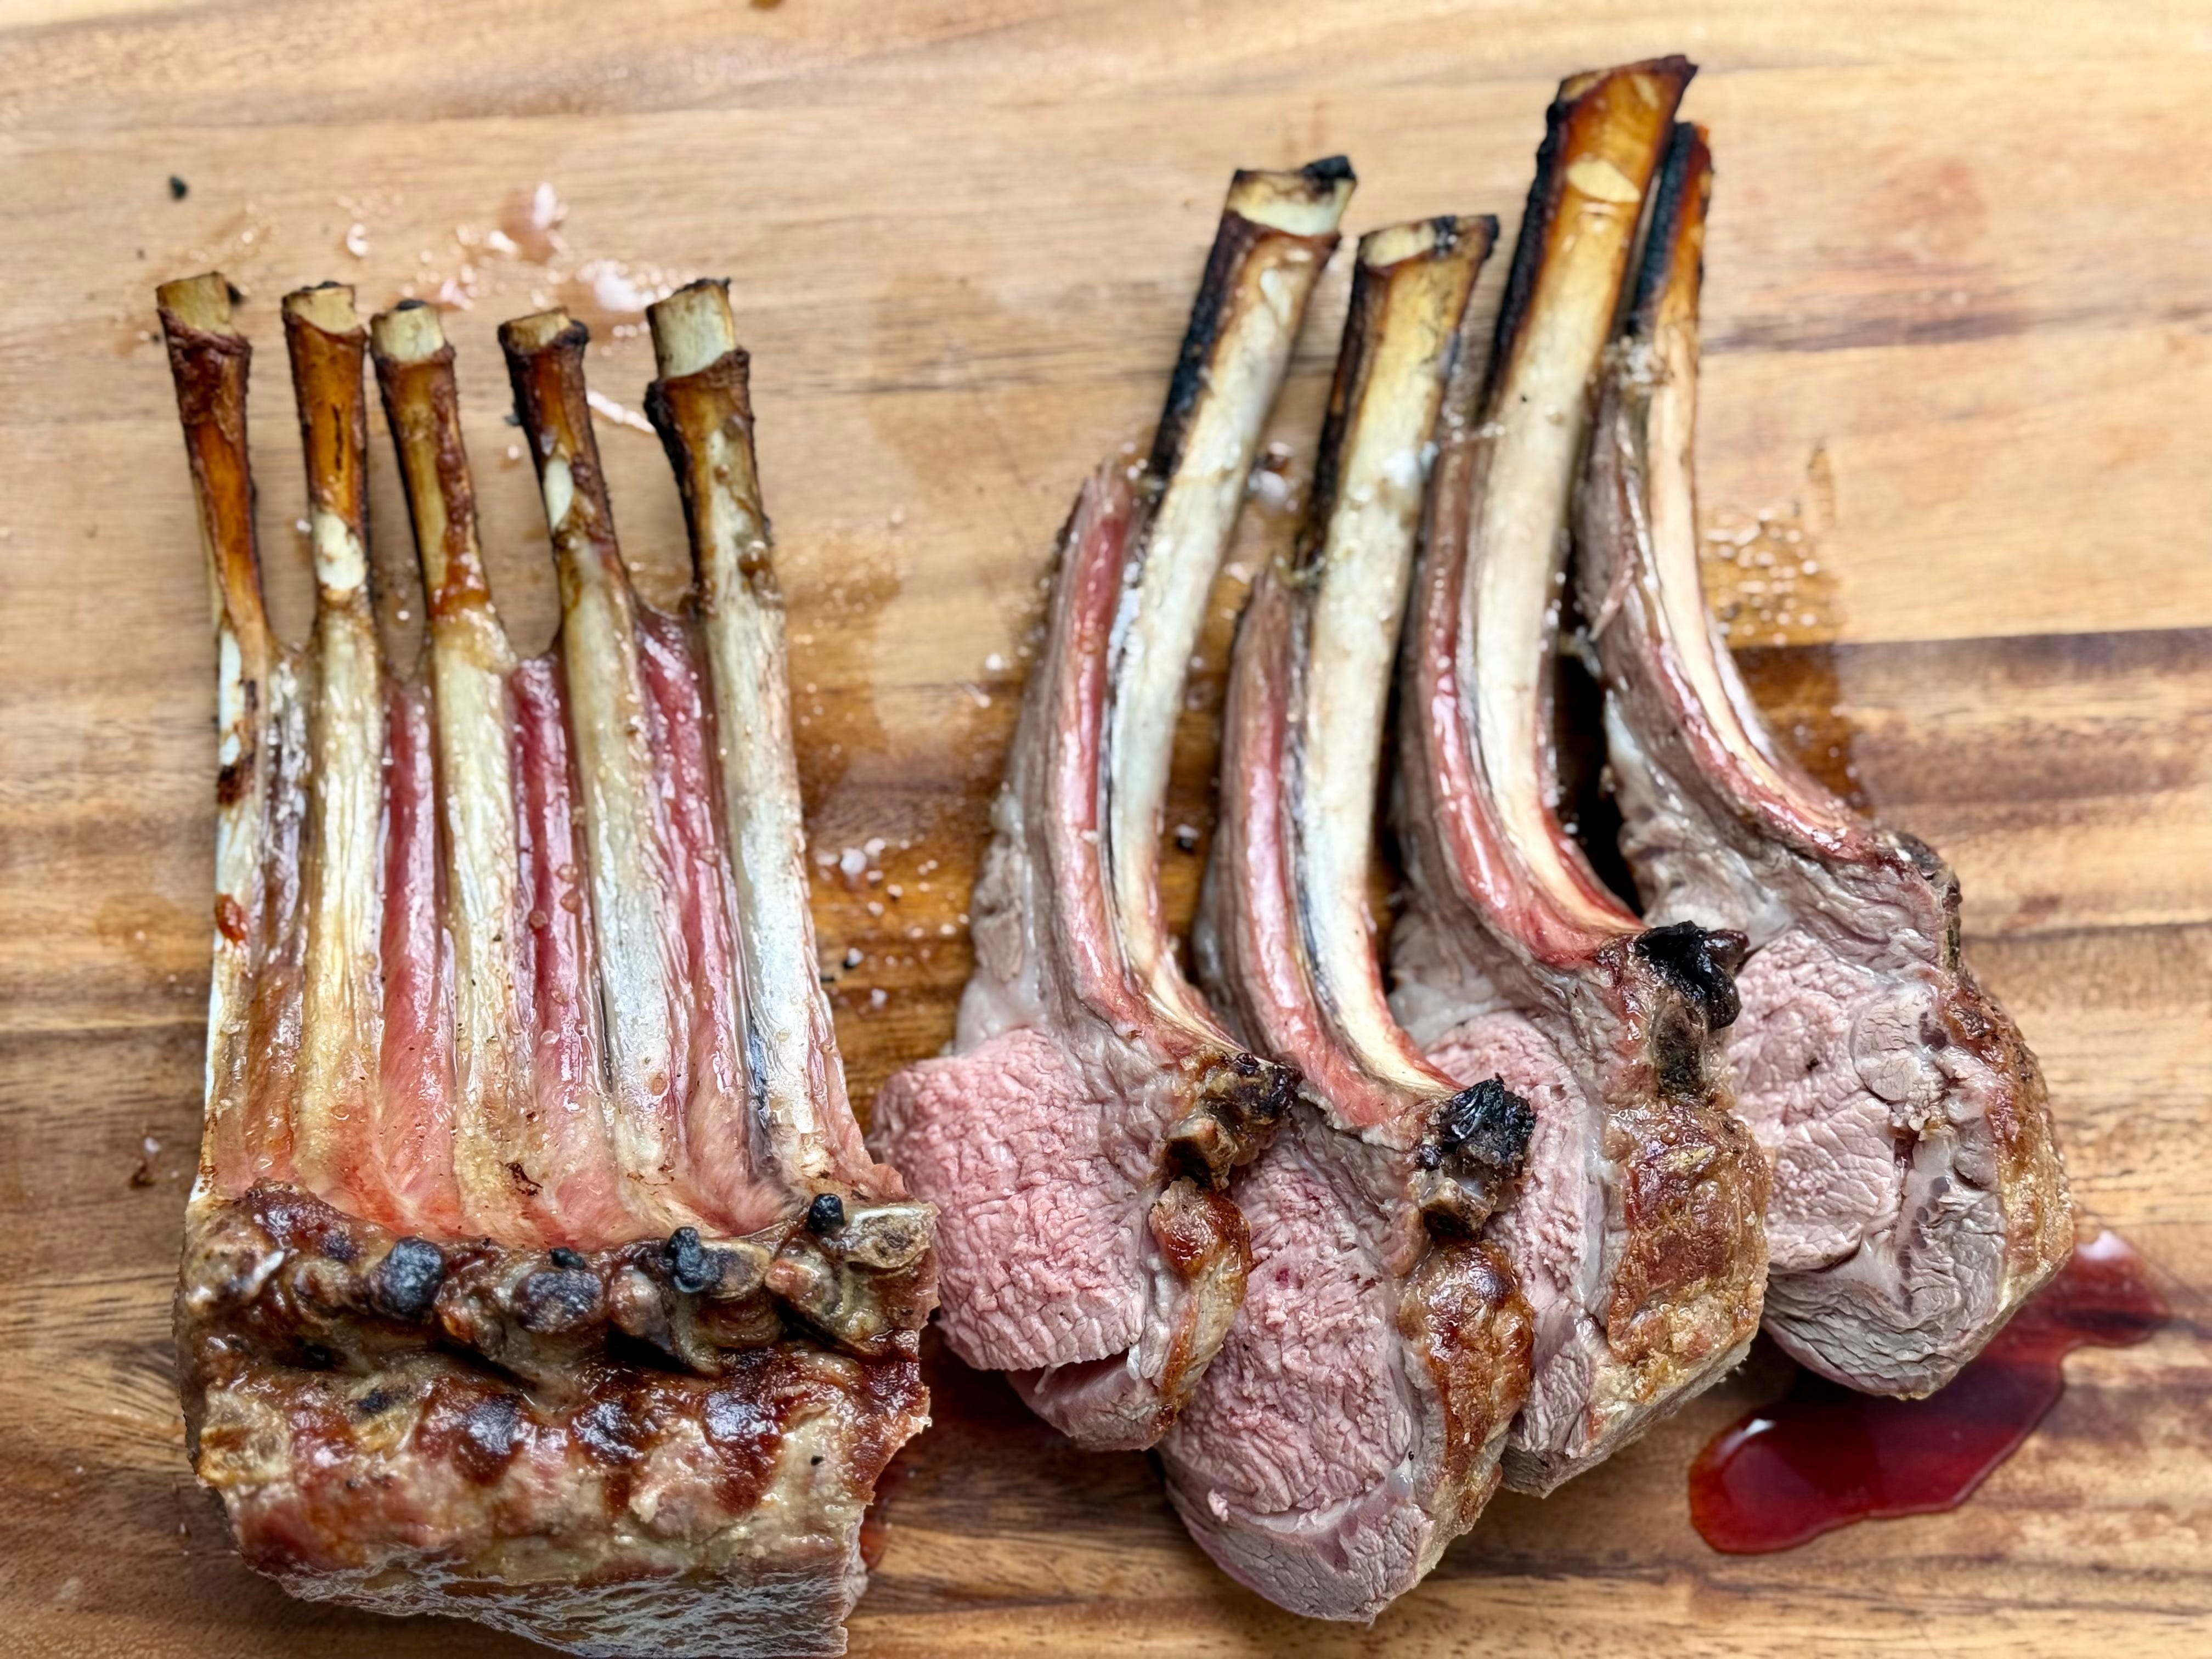
Party Lamb: Everyone Loves a Lamb Lollipop! You can follow this basic procedure and turn the rack into lamb “lollipops,” after it’s cooked. It’s just about failsafe! Grill the rack whole and slice it into individual chops after it’s rested. If you want the grill marks on them, sear them over a medium-high direct heat after you slice them for about 20 seconds a side. You can even grill the rack(s) in advance, refrigerate, and sear the cold chops for about a minute a side—you will get great grill marks and warm them up at the same time!
The three types of grilling methods: direct, indirect, or a combo.
DIRECT = Food that takes less than 20 minutes
INDIRECT = Food that takes more than 20 minutes
COMBO = Sear over DIRECT heat for 1-2 minutes a side, and move to INDIRECT heat to finish cooking
My rule of thumb is anything that takes 20 minutes or less to cook uses the direct method, and if the food takes more than 20 minutes to cook, I use the indirect cooking method. Here is more information on the cooking/grilling methods.
Once you’ve mastered the direct and indirect cooking methods, you can use the combo method: sear over direct heat and finish cooking over indirect. This is the method that I use the most. Searing everything from thick steaks to roasts over direct heat and finishing the cooking over a gentle indirect heat.
If you don’t know how long your food will take to cook, think about it this way: The heavier and denser the food, the longer it will take to cook. If a potato and a large shrimp are about the same diameter, how do you cook them? The heavier and denser potato needs indirect heat to cook through, and the quick-cooking shrimp needs direct heat.
Let me know if this simple explanation is easy to follow or you would rather have recipes to print out and follow.
As I’ve done the past couple of weeks, I will be grilling using the Grilling Trilogy. I will shop every other day and buy what looks good in the meat and produce section.
If you need inspiration, search “grilled” in the archives for all of our past grilled meals…but forget the sauces and marinades, just try grilling your pick of protein and vegetables using EVOO, Salt and Pepper. And if you come to a roadblock, reach out, I am only a question away!!
Thank you for joining me to Grill It Off!
Elizabeth
GrillFighter Grill Cleaning Brush Review
Think of the GrillFighter as the cast-iron chain-mail scrubber for your grill grates. You know how that little tangle of stainless links can take a skillet from scary to clean in a minute or two? Same idea here—only built for cooked-on grill gunk.
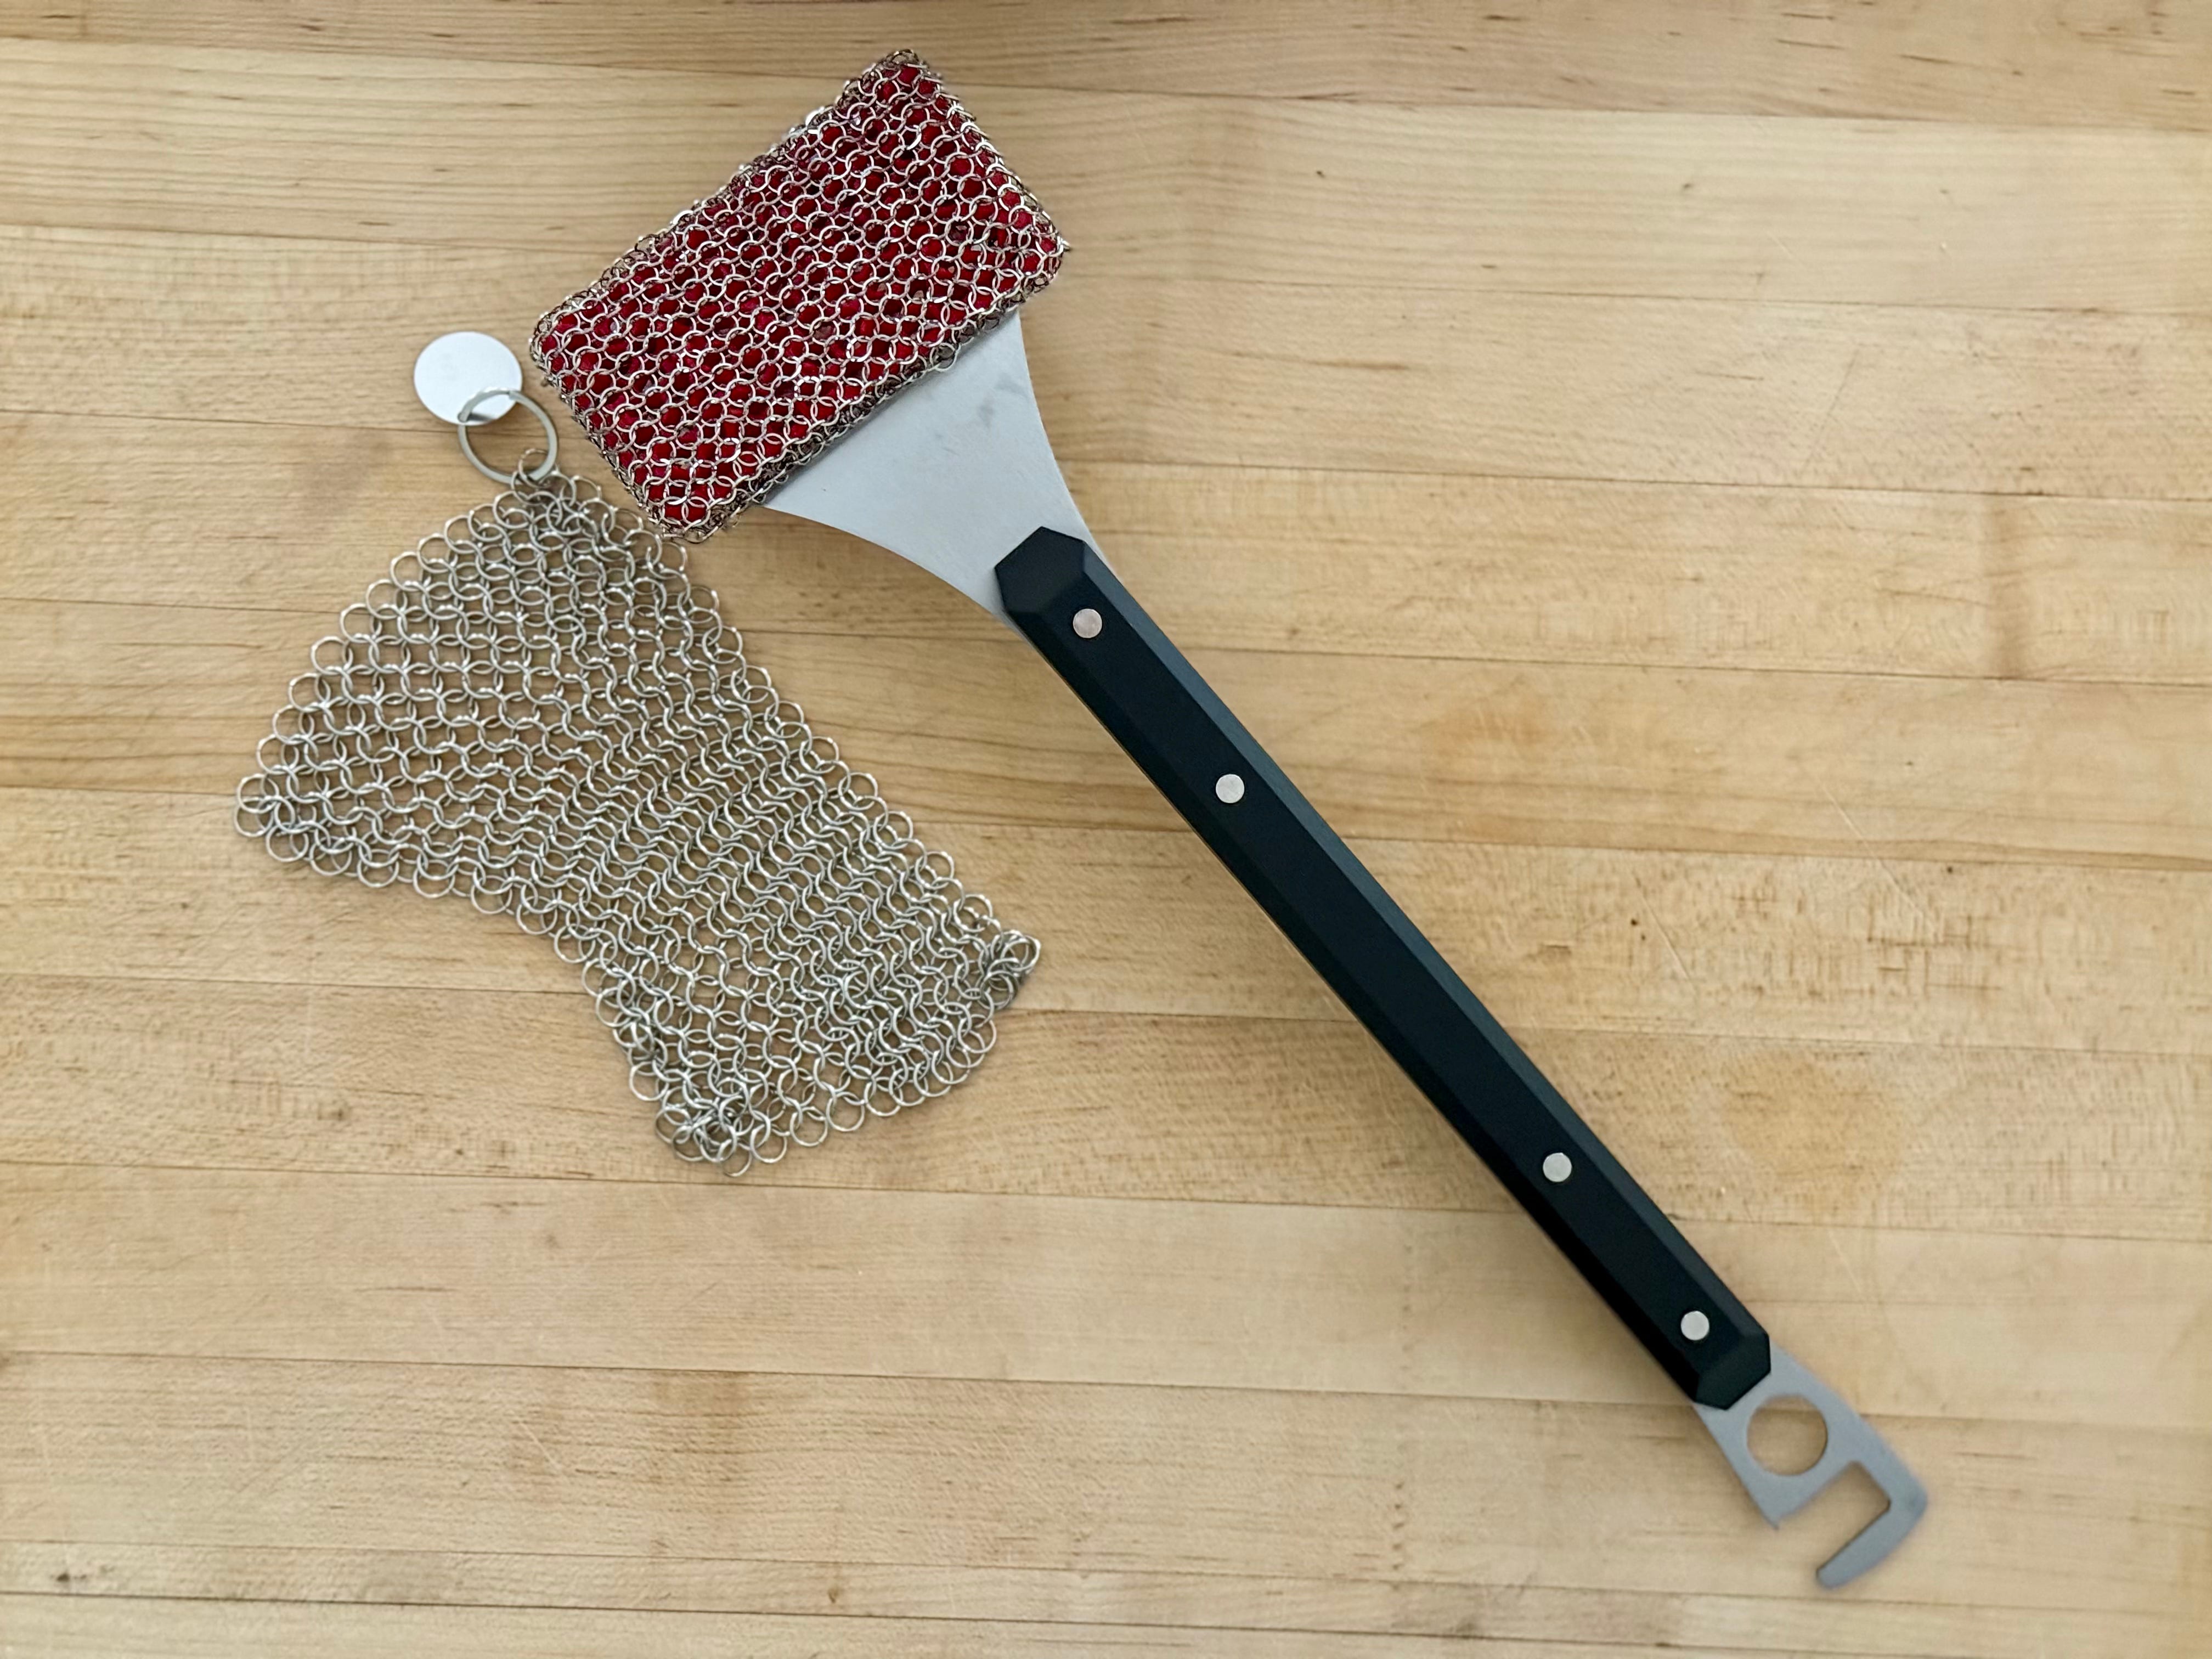
The construction is impressively solid. It’s made from 304 stainless steel, with a long, sturdy handle riveted to a full-tang cleaning head. The head itself is a pad of square-edged chain-link mesh wrapped around a perforated silicone core. Most chain scrubbers use round links, but these have a squared edge, which gives them a little more “bite” when you’re dealing with layers of grill grime that is baked onto the grates.
I also like the fact that the chainmail is wrapped around a square block and has a long handle to give you leverage when cleaning, It’s much more efficient than the loose chainmail made for cast-iron skillets like the one photographed above.
There are a few extra features built in: a saw-tooth scraping edge, cutouts for getting into wire grates, and even a bottle opener on the handle end that doubles as a small pincer for the underside of the grates. In theory, that’s nice. But if the underside of my grates needing cleaning, I would probably turn the grates over and use the chainmail head. Note: If you clean your grill regularly like I do, you won’t need to flip your grates.
Compared with a standard wire brush, the GrillFighter is a better mousetrap. I often use a ball of crumpled aluminum foil instead of a grill brush to clean my grates, and this worked better and it was quicker.
On a smoker that I haven’t used in a while, it was especially satisfying: thick, blackened buildup came off in minutes with very little effort, the way it does when you clean a skillet with chain-mail and a little warm water.

The company suggests using the brush on hot grates and dipping it into a tray of water for a “steam-cleaning” effect. I don’t think you need the water, but if it appeals to you, use it that way. The brush itself is so effective that using it without the water is good enough for me and less messy.
As with any chain-style cleaner, all that loosened gunk has to go somewhere, and much of it ends up caught in the mesh and in the perforated silicone core. The company materials say that the whole thing is dishwasher safe. I rinsed mine in the sink under hot running water and used a squirt of Dawn (degreaser) and it was clean enough to store until the next time I needed it.
Bottom Line:
The GrillFighter is one of those tools that actually makes an annoying cleaning chore easier. The real star is the chain-mail head, which is tough, efficient, and reassuringly bristle-free. If you love the way a chain scrubber brings your cast iron back to life, you’ll appreciate what this does for your grill grates, too. And, if you’ve never used a chain-mail scrubber, make this the first one you try.